What are custom fields?
Custom fields allow you to collect information that isn’t already hardwired on a job record. For example, you might want to collect other sales information, legal details, desktop research etc. You can add in the fields you want to see, whenever you want to start collecting that information.
Where does the data go?
The custom fields you create will appear on the job timeline (custom timeline fields) or the timeline and the property record itself (custom property records). It can be included in your data exports, on the GET API and is included on Zapier and on report writing feeds.
What is the difference between timeline fields and property fields?
They are very similar. Both types will add on to your job records and new or removed fields will only reflect on new jobs created. However, property fields will also appear on the property record itself as well as the job record in case you want to display data collected there too. Property fields are fixed on the timeline record (if you add or remove fields the changes appear only on new jobs) but are dynamic on the property record itself. If you add or remove fields they’ll add or remove from the property record view.
Creating custom timeline fields
These are fields that appear on the timeline record and aren’t property details. If you want to add details that are about the property and you want them visible on the property record itself then you can add these under custom property fields.
Step 1: Create your fields
- In the first section, add a field by setting the name of the field “e.g. Soil type”.
- Set if it is a text field, number field or dropdown.
- If it is a dropdown you can add your own values that you’ll be able to select on the job record (e.g. Clay,Sandy,Silt…). Enter each value followed by a comma.
- Set which job types that field should be visible for so that it only appears on the types of jobs you need it for, keeping the jobs you don’t need it for simpler.
To edit an existing field, edit the row and then press the “Update” button at the top of the section. Edit one row at a time, press update and then edit the next row.
Step 2: Create your timeline sections in the layout settings
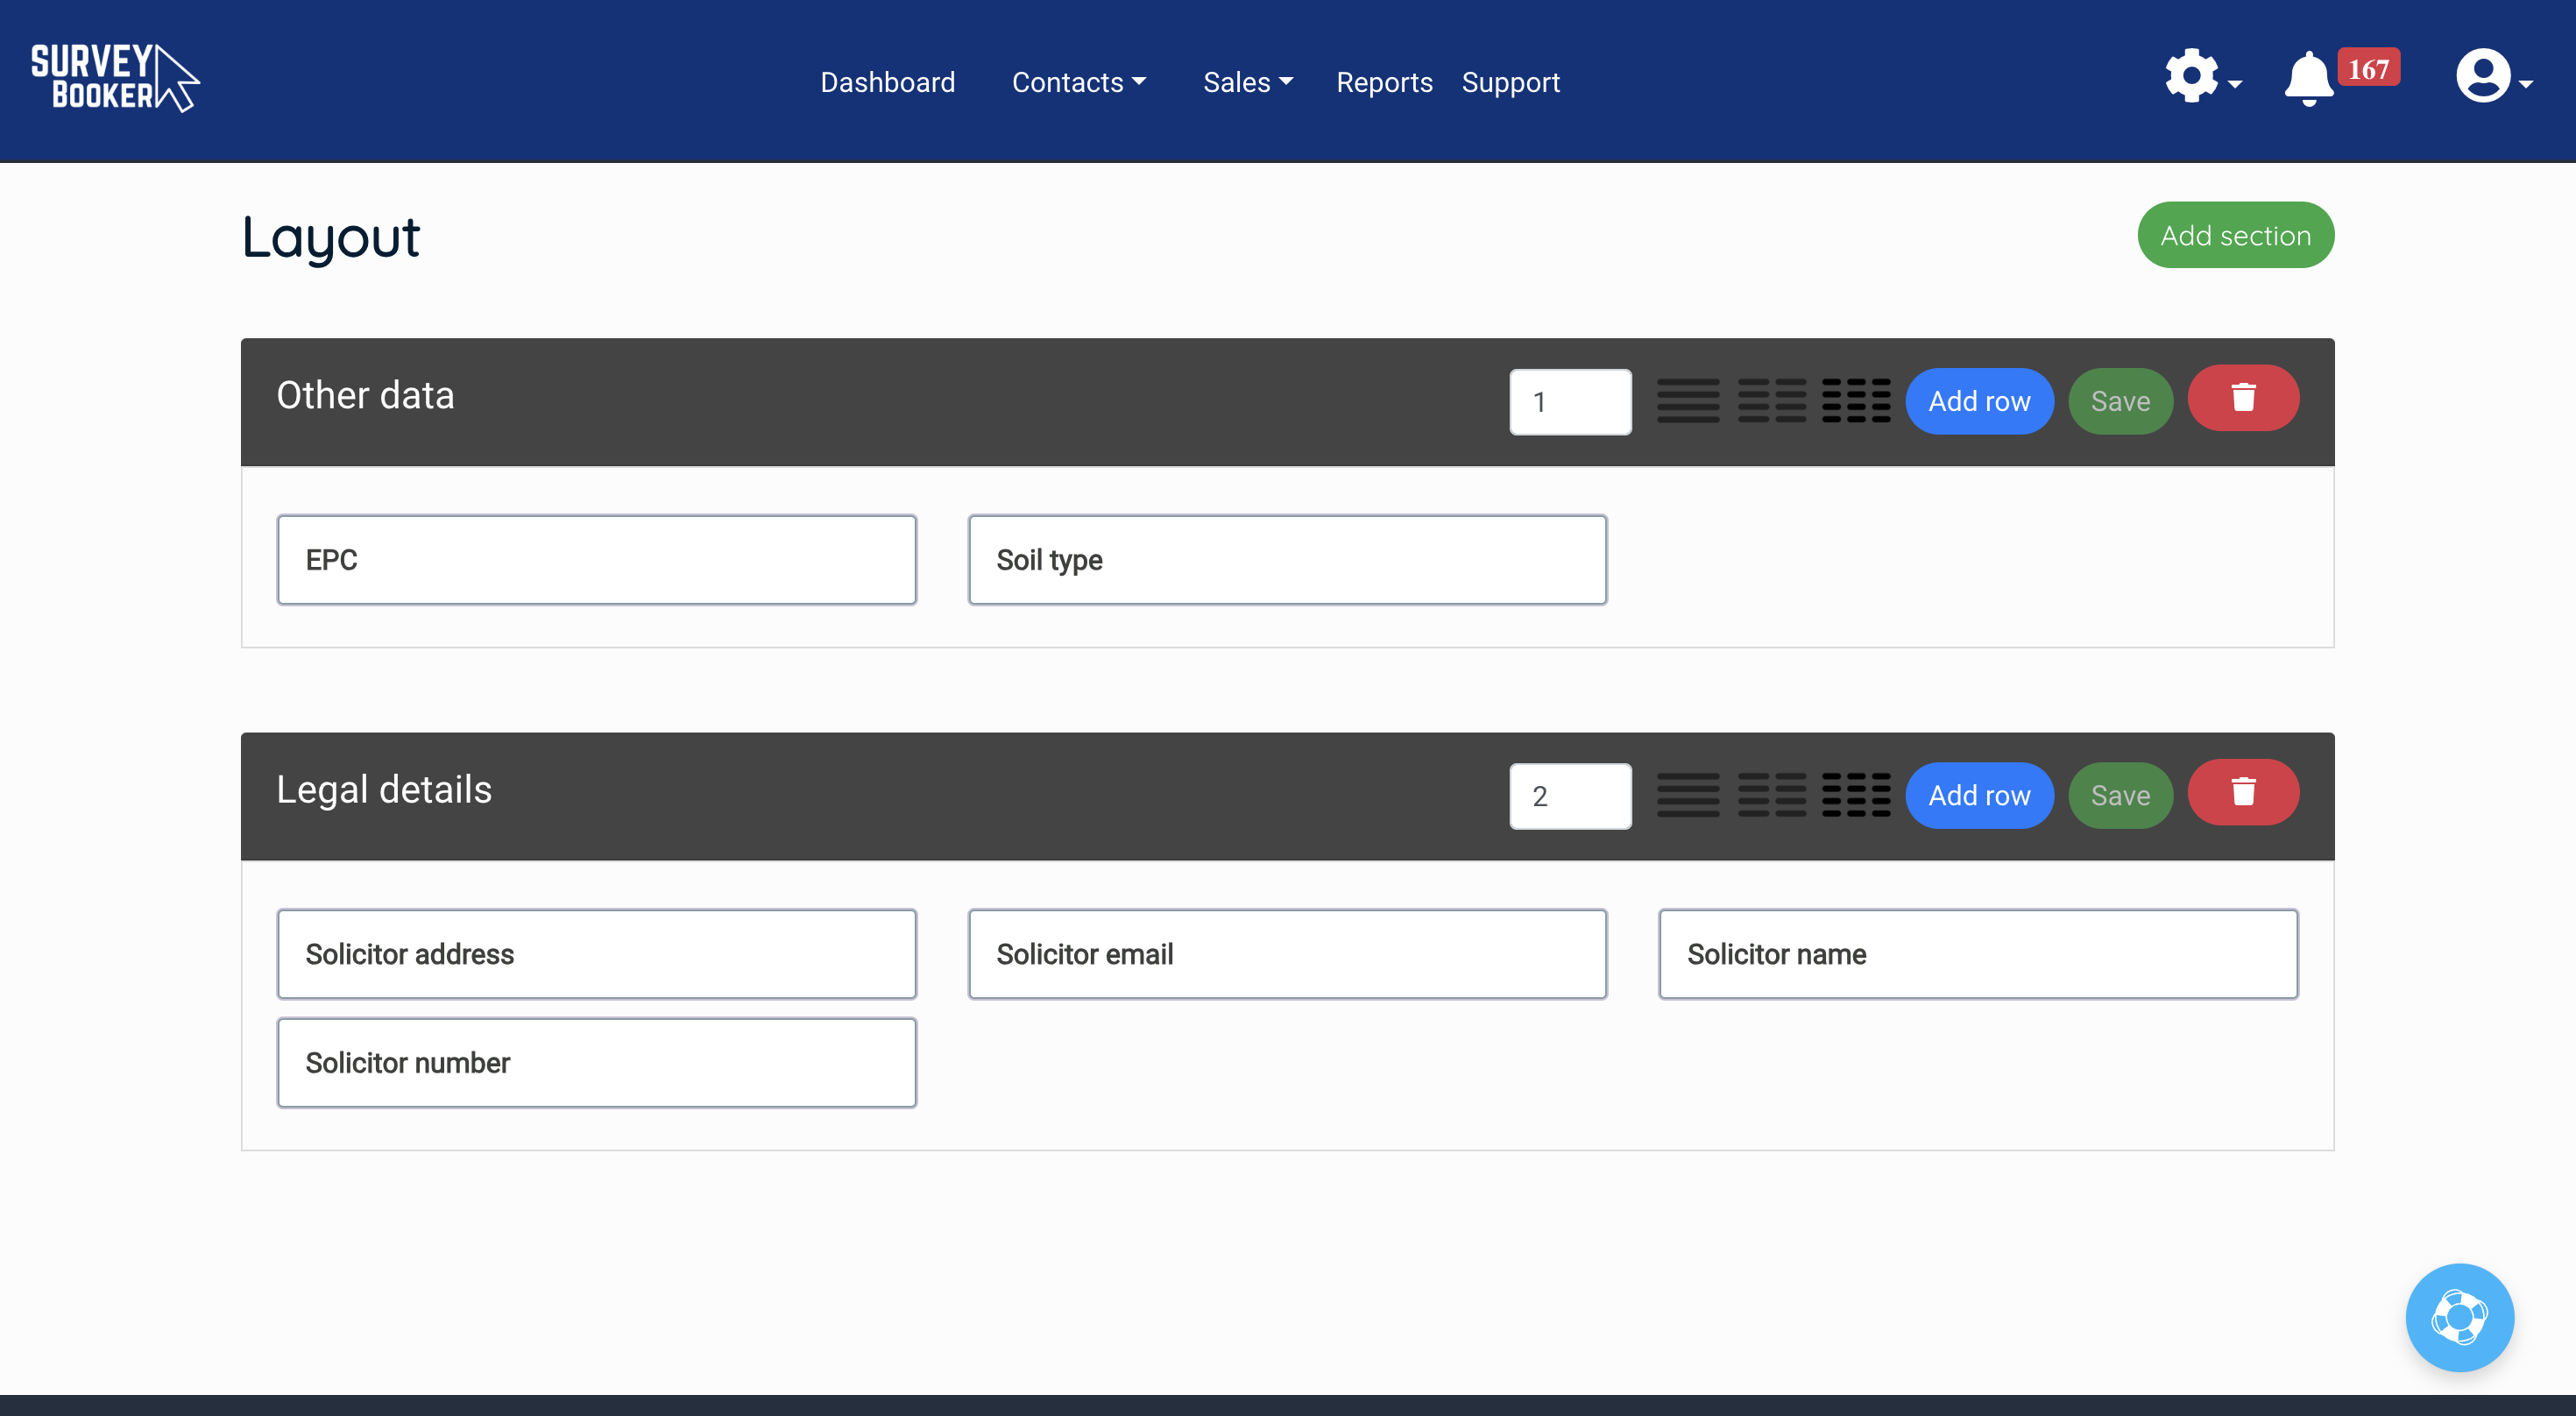
Once you’ve created the fields you want to set up, you can set where you want them to appear on the job record. For example, you might have added sections to collect information about legal details and also about conflicts of interest checks. You can add them into different sections to make it easier to find the data you need.
- Press “Add section”
- Add a name for your section
- Set if you want your fields to be shown in 1, 2 or 3 columns
- Set the order that the sections should appear in (the sections will appear on the job timeline under the property details section and add in the order you have set here)
- Press add row and select the field you want to display there
- Add as many rows as you need and press save.
If you deactivate a field, it will automatically remove from the layout section for you.
Notes:
Changes made will only apply to new quotes created since the change. For example, you remove fields from the layout settings. New quotes created will no longer create with that field but the system will continue to display those fields on existing jobs.
If you add new fields, these will apply only to new jobs created and not existing records.
We do this to prevent data being lost on existing jobs where fields are removed and to prevent older records from showing fields that were not relevant at the time.
Step 3: Use your new fields
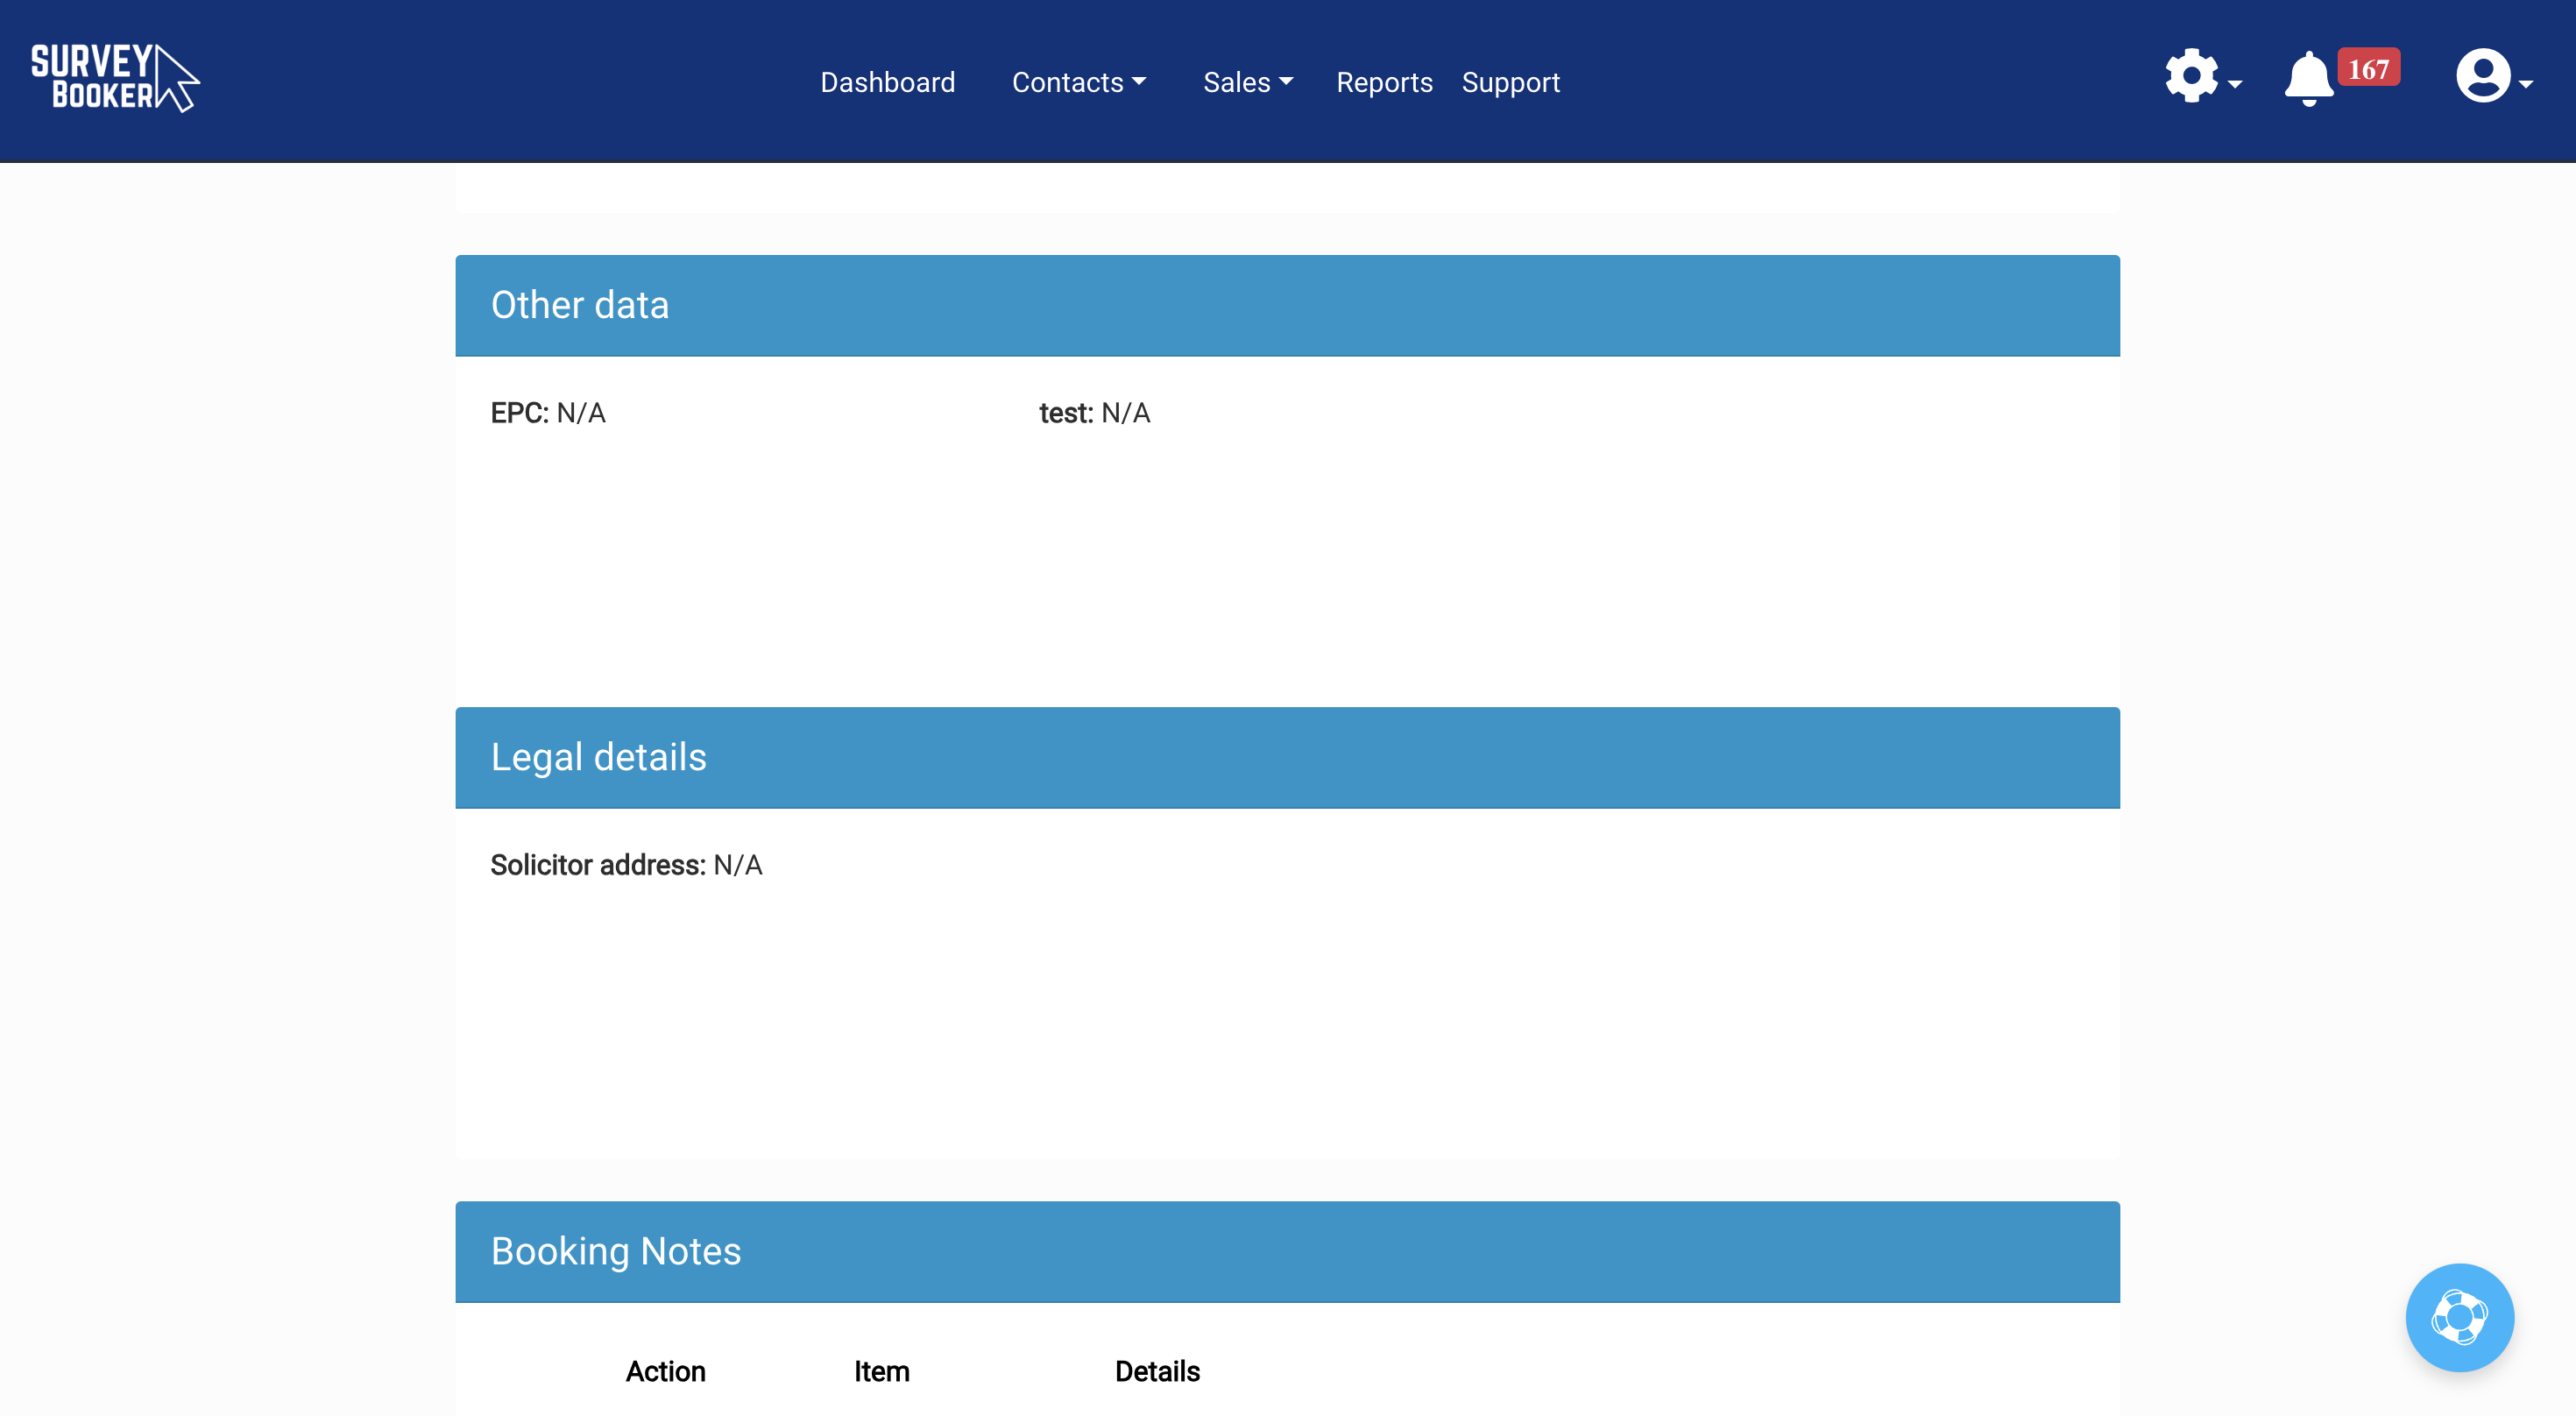
On the next quote you create, these new fields will create on the job timeline and you can start adding the data in. Simply click on a field to edit it, set your answer and press “Update”.
Note: changes to fields added or removed will reflect on new records created after the change only and not to older records. This is to prevent data loss on existing records.
Custom property records
You can follow the same steps to create custom property fields under Settings > Survey settings > Custom property fields.
What is different with custom property records? The property sections you create will add under the property details section on the job timeline (before any custom timeline fields) and also display on the property record itself.
Changes made to add or remove fields and sections will only reflect on new jobs created to prevent data loss but will appear dynamically on existing property records.


