
Adding payments, removing payments and processing refunds
In this guide, we look at how you can add payments, remove payments and refund payments, whether manually or via integrated payment providers.
Adding a payment to a job
Request a payment
Manually: Press the “Send payment request” button in your ‘Key statuses’ section – this sends your “Payment due” email template. Ensure this is set up with your guidance on how to pay.
Automatically: Include your payment details in other automated templates such as the “Terms signed and payment link available email template”. This is sent when customers sign terms and can include details on how to pay. You can also include payment details in any of your job templates such as “Survey appointment booked”.
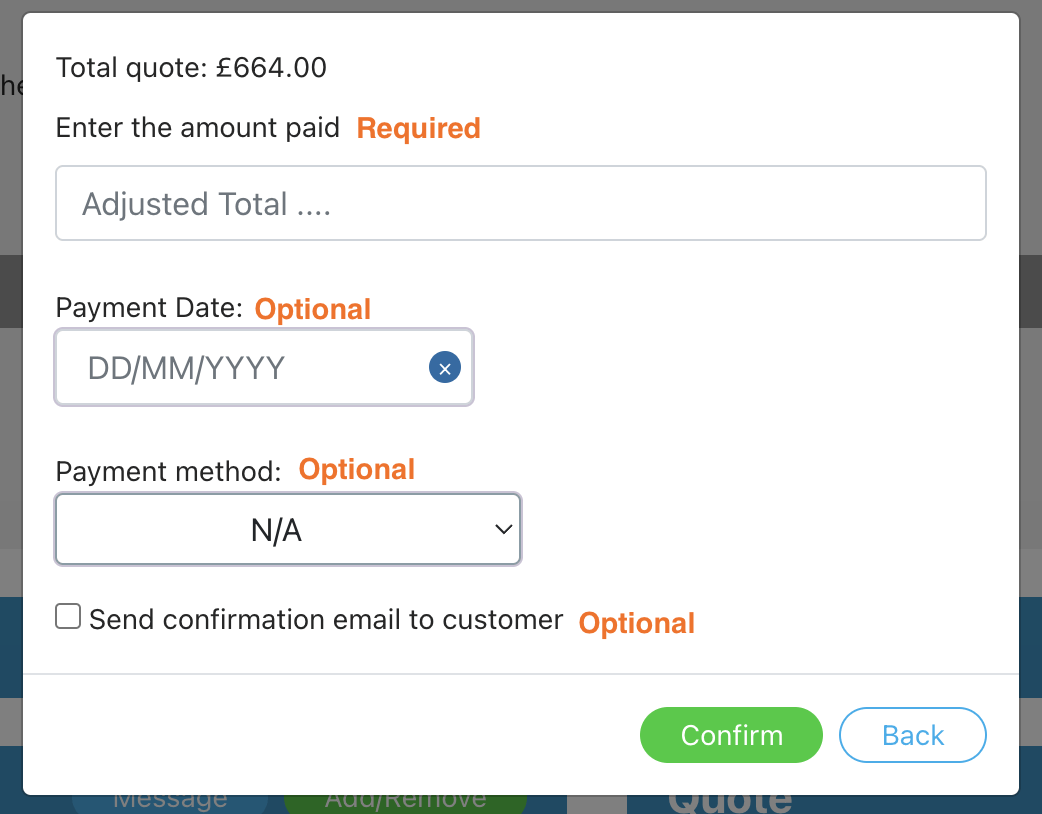
Manually add payment
You can press the “Add/Skip payment” button in the “What’s next” or “Key status” section.
Here you can either skip payment to later in the job or add payment.
To add payment, press “No” to the Allow payment later pop-up.
Here you can enter:
- Payment amount (this can be the full payment or a partial payment)
- Payment method (optional)
- Payment ID (optional)
- Payment date (optional – sets today’s date for reporting if not date is set)
You can then choose if to send a payment receipt to your customer. This uses the “payment received” email template in your email settings.
Automatically add payments
Customers can log in to their account to make a secure online payment. The options shown depend on what you set under Settings > Account Settings.
It is also possible to mark a job as paid using our Patch API from a third party system.
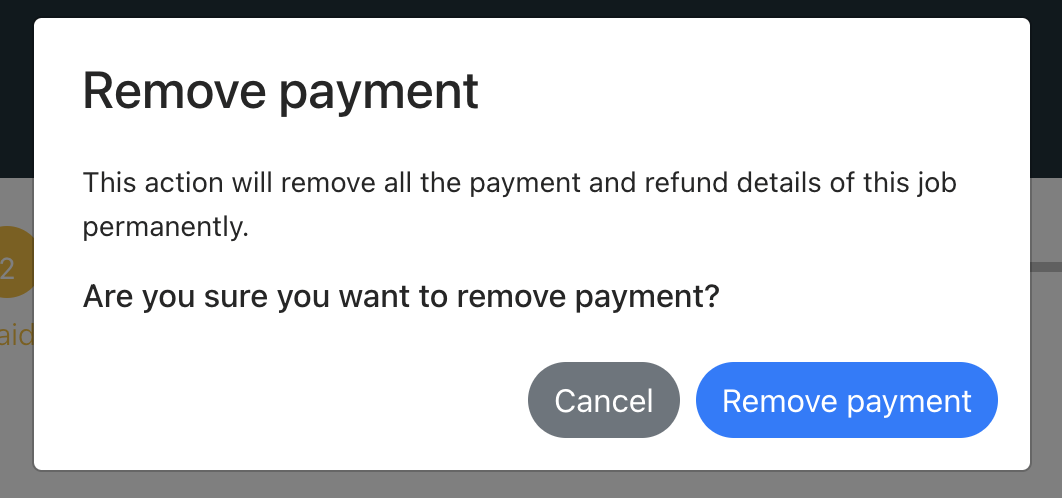
Removing payment from a job
There may be times where you need to remove a payment from a job instead of refunding a payment. For example, you marked the wrong job as paid.
To do this, press the “Remove payment” button.
This will remove payment from the job completely and mark the job as “Payment skipped”.
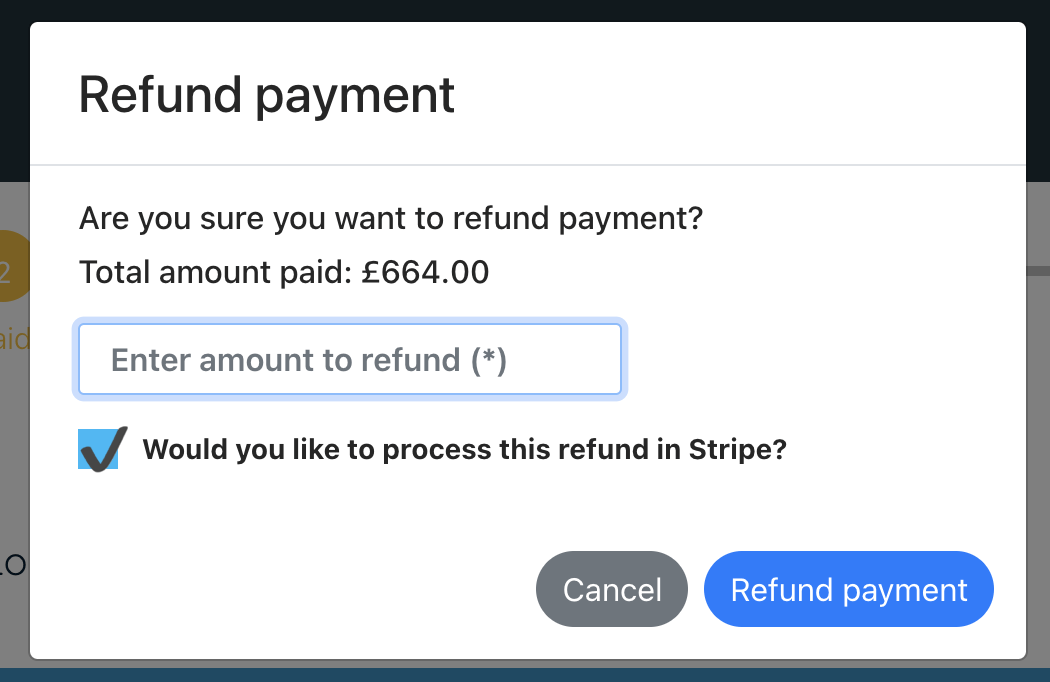
Refunding a payment
There may be times where you need to refund or partially refund a payment. This could be because the service is changed or a customer has to cancel due to unforeseen circumstances.
To refund a payment, click “Refund payment”.
On the pop up, you can enter the amount to be refunded (a full or partial amount).
If the customer paid via Stripe, you will be asked if you want to process the refund in Stripe. If ticked, the request will be sent to Stripe to process the refund to your customer. Note: the payment intent is set in the payment ID column. If this payment intent is still valid, the refund can be processed (e.g. the payment hasn’t already been refunded in Stripe directly). Refunds via Opayo will be available in a future update.
The key dates section will show the refund date and the quotes section will display the refund amount processed.
Your timeline will show the payment as partially refunded.
A refund can be processed by super admin users or custom users who have job timeline access set as “Full”.