

Where are these settings managed?
These settings are set under Settings > User settings > User availability settings.
What are these settings used for?
These settings are used to set the availability / working times for your whole team. There are three use cases for these settings:
- For users marked as surveyors: easily see working times on the booking calendar / pop-up
- For users part of auto lead allocation (Enterprise) – is used to set when leads can be assigned to a user and when a user isn’t allowed to be allocated leads (e.g. lunch break, end of shift etc).
- For all other users, allow them to see what days they are working, when they are on annual leave and to record any sickness.
Regional and regular-level users can view their working times under Settings > Your shifts.
Adding each user’s availability
There are two main options – bulk setting and manually setting day by day.
Bulk setting working times
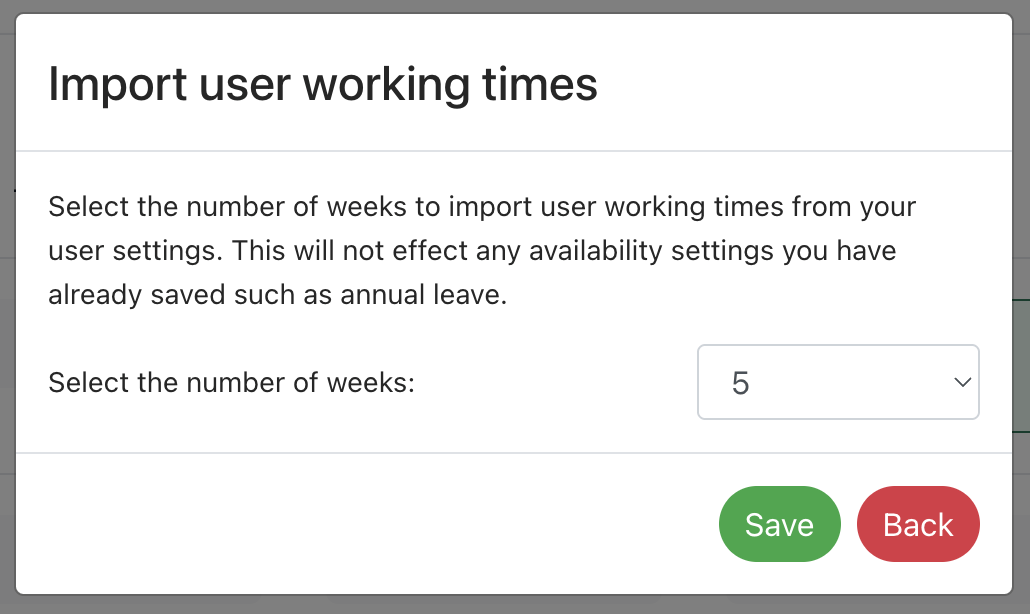
Click the “Import user working times” button. This will load a pop-up that allows you to select how many weeks that you would like to preset working times for based on the working times set in that user’s settings.
This means you can copy in the hours of all users for up to 15 weeks at a time. You can then manually adjust any dates where a user is on leave etc. You can set each user’s standard working times in their user settings.
Manually setting each date
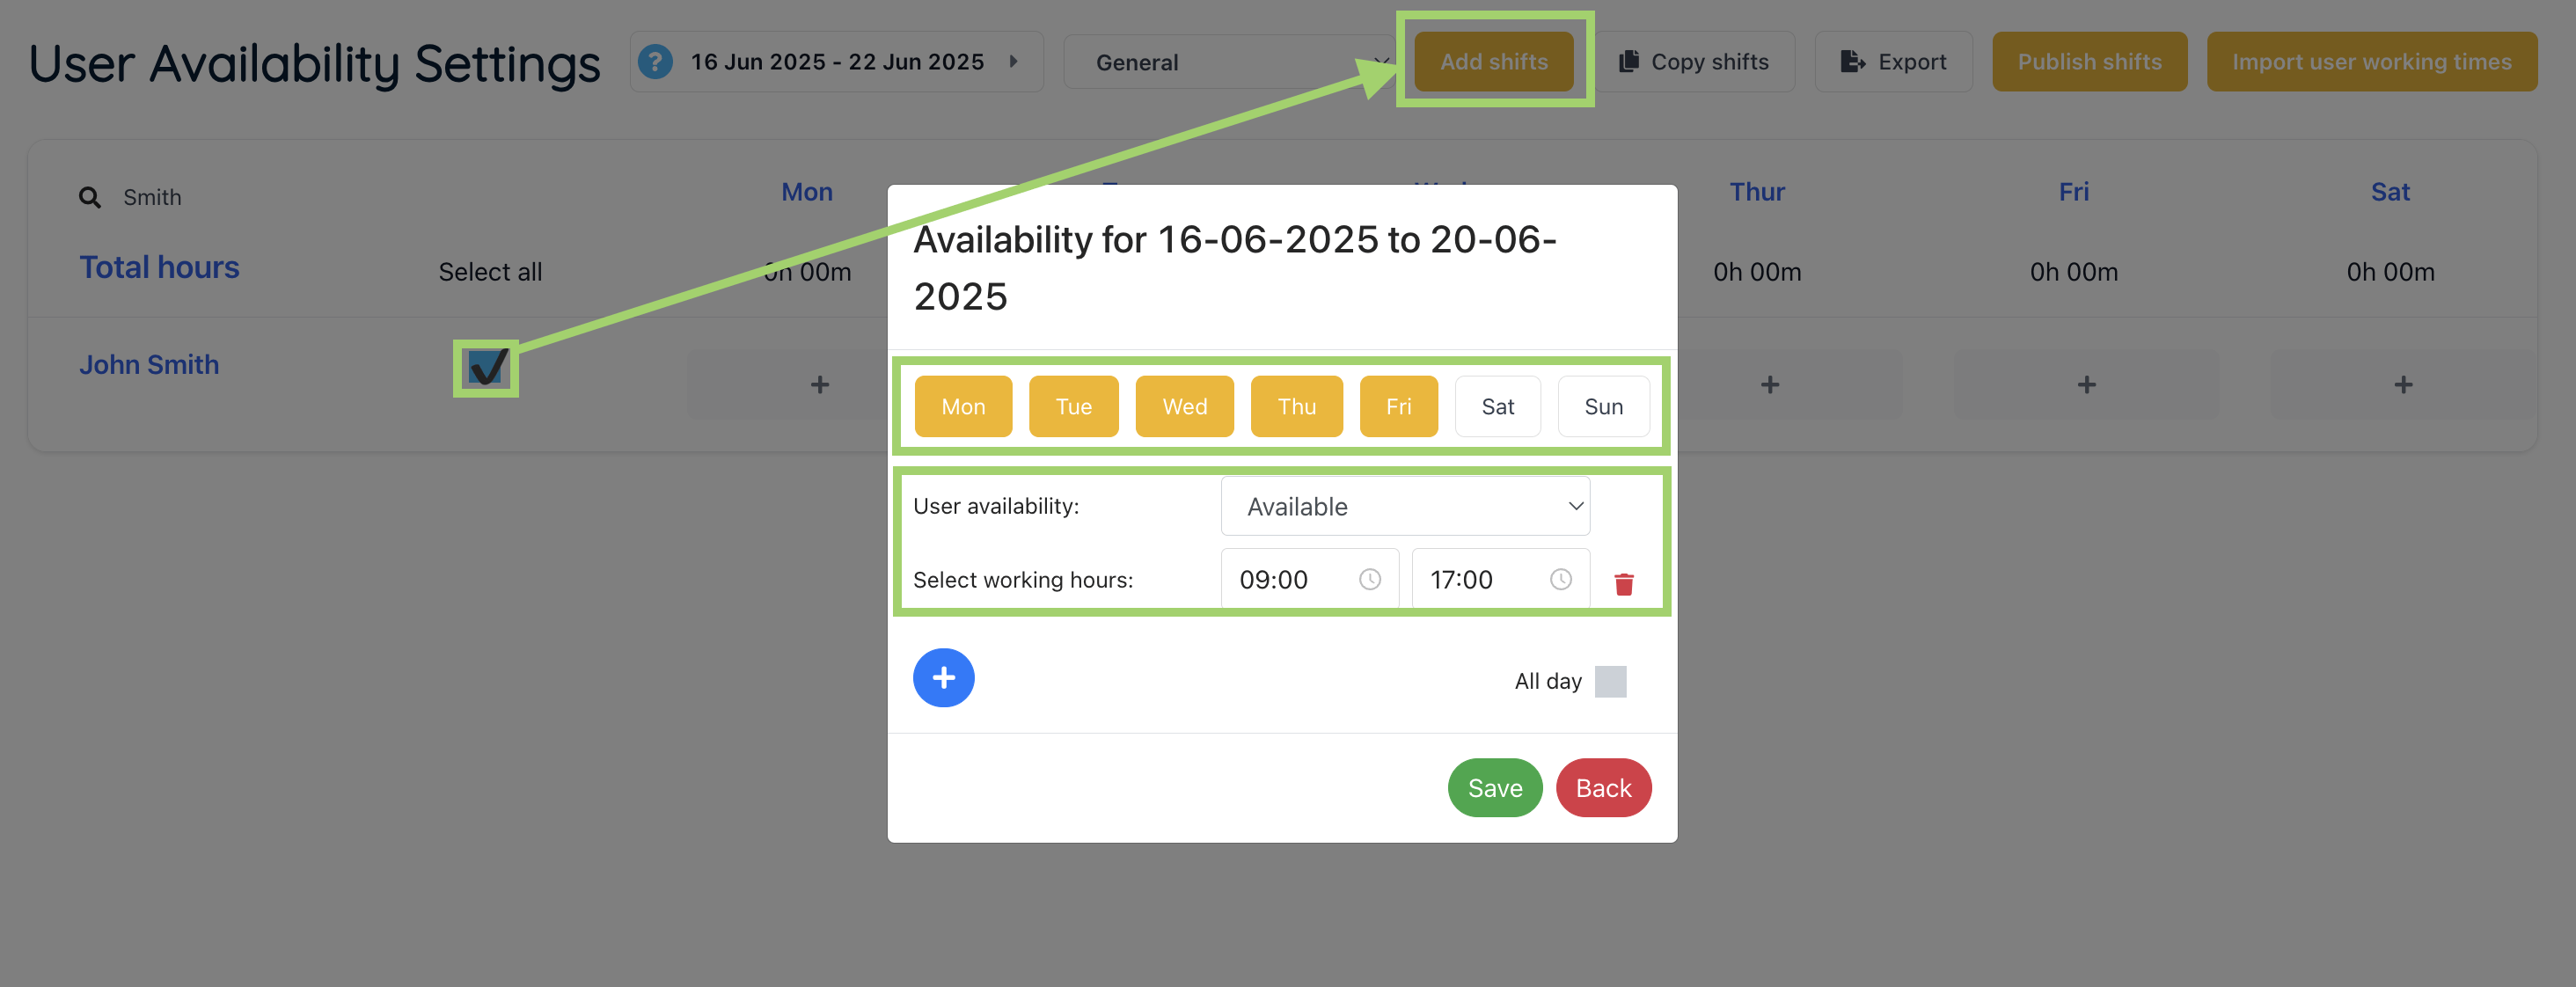
Option 1: Bulk setting – click the tickbox next to your chosen user. Click on the “Add shifts” button that appears. Select the days of the week you want to set the working times for. Enter the working times. To set multiple times press the + button. Once all set, press Save and each day selected will be set up for you. This will apply the working times set on the original week to any users who don’t currently have any working times set. This is to prevent any settings added already from being overwritten.
Option 2: Setting day by day – if you want to set different working times each day, you can click on a day in the user’s row and fill in the working times for that day.
Option 3: Copying a previous week – you can also save time by copying working times from a previous week. Scroll to the week you want to copy, and press the “Copy” button. Then scroll to the week you want to paste the working times to and press the “Paste” button. This will apply the working times set on the original week to any users who don’t currently have any working times set. This is to prevent any settings added already from being overwritten.
Other options
Export: export the working times of each user for the selected week to a spreadsheet.
Publish: this will formally share the shifts saved in each user’s “Your shifts” page so they can see when they have been given time off and their working hours.
All-day events on the calendar
The availability you set is visible on both your booking pop-up on the job page and on your main calendar under Sales > Calendar and Tasks > Calendar page.
For all-day events such as annual leave, sick and unavailable, an all-day event will show on the month view.
For all-day events and working hours set (e.g. 0900 – 1700), the user will show white on the week/day view if they are available or grey if they have been set as unavailable, lunch, meeting to help prevent you from booking a job at a time the user isn’t available.