Adding Users to Your Account
We have 3 user types on Survey Booker: Surveyor (you), Customer and Referrer. Each of these can access the system. You can only add an email address to the system as one user type. For example, the same email address can’t be used for both a customer and a referrer record, otherwise during login we won’t know which account to send that user to.
To add new surveying firm users navigate to: Settings > User settings > Manage users. Open this page and click ‘Add User‘.
User levels:
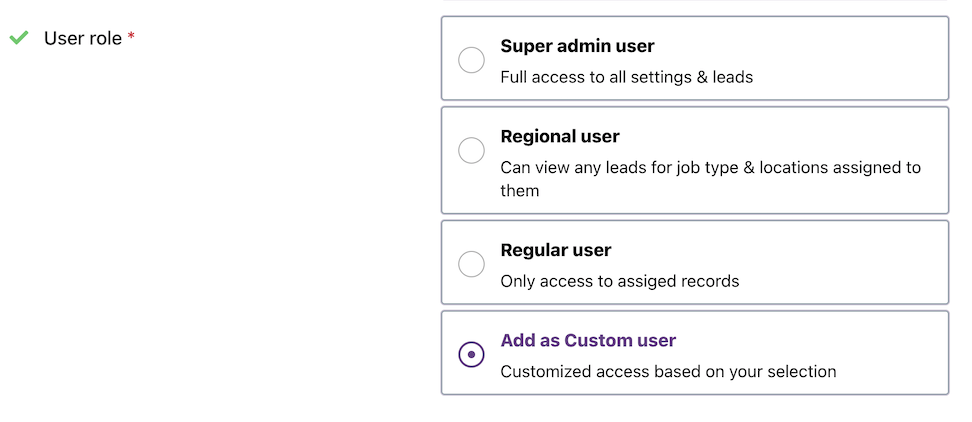
There are four user levels you can select when adding a new user. A summary is listed below but a full list of what each user can see/do is listed at the end of this document.
Super admin:
Full access to all settings, surveys and reporting.
Regional:
No access to settings.
This user can view surveys within the postcode districts that they are assigned to and for the job types they are assigned to.
They can also view jobs outside of these locations/job types where they have been assigned.
This allows these users to deal with specific areas or survey types (residential, commercial or both). Perfect for office teams dealing with different parts of the country or for users needing access to all quotes/jobs without access to your company settings. You can also set these users to cover all locations and job types so they have full record access but no settings access.
Regular:
These users can only see surveys that have been assigned to them and are not able to view or adjust any account settings.
This is perfect for field surveyors who just need to view information about the survey they are carrying out and who can update the status of a survey they are doing. The job fees and signed terms are hidden from the timeline page overview but may still be visible in email logs.
Custom user:
You have full control over what your users can see and do. With granular access settings, you can restrict specific job record tabs or limit access to certain system settings. Our three standard user roles offer a quick and easy setup. However, if you need more flexibility—whether granting additional permissions or imposing further restrictions—a custom user role allows you to tailor access levels to your exact needs.
Activating an account
- Each new user added receives an account activation email. It is important you only add a new user once their email address is valid. If adding a user before their email is active, the activation email will bounce and their email will be blocked to prevent further bounces. This will then need reviewing by our team.
- The user should follow the activation link received. They will be asked to set a password which will be used to login.
- The activation link expires after 30 minutes after which a new activation email can be requested by entering their email address on the forgotten password page or login page.
Customising user access settings for standard roles
- On the manage users page, you can open the “user access settings” tab. Here you set whether or not your regional and/or regular users are also allowed to view reports. Reports are restricted to data assigned to those users. See our reporting guide for more details. You can also set which standard user levels are allowed to merge records.
Configuring all user types
Basic user details
Required fields: You must enter a name and email address.
Optional: The phone number is optional.
Notes: The details entered here can be tagged into emails to enable emails to be personalised and to provide direct contact details if needed.

User type
Choose a user type.
You can choose between one of our default user types or create your own customised user access. See above for full details.
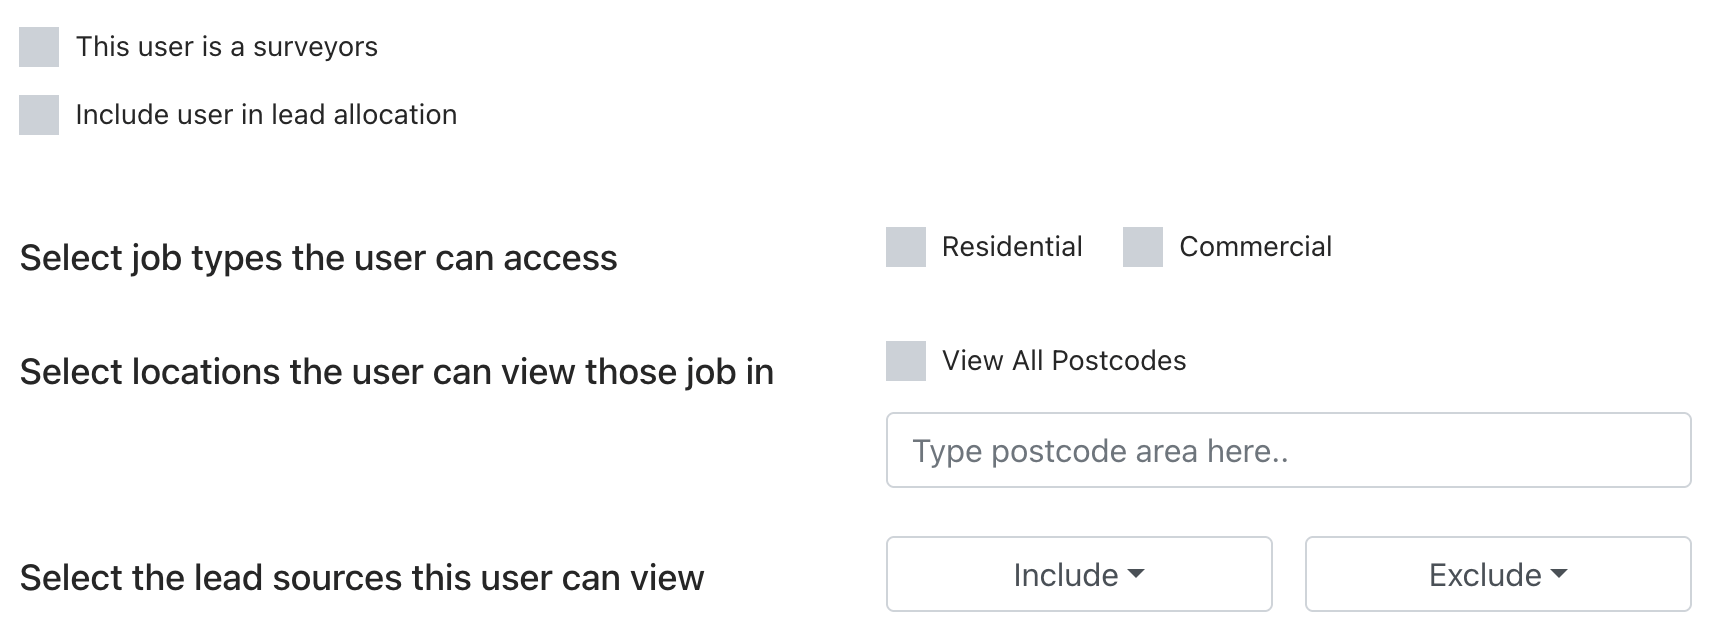
Users who are field surveyors
If the user you are adding is a surveyor, you can check this option and set which job types and locations they cover.
When booking appointments, the users you’ve ticked as surveyors that cover that job type and location will appear automatically so that you can view their availability.
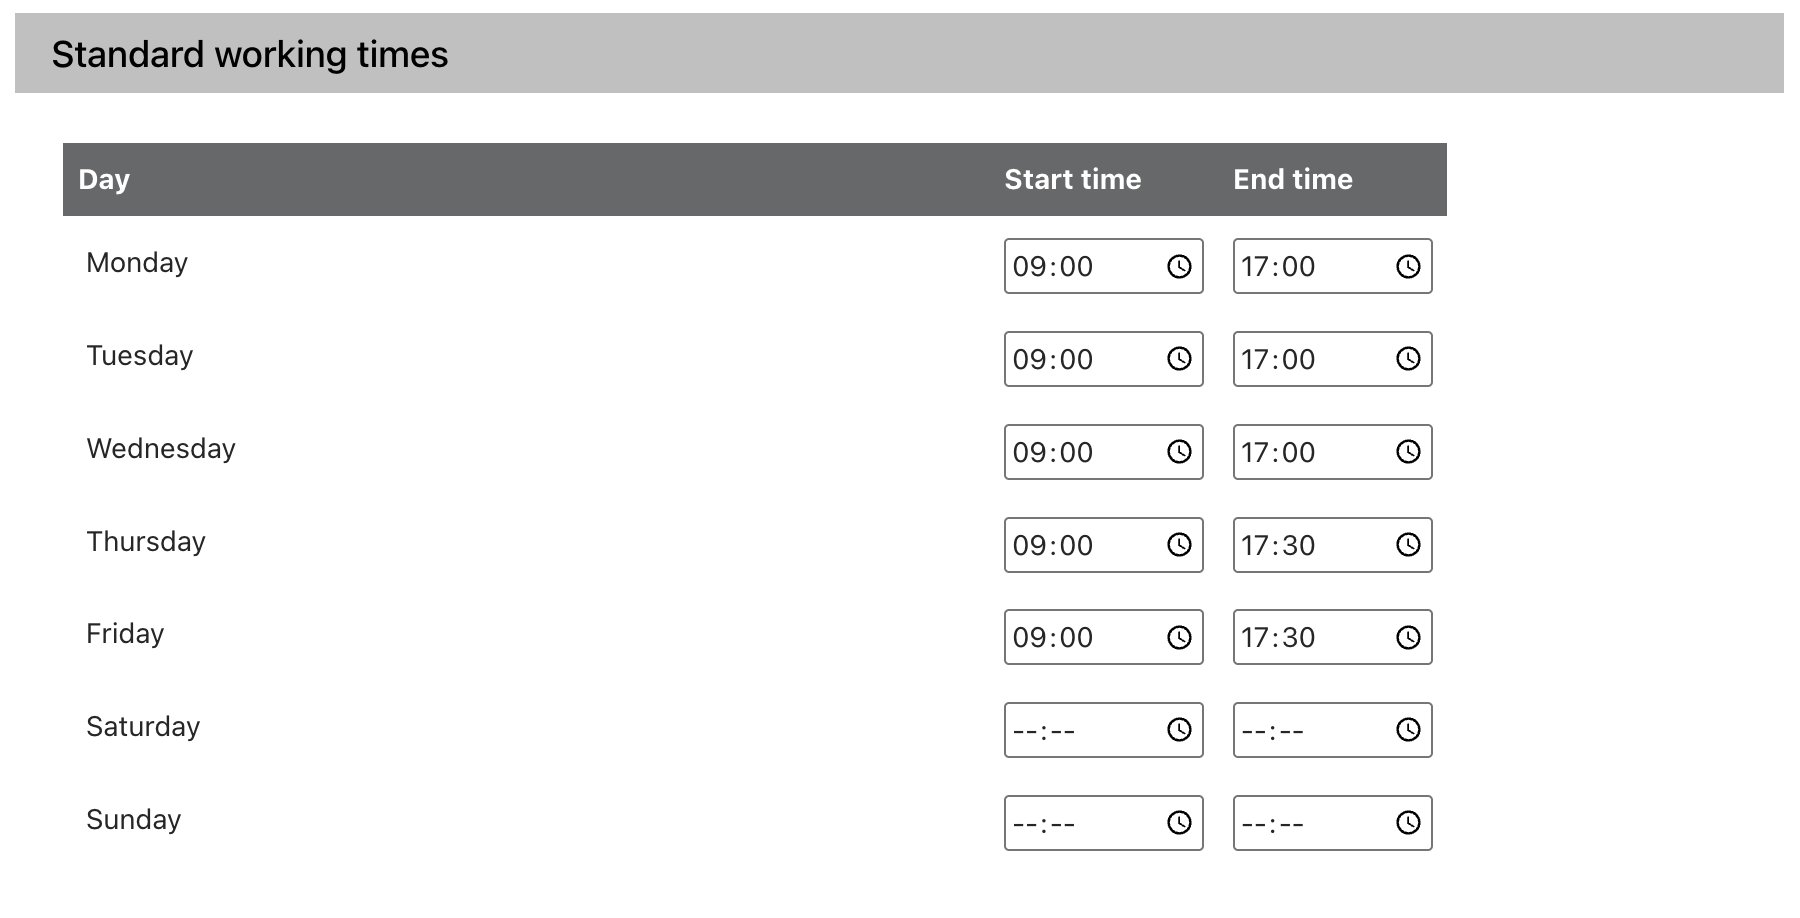
Working times
Enter the user’s standard working hours.
These can be imported into your user availability settings so you can see which days/times your user works, when they are on annual leave and more.
Users who are part of lead allocation (Enterprise)
If you are using our automated lead allocation feature (Enterprise), you can tick this setting so that the system includes this user in the lead allocation process.
Once ticked, set the job types, locations and lead sources that the user deals with. They will then also appear in your lead allocation settings.

Configuring custom users
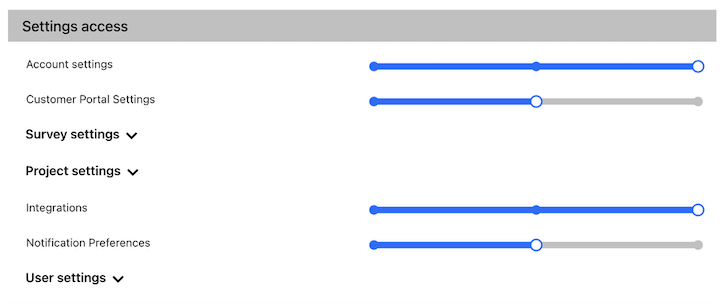
Settings access
For each of the settings listed, you can set:
No access – the user is unable to access the selected settings at all.
Read Access – the user can access the selected settings to view them. Changes cannot be made. This can be granted to users who need to know certain details, for example, access to pricing information.
Full – the user can view and edit the settings. This should be granted only to users who need to be able to make changes to these settings.
Note: security best practice is to limit user access only to what they need.
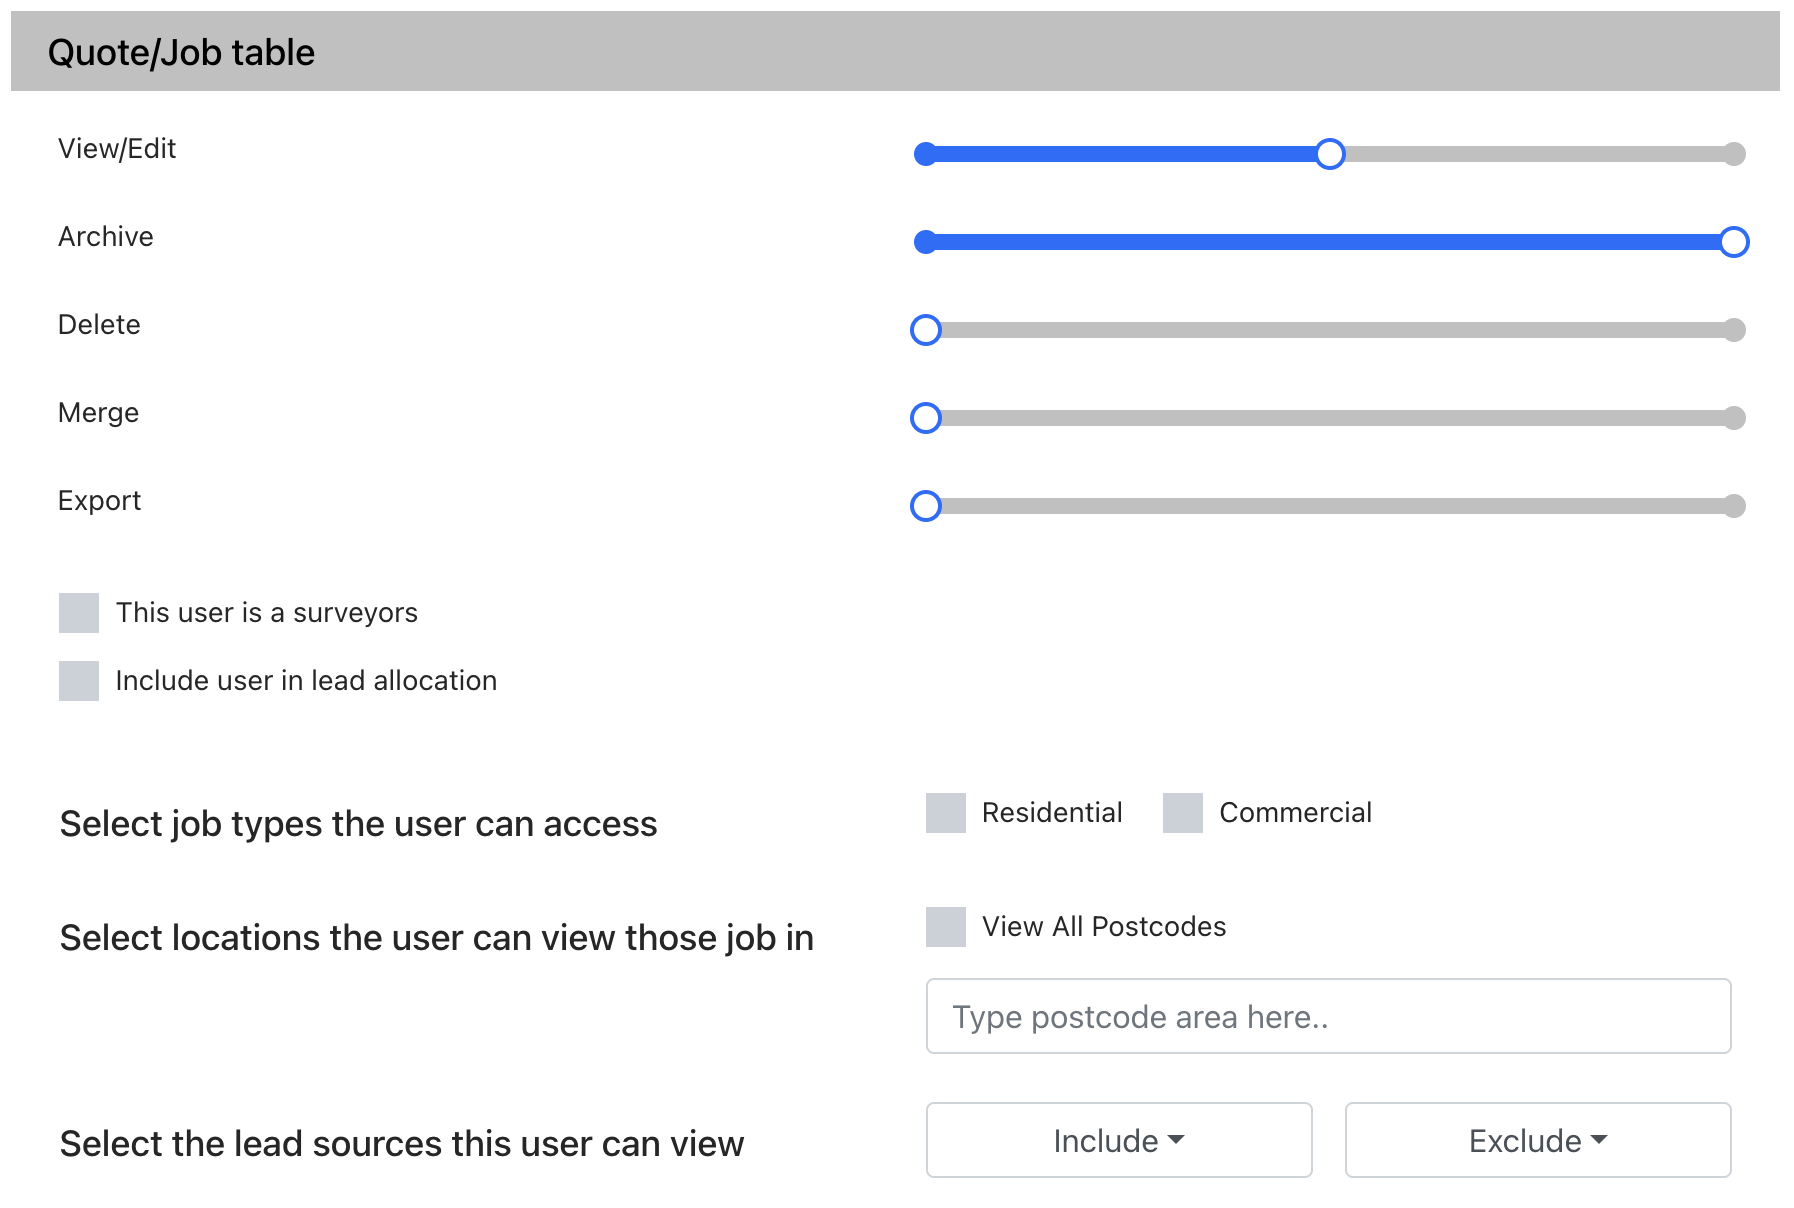
Quote/job table settings
View/edit
- Set if users have no access to records
- View only allowed job types and locations
- View all data regardless of which job types, locations, or lead sources the user can be allocated on lead allocation or assigned as a surveyor
Other settings – set if the user is allowed to export, archive, delete or merge data. These are either set to no access or full access.
Data types:
If you set above that the user can view all records, these settings only impact when the user appears for appointment booking as a surveyor or if they can be allocated leads on lead allocation.
Lead source – this sets which lead sources the user is allowed or not allowed to view. By default, if no selections are made, the user can see all lead sources. You do not need to select all lead sources under “Include” for a user to be able to see them. This is used only as a filter to show specific sources only.
- Include – allows you to restrict the user to view only certain lead sources (e.g. they manage leads from one referral partner)
- Exclude – allows you to set the user can manage all lead sources apart from the ones selected
Job types – select which job types the user can view (if not set to be able to view all data),, be allocated (lead allocation) or display for on the booking pop up (surveyor setting)
Locations – select which job types the user can view (if not set to be able to view all data), be allocated (lead allocation) or display for on the booking pop up (surveyor setting)
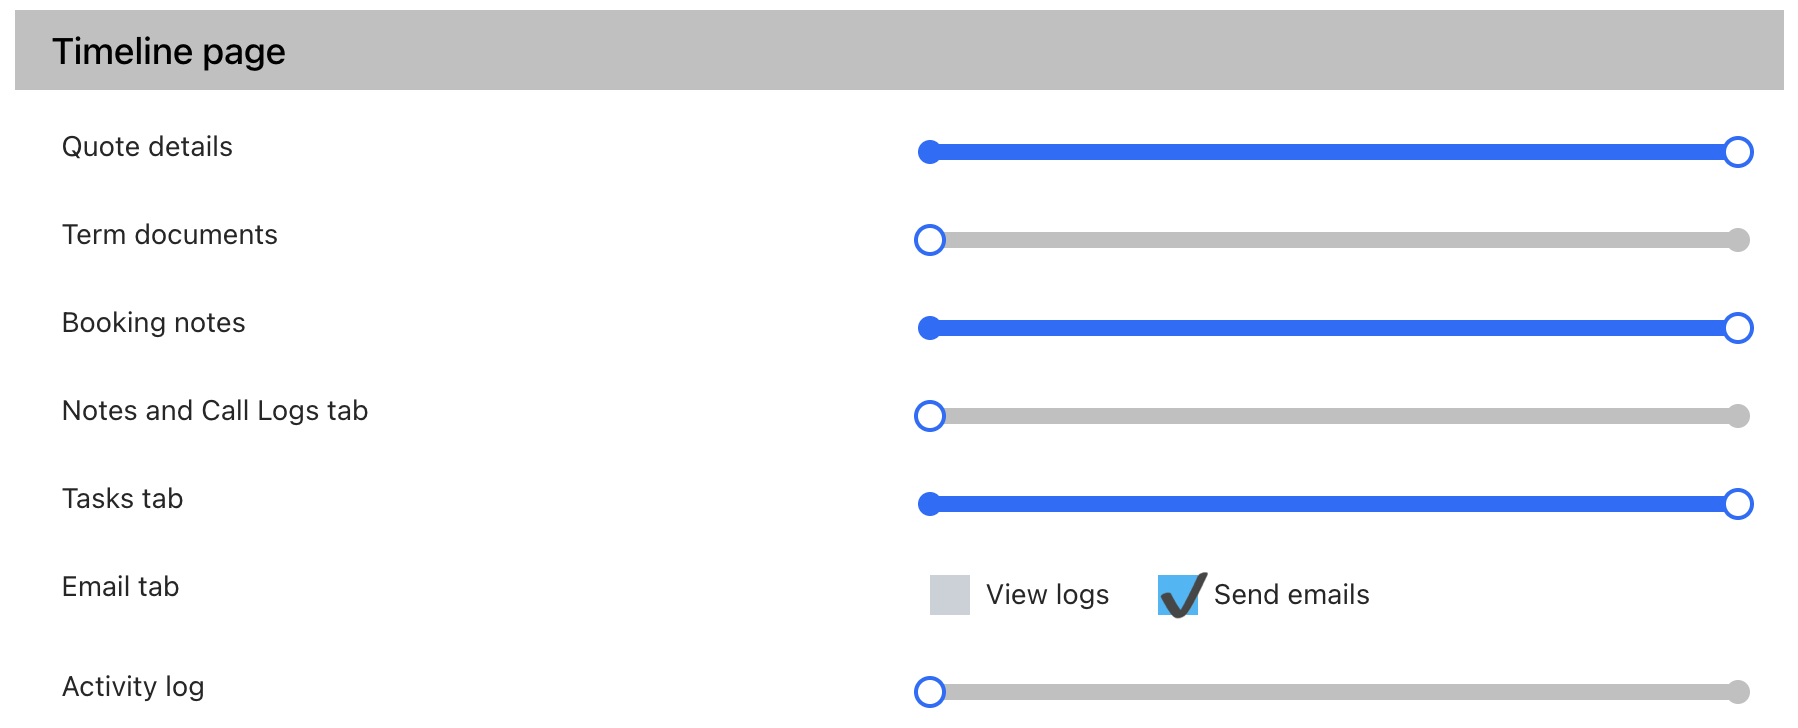
Timeline settings
For each of these settings, you can choose if the user has no access or full access. No access prevents the user from viewing this information. Full access allows the user to view the tab.
Emails offer two options:
- View logs – the user can view all emails logs
- Send emails – the user can send emails via the composer and view any emails that they have sent
These settings allow you to restrict what a user is able to view on the job record.
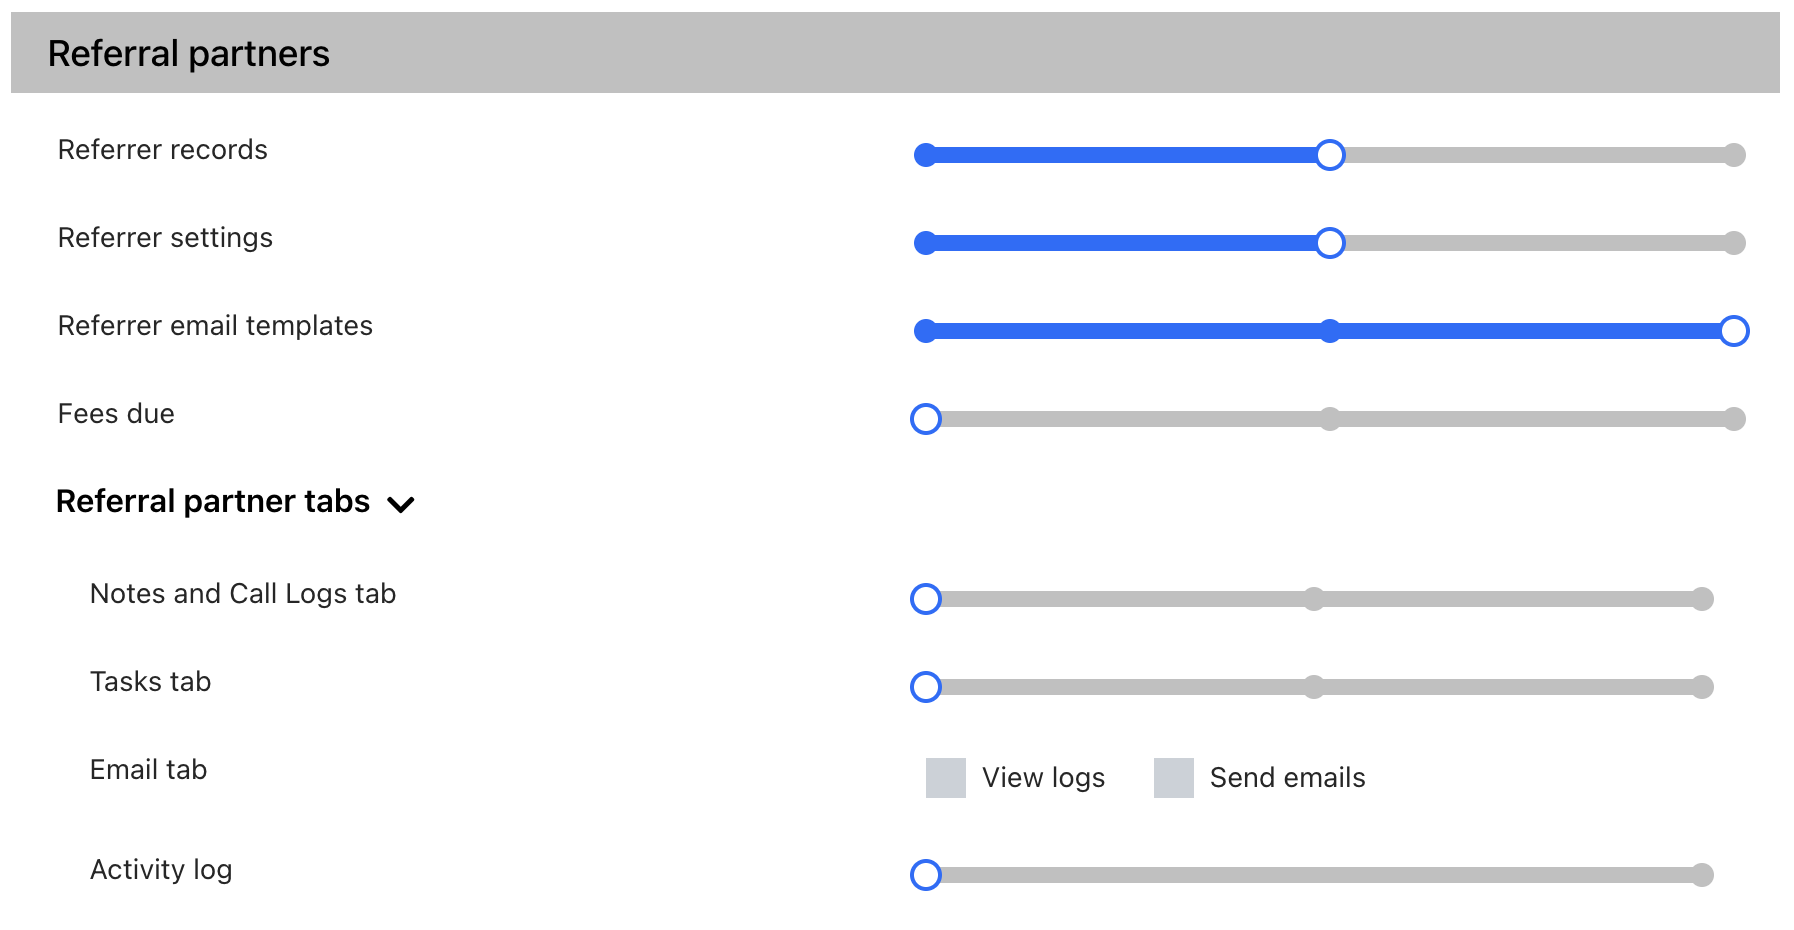
Referral partner settings
These settings allow you to set if a user has no access to the relevant setting/data, read access where they can view information but not update it or full access where the settings can be adjusted.
For referrer records you can set if the user can view assigned records only (records where they are the account manager), read only (can view all records), or full (they are able to send terms, edit bank details etc).
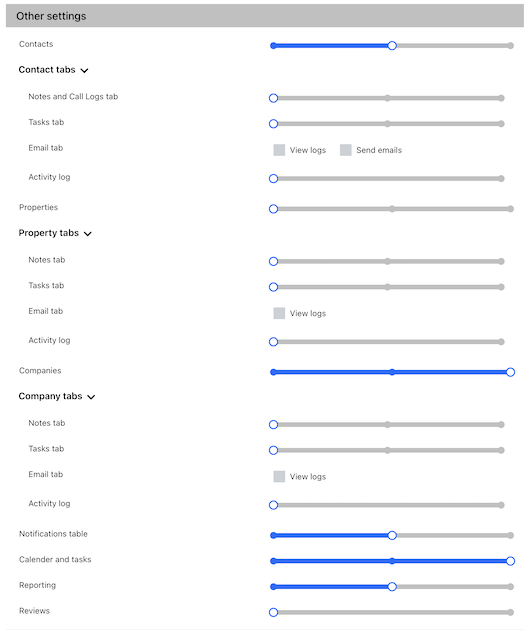
Other settings
For contacts, properties and companies, there are three options:
- View own – the user can view/edit/export any records where they are the assigned user
- View all – the user can view/edit/export all records
- Full – the user also has the ability to merge or delete the record
Notifications: the user can be given no access to this table, view only their own notifications or view all notifications for the company.
Calendar and tasks: the user can view their own records, view all records or as a full user they can also delete data. As a full user, they can also edit calendar settings such as event titles, colours etc.
Reporting: set if the user has no reporting access, can view reports for their own data or view all data in reports.
Reviews: provide a user full access to view the reviews page or no access.
View user email and calendar connections
On the user table you’ll see calendar and email icon.
If grey, the user has no account connected.
If green, you can hover over to see which email and calendar they have connected.
This enables you to see if users have any accounts connected and, if so, which accounts they’ve added.
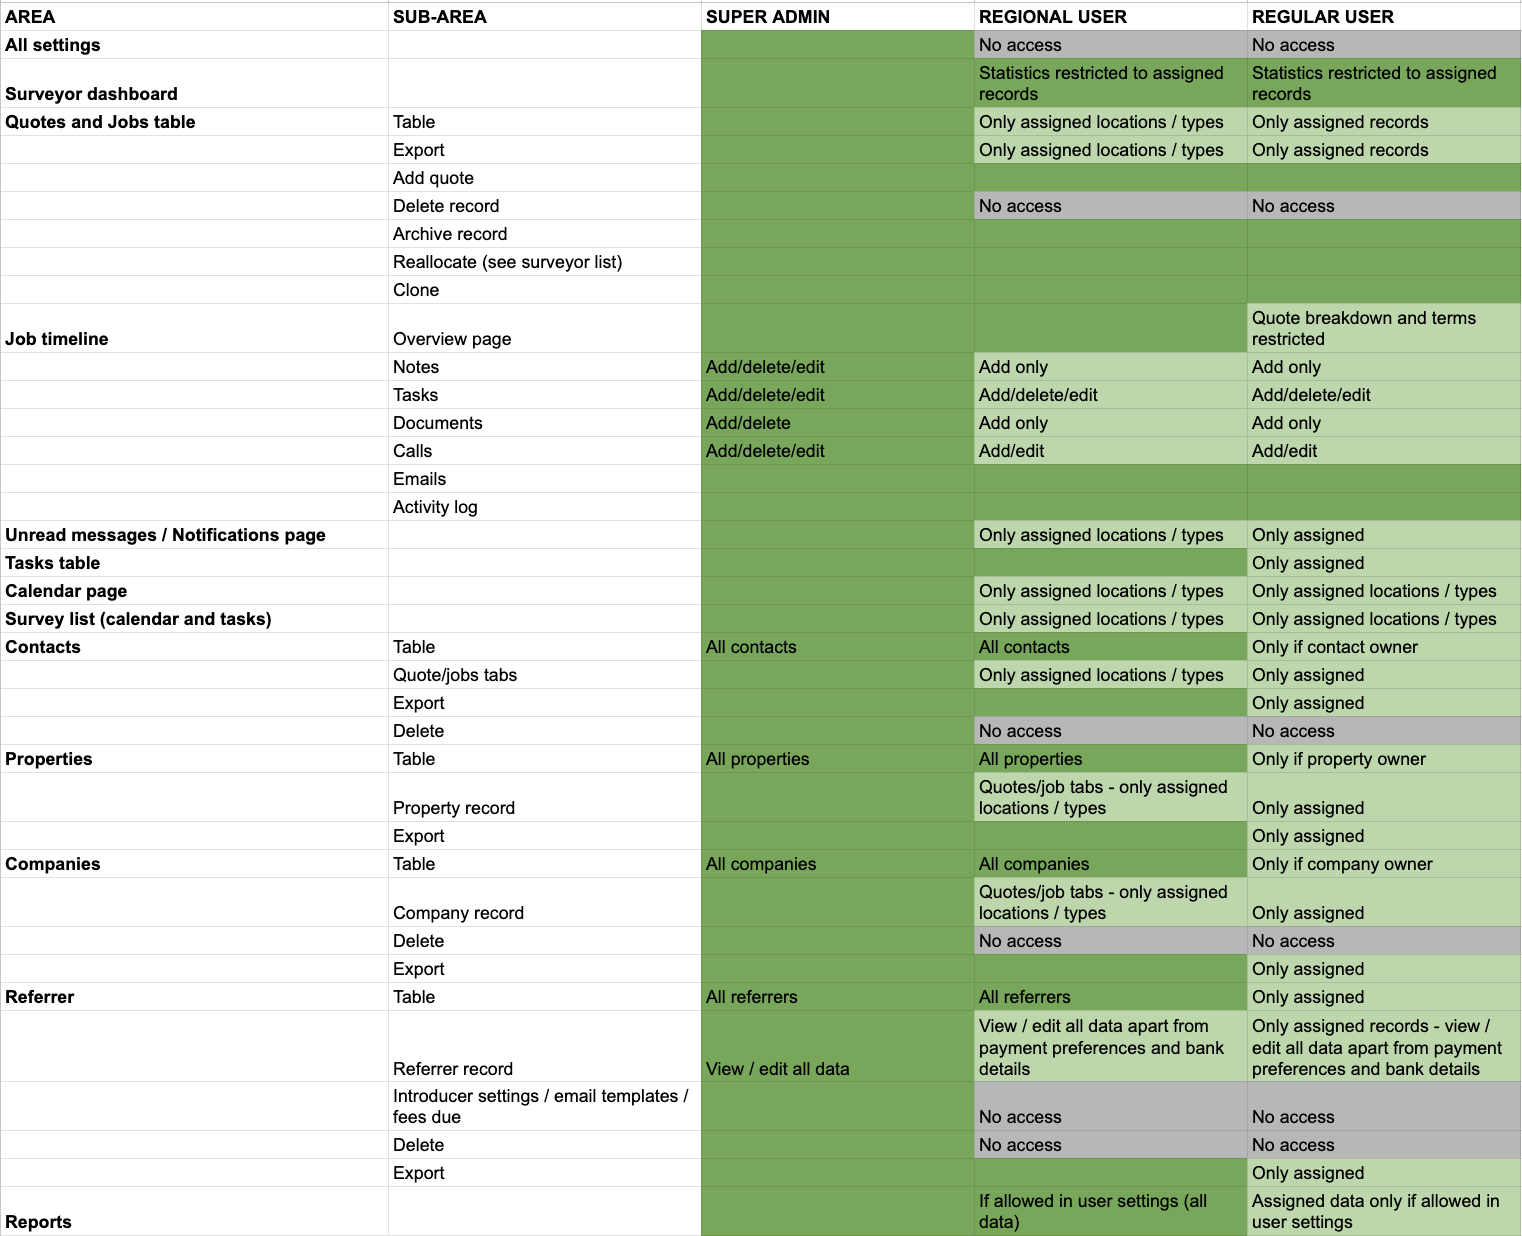
A detailed view of what each standard user type can do
The table below outlines what each user level is able to do. This does not apply to custom users – for custom users you can set your own preferences. Our preset users allow you to quickly add users with the most commonly preferred access levels.
Green: Full Access
Light Green: Limited Access
Grey: No Access
FAQs
I’ve hit my user limit and I need to add another user
Your plan has a user limit. Once you’ve reached your user limit you won’t be able to add more users. Once you’ve reached your user limit you can either adjust your plan allowance by contacting our support team or remove users you no longer need. Once a user is removed, you can add a new one.
If I delete a user will I lose reporting?
When a user is deleted you can still report on who took actions on jobs, who was assigned and more. The user will be removed and can no longer access the system.

