
What is Sprift?
Sprift is a tool to help you produce research on properties very quickly. This can be used to:
- Increase sales by showing your local knowledge – share reports with customers
- Saving time compiling desktop research – focus on analysis
There are three types of report you can produce:
- PDF report (automatically or manually)
- Interactive link (automatically or manually)
- Raw data (manually)
There are four key things you can do with our Sprift integration:
- Automate the generation of property reports to be included in your welcome emails
- Grow sales by showing your local knowledge
- Generate reports manually
- Use this for internal record keeping and compliance (e.g. evidence of desktop research)
- View and discuss reports with customers during the sales process
- Save raw data and display it where you need it
- Saved data will push to your report writing software
- Saved data will push to other systems you use and be included in features such as Job sheets
- Display selected fields in your quotes/jobs table and filter your table by those columns
- Export data as part of your quote/jobs table export
- Sprift viewer
- View your Sprift reports in the Sprift dashboard directly from each job record, allowing you to discuss a report and progress the job/update fields whilst speaking to the customer.
In this guide, we’ll look at how you set up your integration settings and the different options you have when using the feed to grow sales, save time or manage compliance.
Setting up your Sprift integration
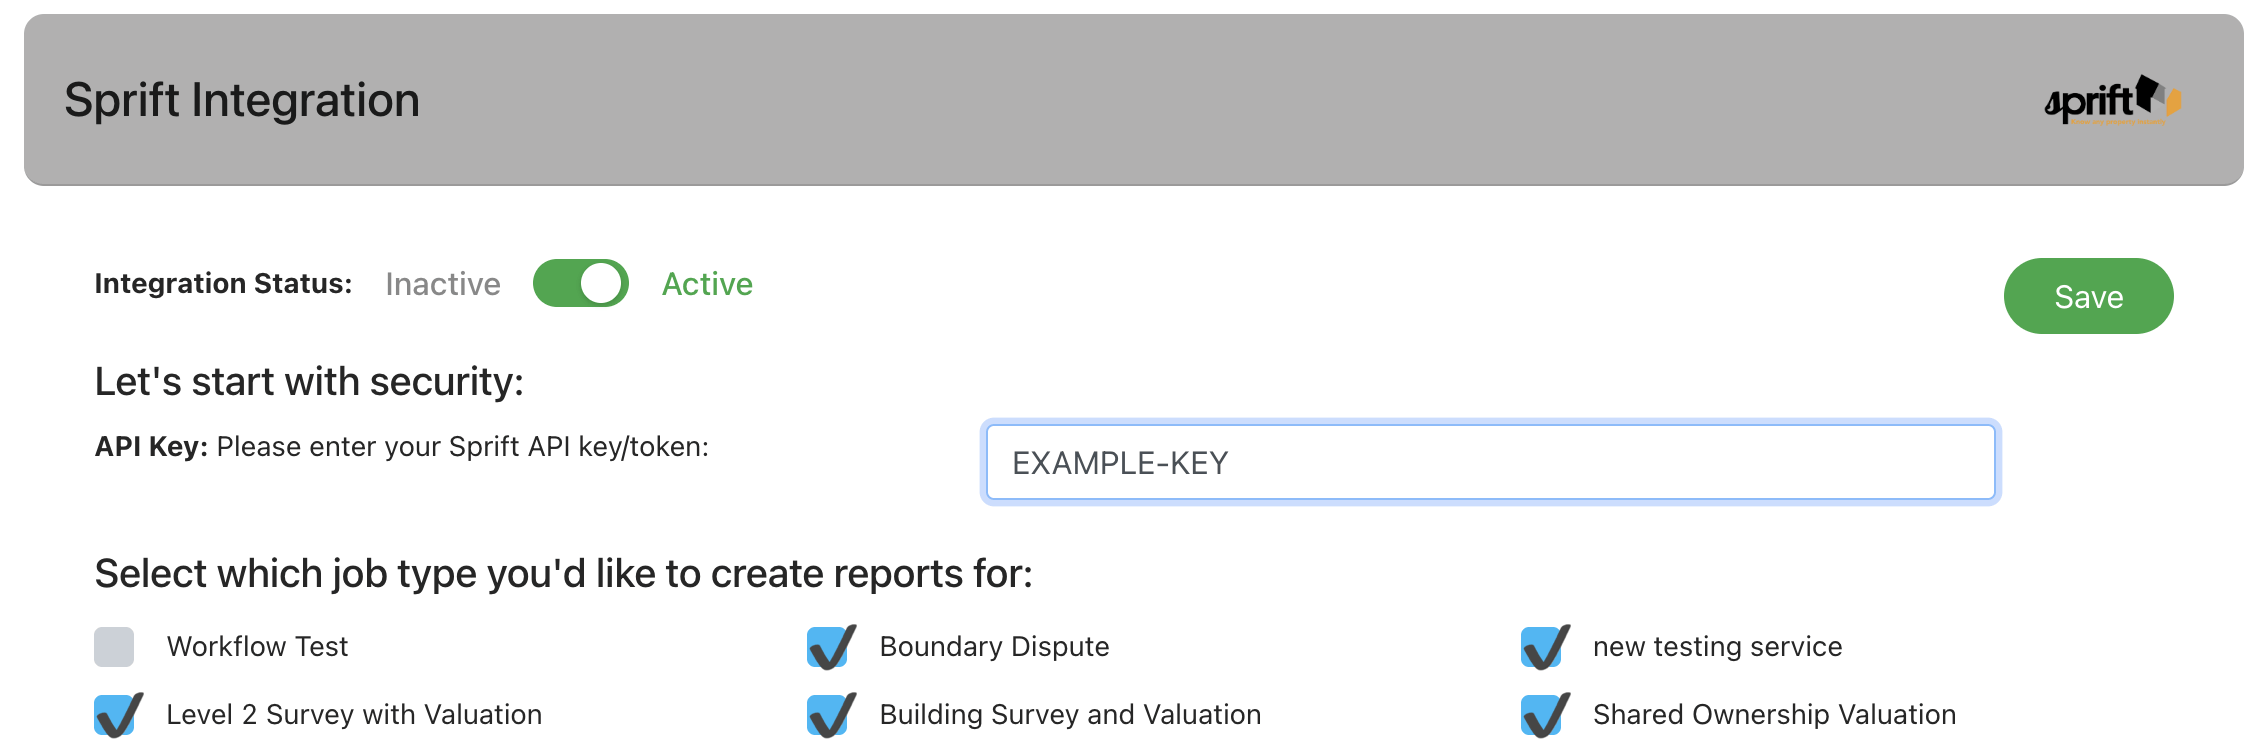
1. Basic Settings
Enter your API key (this will be provided by Sprift)
Select which services you want the Sprift integration to be available for (this could be some services or all services)
Press “Save”
Once all settings have been added below, turn the integration settings slider to “Active” to start using it. You can disable to integration any any time by setting it to Inactive.
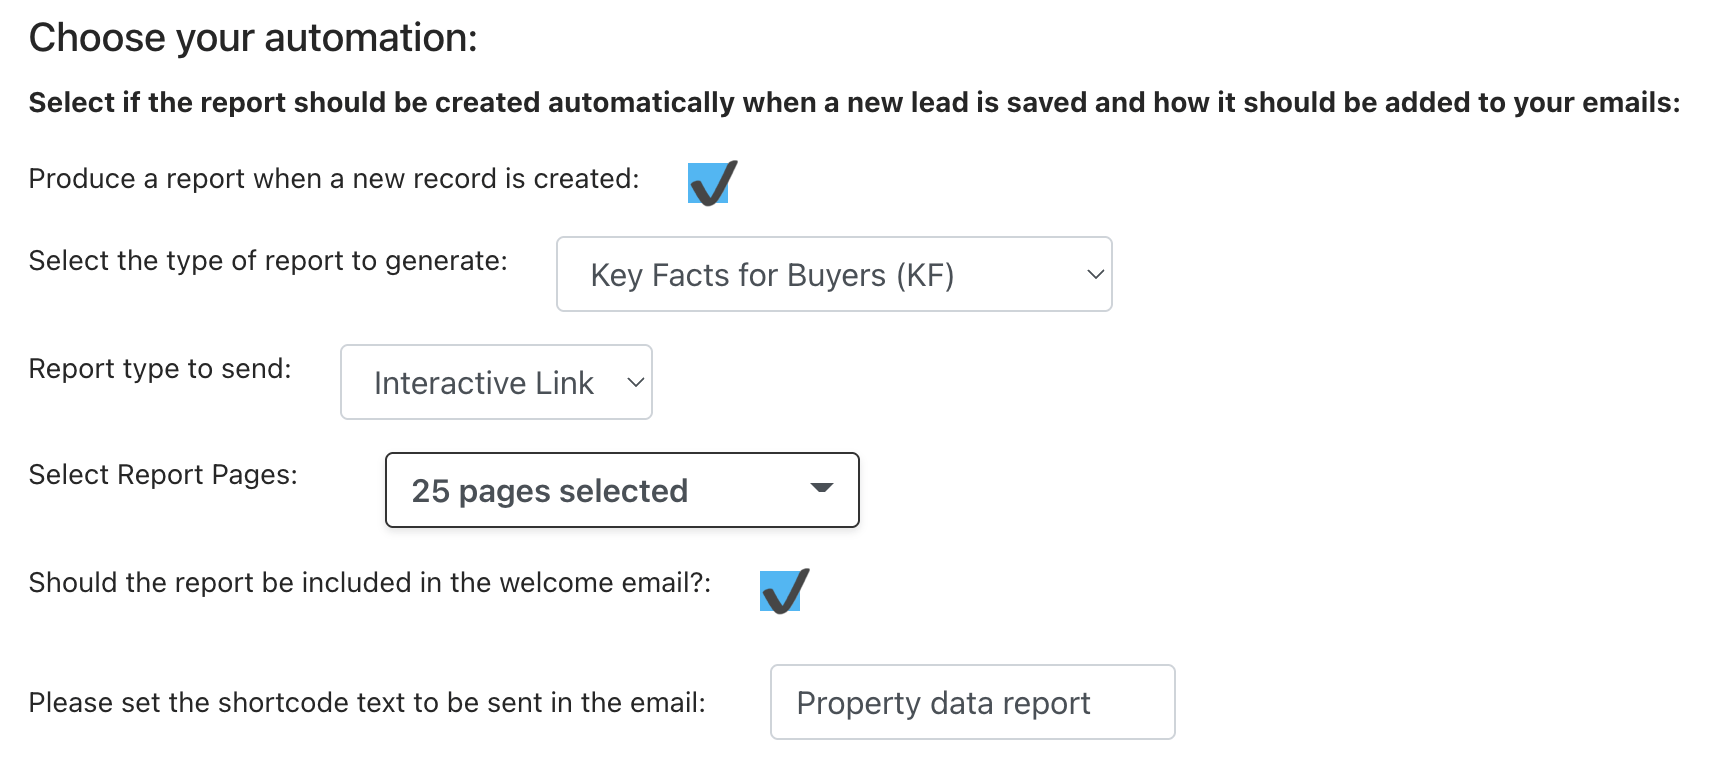
2. Choose Your Automation
Choose if you automate report creation when a new lead is added or if you do this manually:
Produce a report when a new record is created: if ticked, a new report will be created for each new lead (billing in Sprift applies)
Select the type of report to generate: choose between:
- Key Property Facts
- Desktop Research Report
Report type to send: choose between:
- Interactive link (recommended for tracking)
Select Report Pages: choose which pages should be included in your property report
Please set the shortcode text to be sent in the email: when adding a shortcode into your emails for the report, you can set what text should appear on the link – e.g. “Click here to view your personal property report”. Shortcodes you can use:
- [Property Data Report] – use this in your emails if selecting the PDF report type
- [Interactive Property Data Report] – use this in your emails if selecting the interactive report type
Note: when automatically pulling back a report, Survey Booker will attempt to match the address shared on the lead with an address in Sprift to pull back the correct report. It is possible that in some cases, a different property is selected with very closely matched report data. However, generally, you should see the correct report located and saved. When manually generating a report, you will be asked to confirm the address you’d like to select the report for.
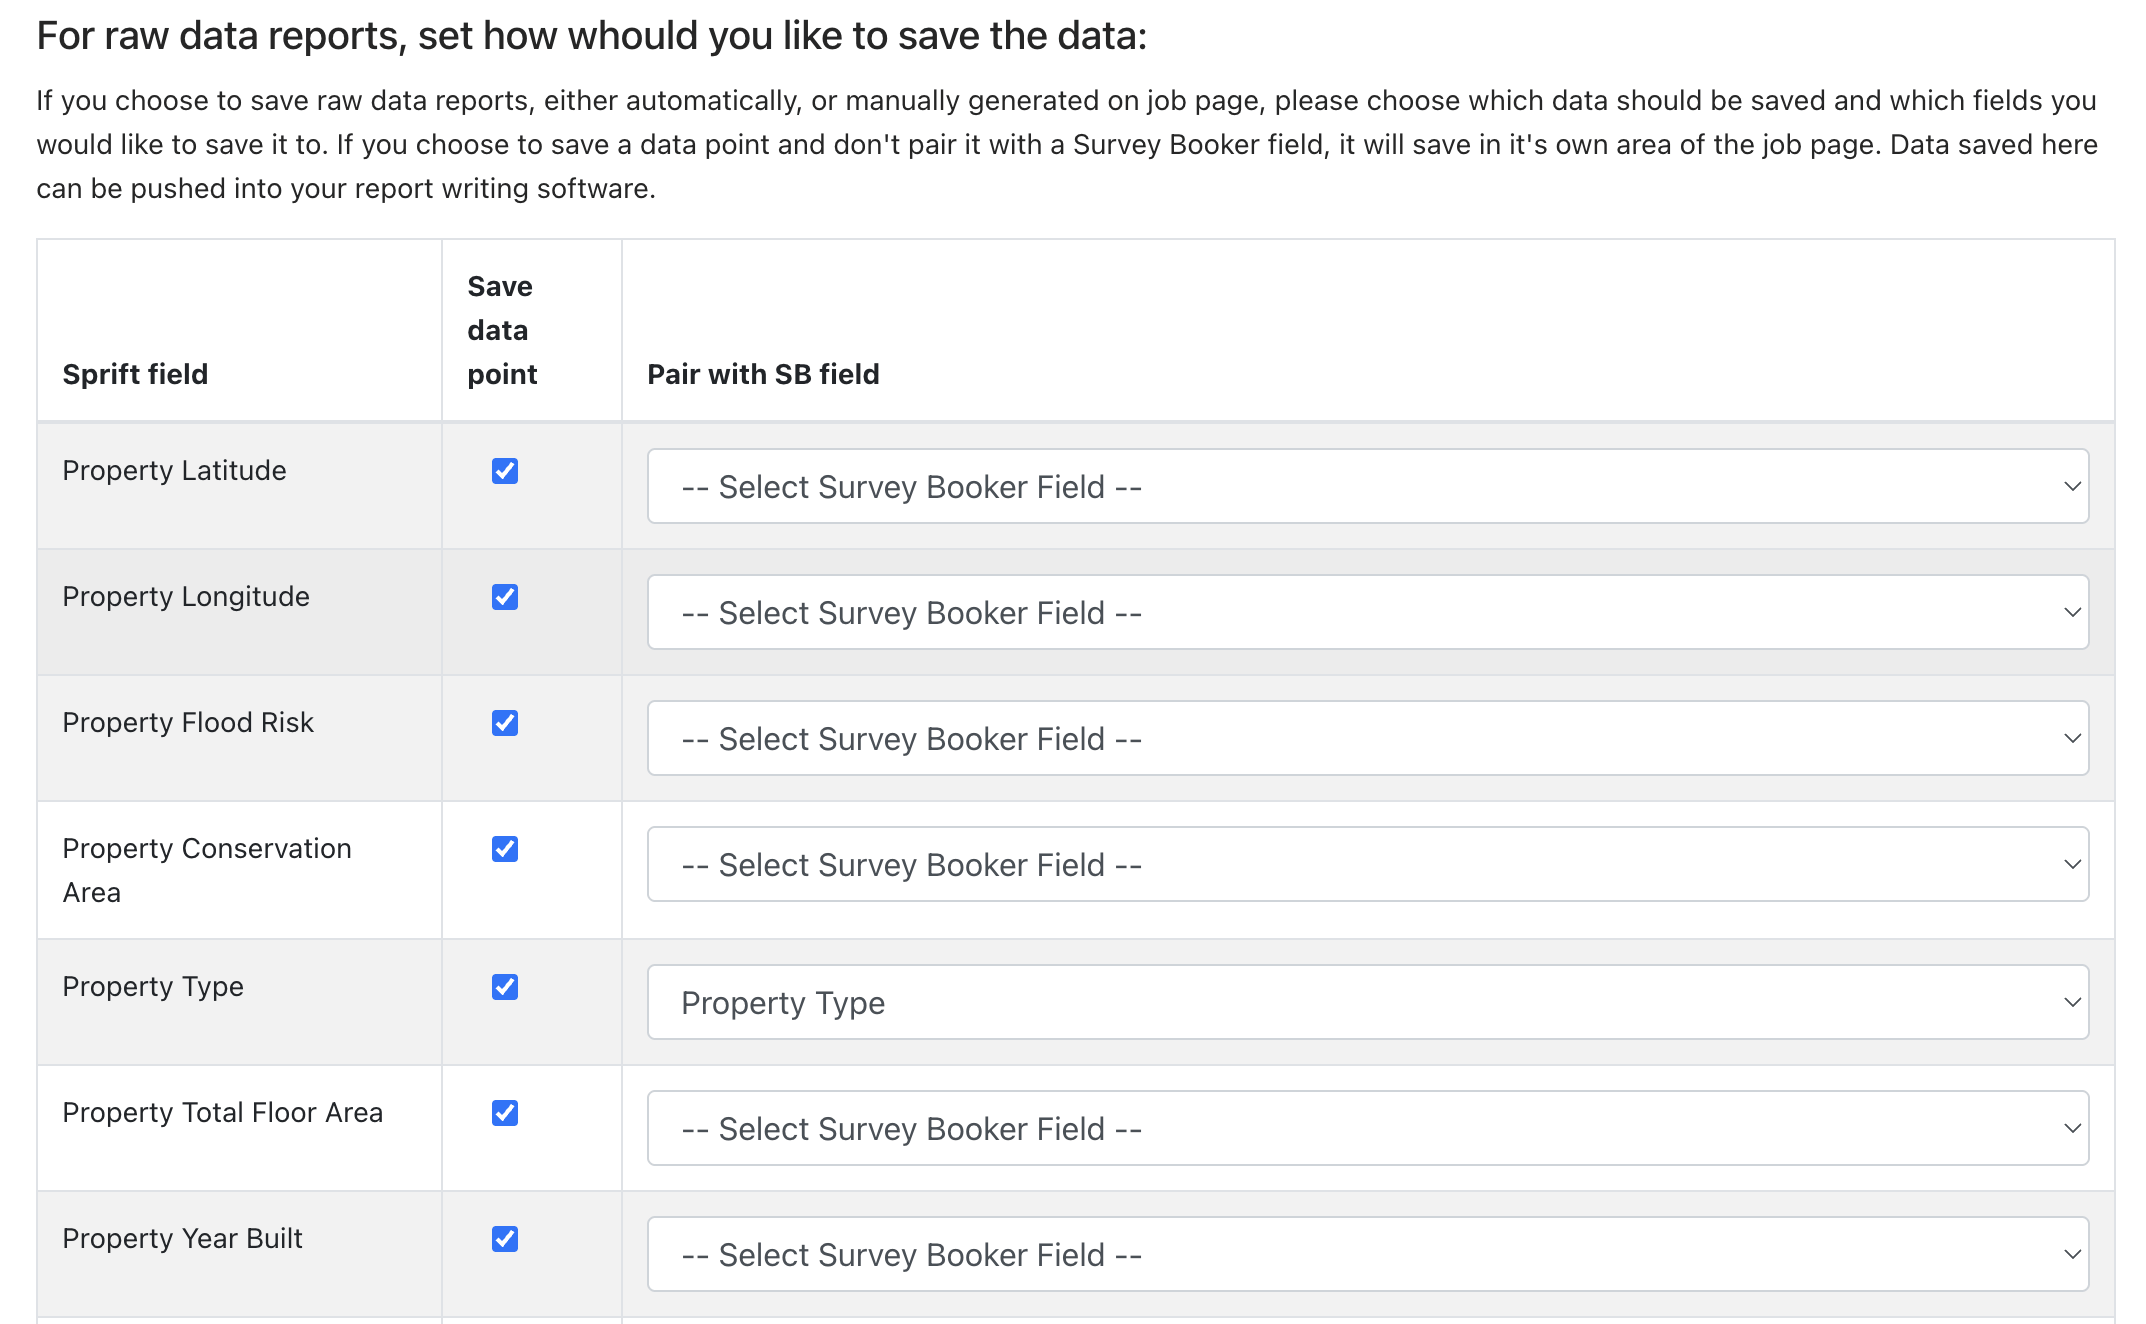
3. Raw data reports
Choose which fields to save: When running a raw data report, you can choose which property fields are saved by ticking the tick box next to each field you would like to save.
Choose where to save the data: If you have set up ‘Custom Timeline Fields’ or ‘Custom Property Fields’ you can set if any of the fields you are saving are saved to existing fields you have created, so you don’t need to manually fill them in.
Any fields you select to save, but don’t pair to a Survey Booker field, will appear as a list on the job timeline in the Property Details section.
Top tip: Any data paired to custom timeline fields can then be populated in Job sheets, Email templates and sent to your report writing software!
Remember – press “Save” once all your settings have been added
Using the Sprift Integration
1. Open a Job Timeline
When you open a job timeline for a job type you have allowed on the Sprift integration, there are 3 things you will see:
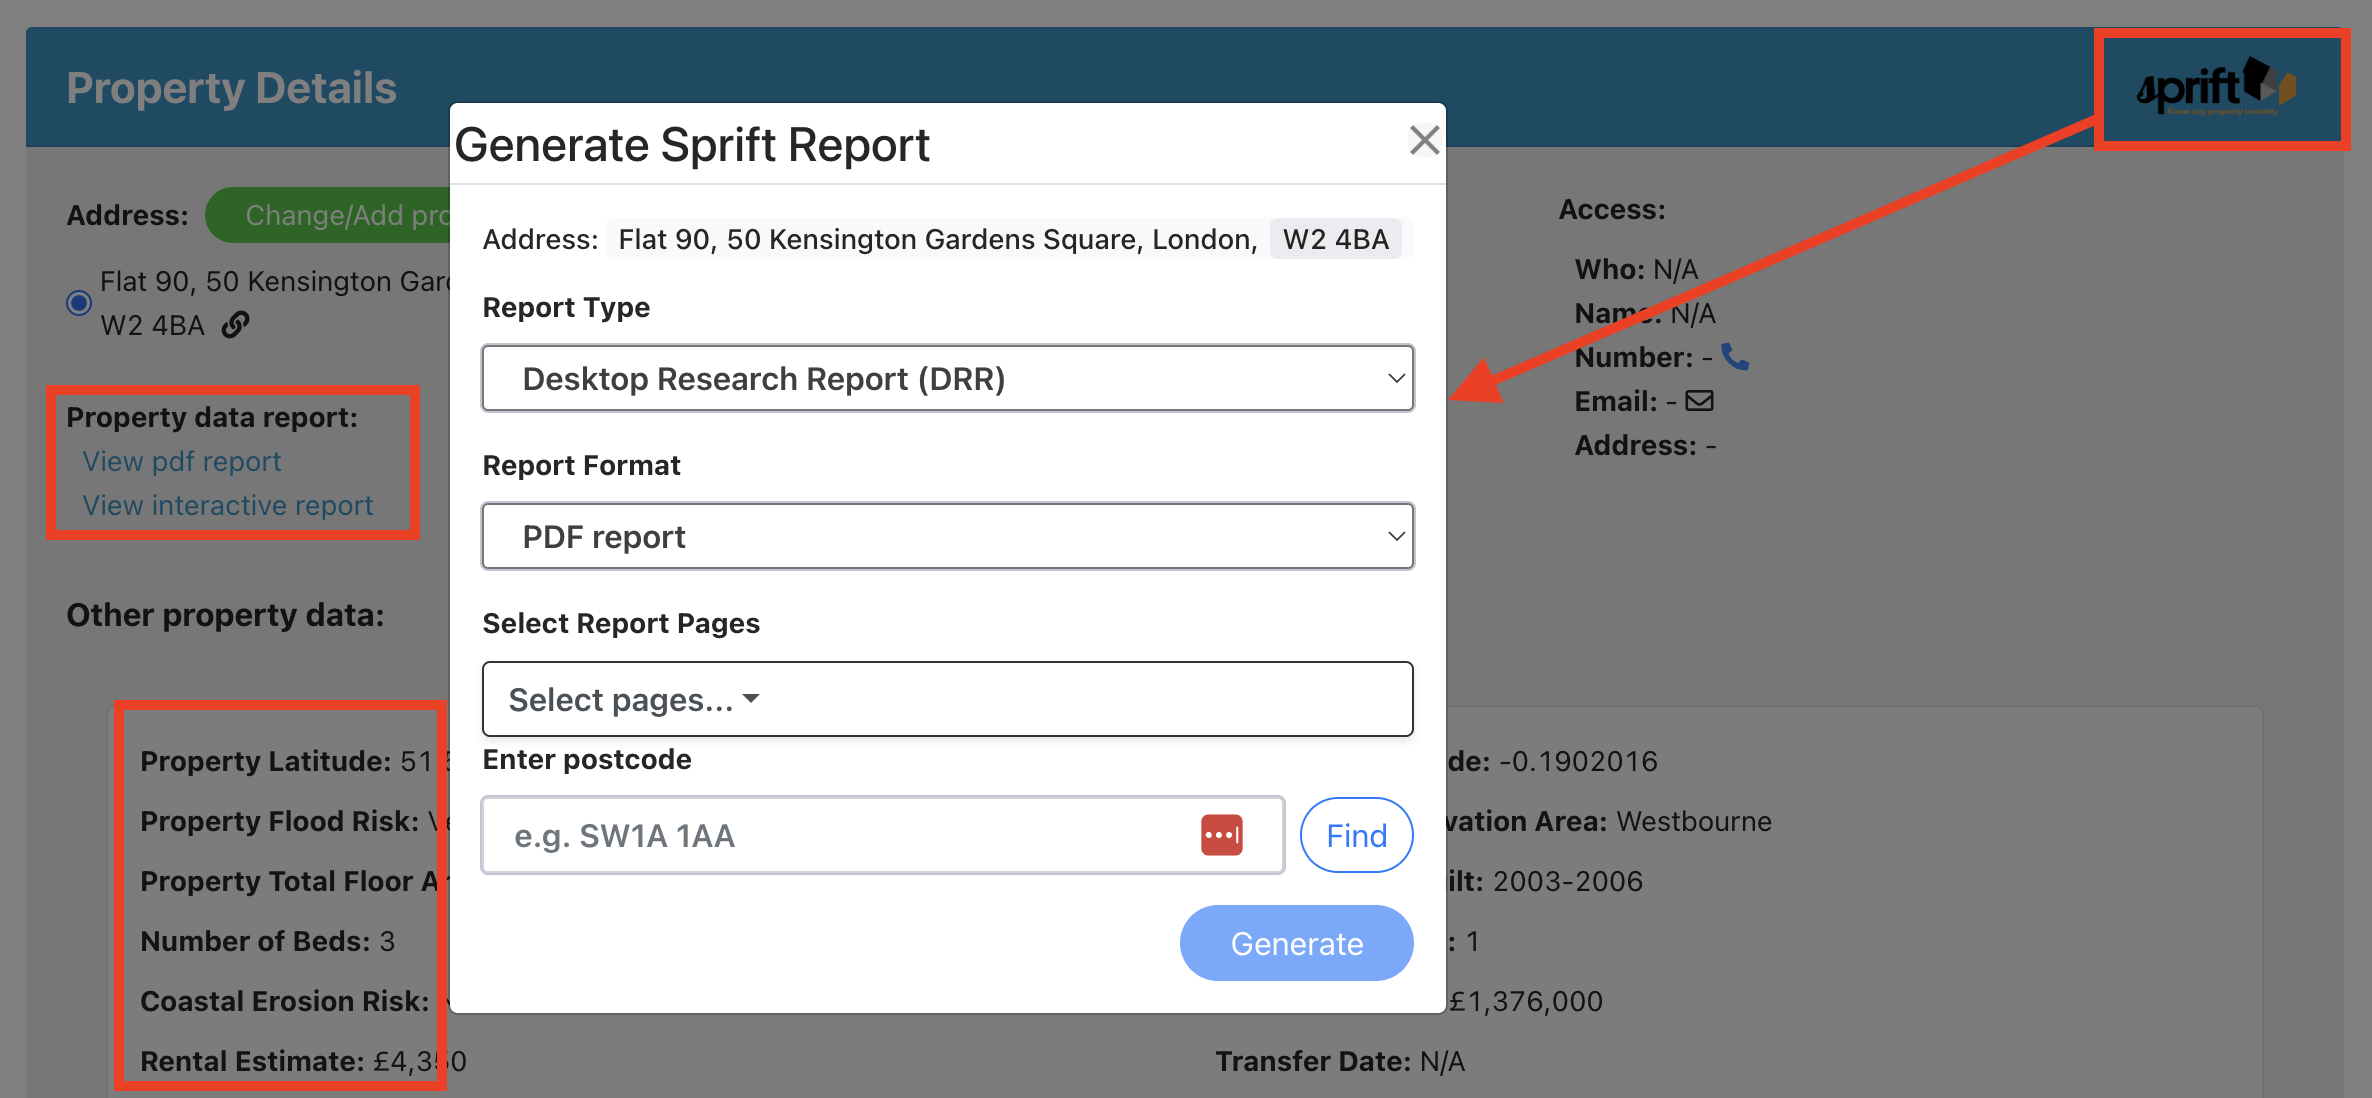
Report links – if you have automatically or manually set a report to be created, the links will appear in the property details section. Use the email shortcodes above to include an interactive or PDF report link in your emails.
Sprift logo – by clicking on the Sprift logo, you can load a pop up to choose which report type, format, pages and property you would like the report for. This allows you to generate a report at any time.
Raw data – where you have paired raw data fields to a timeline field on your record, it will be saved there automatically. Where you don’t pair it to a Survey Booker field/custom field, it will appear in a section titled “Other property data” within the Property Details section.
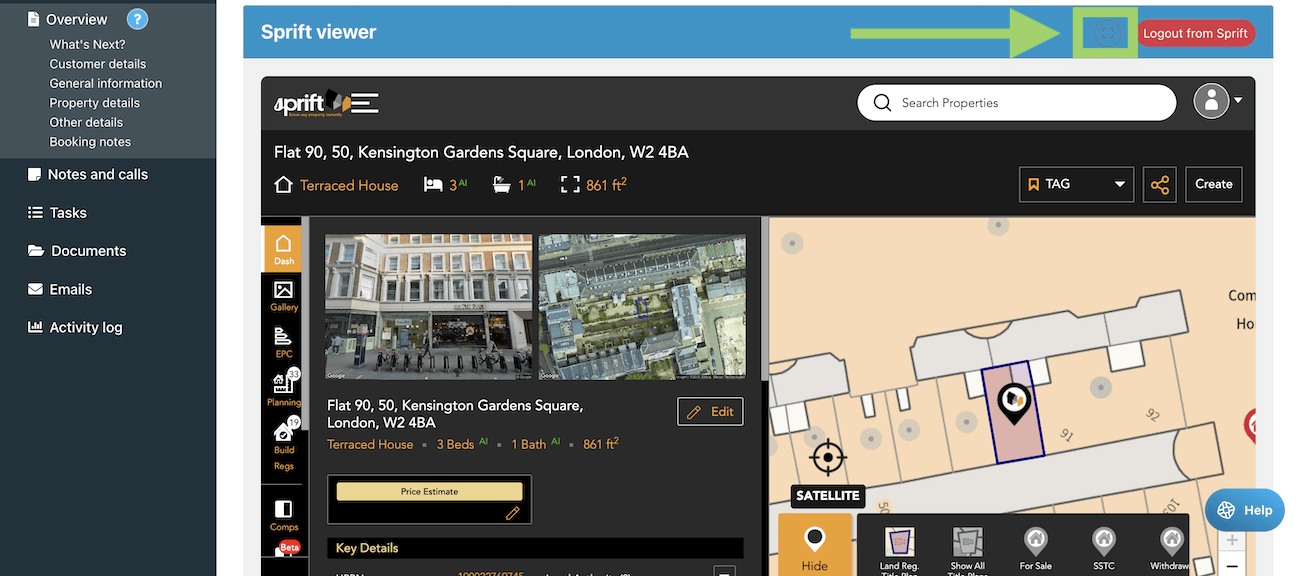
2. View the Sprift Dashboard directly in Survey Booker
You can log in to your Sprift account from any job page to view your Sprift account and view a report.
Click login > Enter your Sprift username and password in the popup.
You’ll stay logged in across different job pages you visit so you don’t need to login each time.
Use the icon at the top right to fullscreen the viewer to see the report in more detail, and the “X” to close the fullscreen view back to normal size.
This allows you to view Sprift within the context of your job record when speaking to your customer.