

What are workflows?
Workflows is a feature that allows you to set up your own custom automations. How it works:
- Select what record type you want to create a workflow for (Survey, Project or Referrer)
- Choose a Trigger – what should cause a workflow to run
- Set Conditions – for which records should the workflow be allowed to run
- Set action – set an action to run (Send Email, Send SMS, Create Task, Create Note)
What type of scenarios might I automate?
Here are some ideas for processes you might want to automate:
- Survey – set an email to be sent 55 days after a Help to Buy valuation job is completed to ask the customer if they’d like to book a desktop extension soon. Or create a task to remind yourself to follow up with a call.
- Project – automate a task to be created when a project reaches a certain job stage to set the assigned users to complete them.
- Referrer – send an email to all “Lapsed” referral partners to encourage them to start referring again.
There are a lot of processes you can automate with workflows to save time or increase sales!
Setting up a Workflow - Event Automation
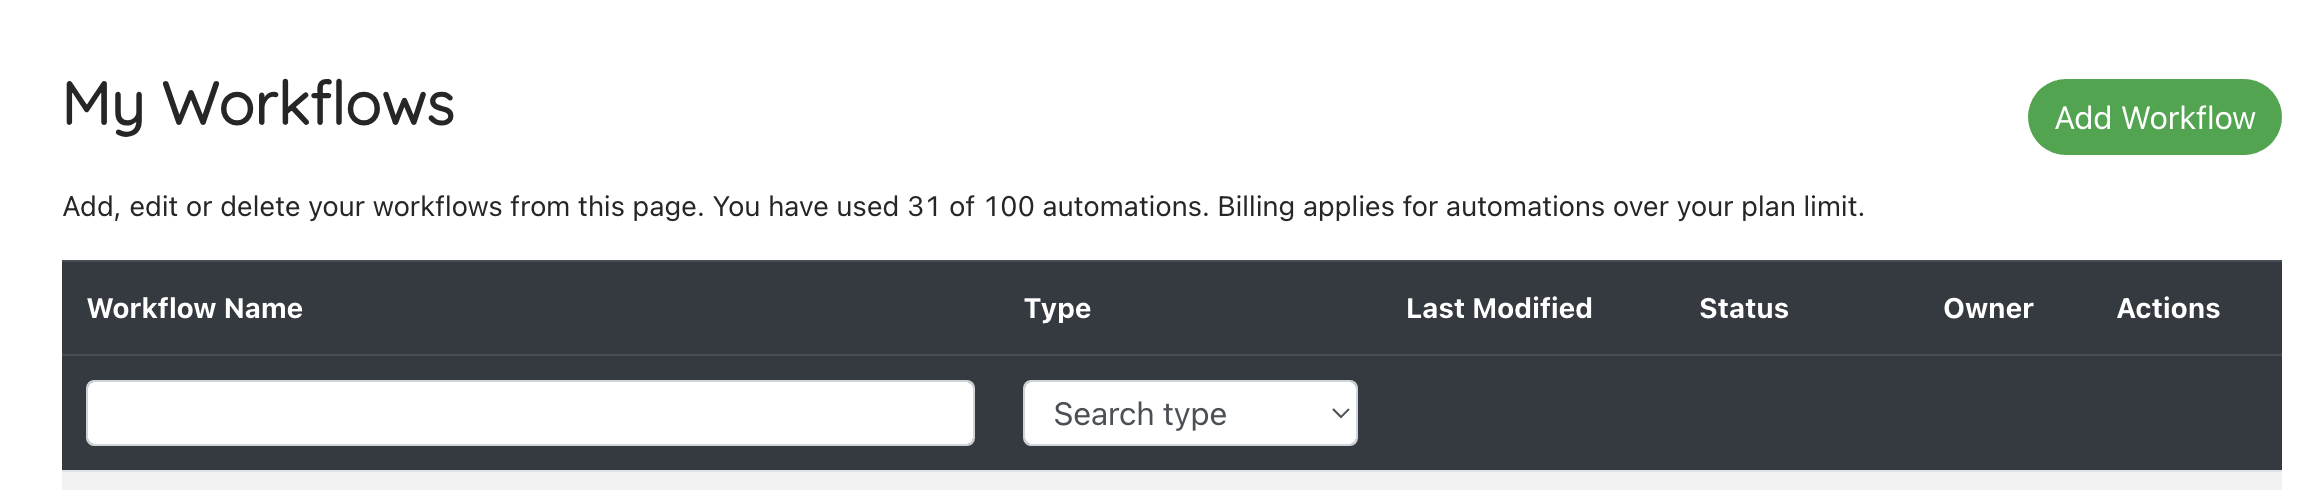
1. Click "Add Workflow"
Click “Add workflow”
Enter the name of the workflow so you can identify it later. E.g. “Send email 3 days after a job is completed”
Select the type of task to run (Email, SMS, Task Note)
Press “Add Workflow”
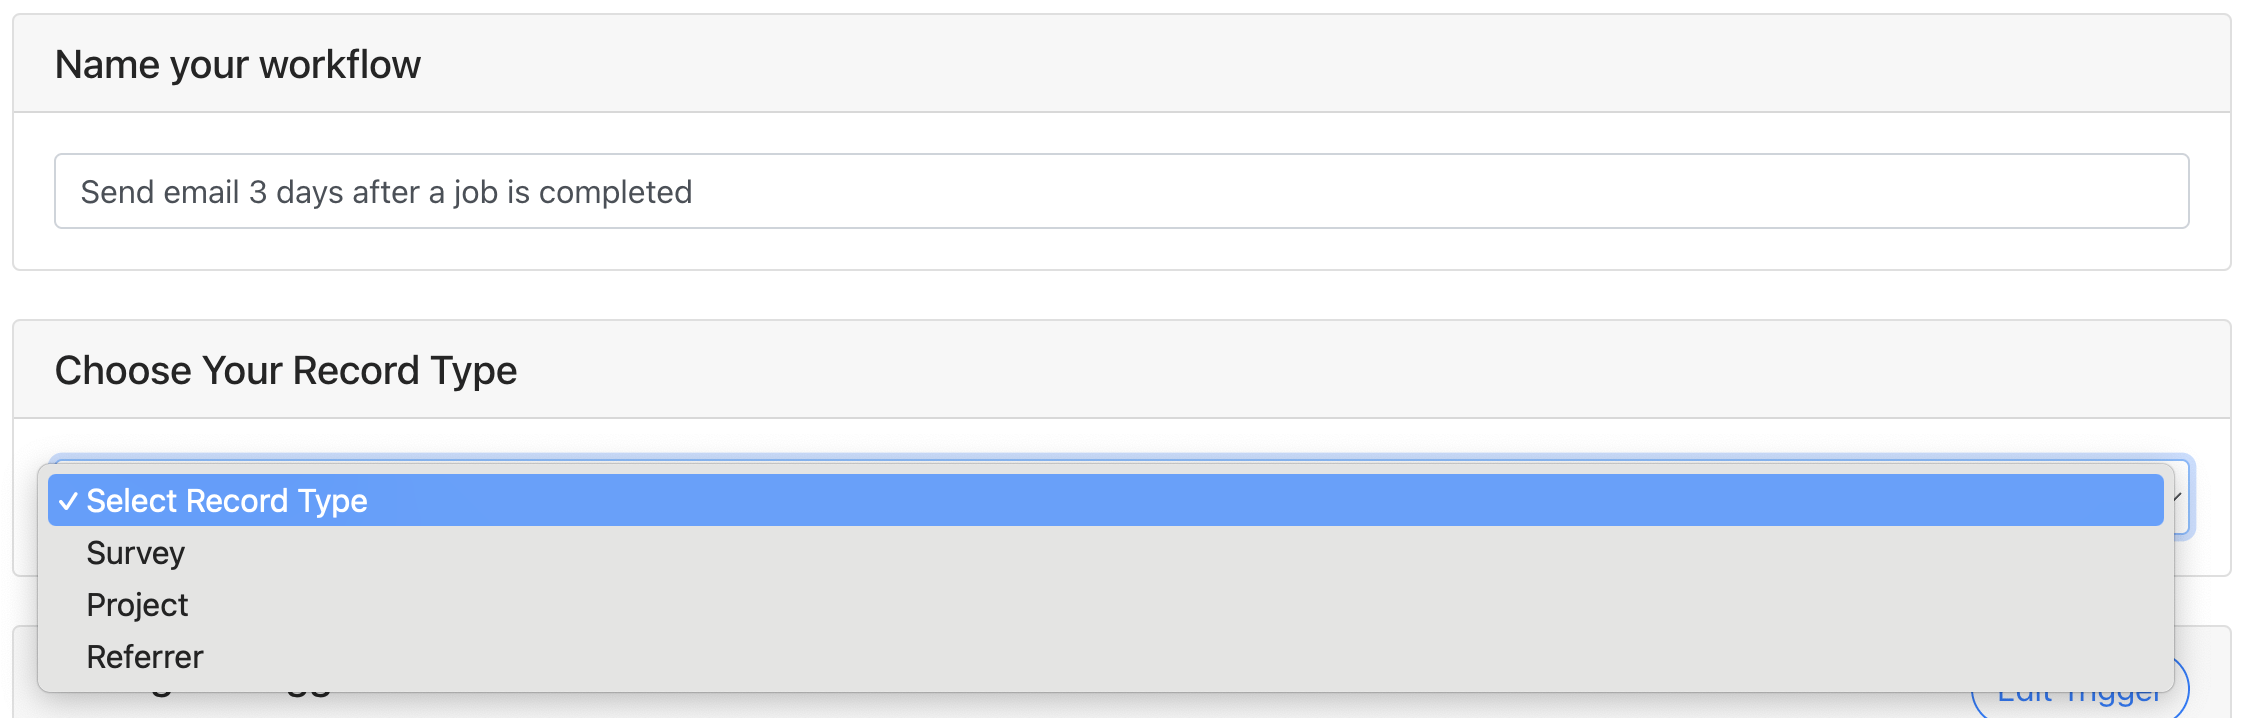
2. Choose Your Record Type
Choose which type of record you want to run the automation for:
a. Survey (a survey or valuation lead/job record)
b. Project (a project quote/job record)
c. Referrer (a referral partner)
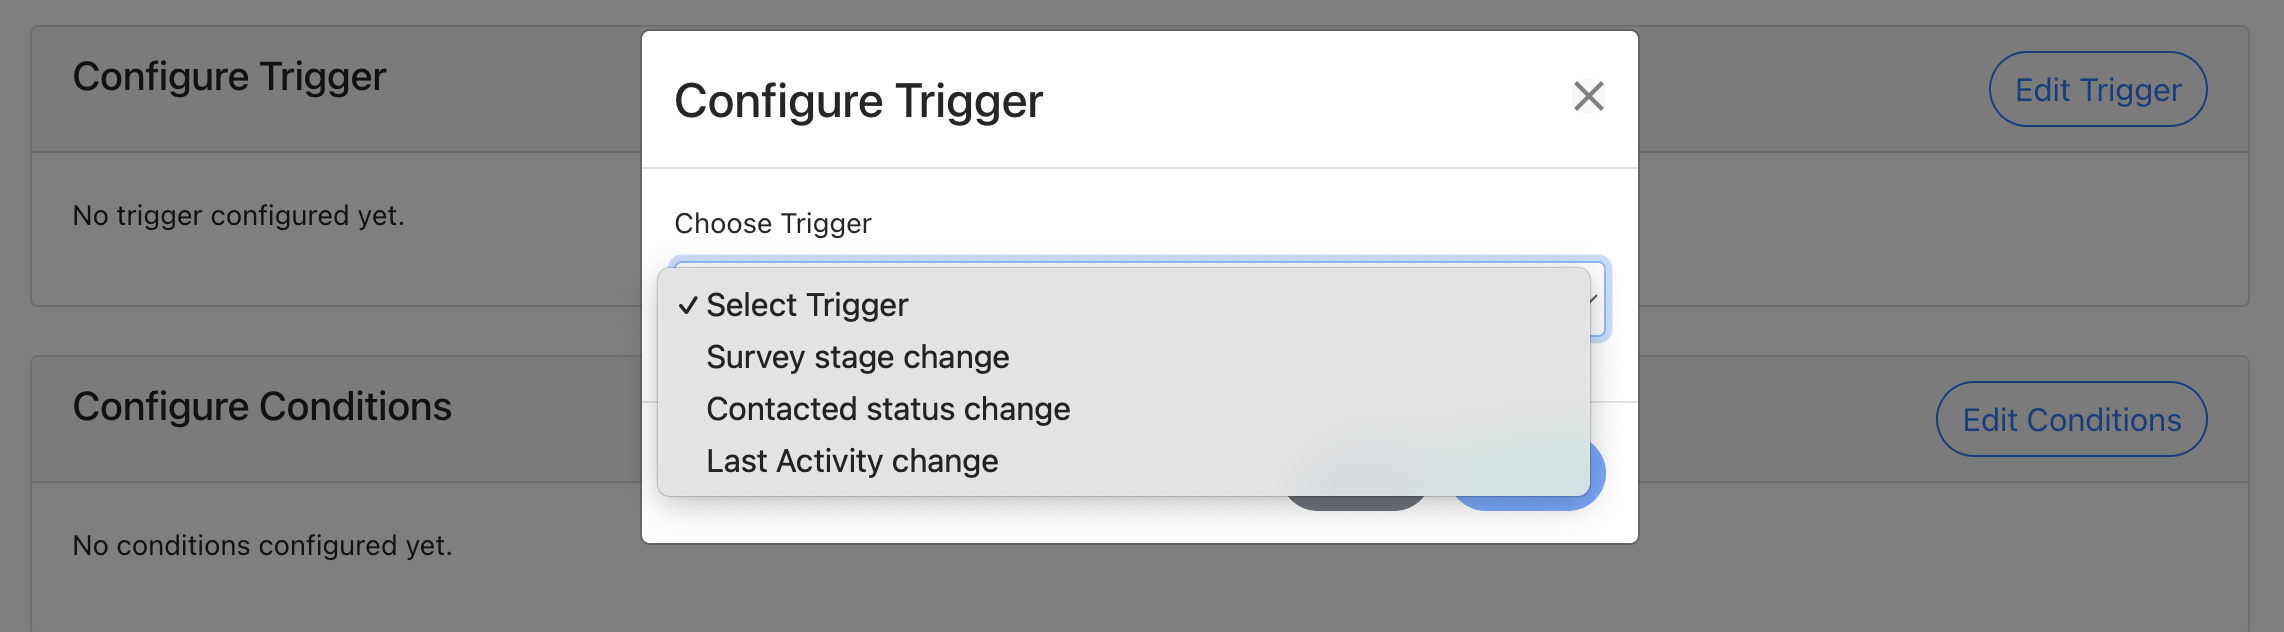
3. Configure Trigger
The trigger is the change in status for that record that should cause the workflow automation to run. These vary by record type:
Survey
- Survey stage change – when the job moves to the selected stage(s), this automation will run
- Contacted status change – when the job moves to the selected contacted status(us), this automation will run
- Last activity change – when any action is taken, this can trigger an action to run if the conditions selected in the next stage are met
Project
- Project stage change – when the project moves to the selected stage(s) – deal or project stage, this automation will run
- Contacted status change – when the job moves to the selected contacted status(es), this automation will run
- Last activity change – when any action is taken, this can trigger an action to run if the conditions selected in the next stage are met
Referrer
- Referrer status change – when the referrer moves to the selected status(es), this automation will run
- Last activity change – when any action is taken, this can trigger an action to run if the conditions selected in the next stage are met
- New referral received – when a new referral is received from a referral partner
- New job completed – when a job associated with a referral partner is completed
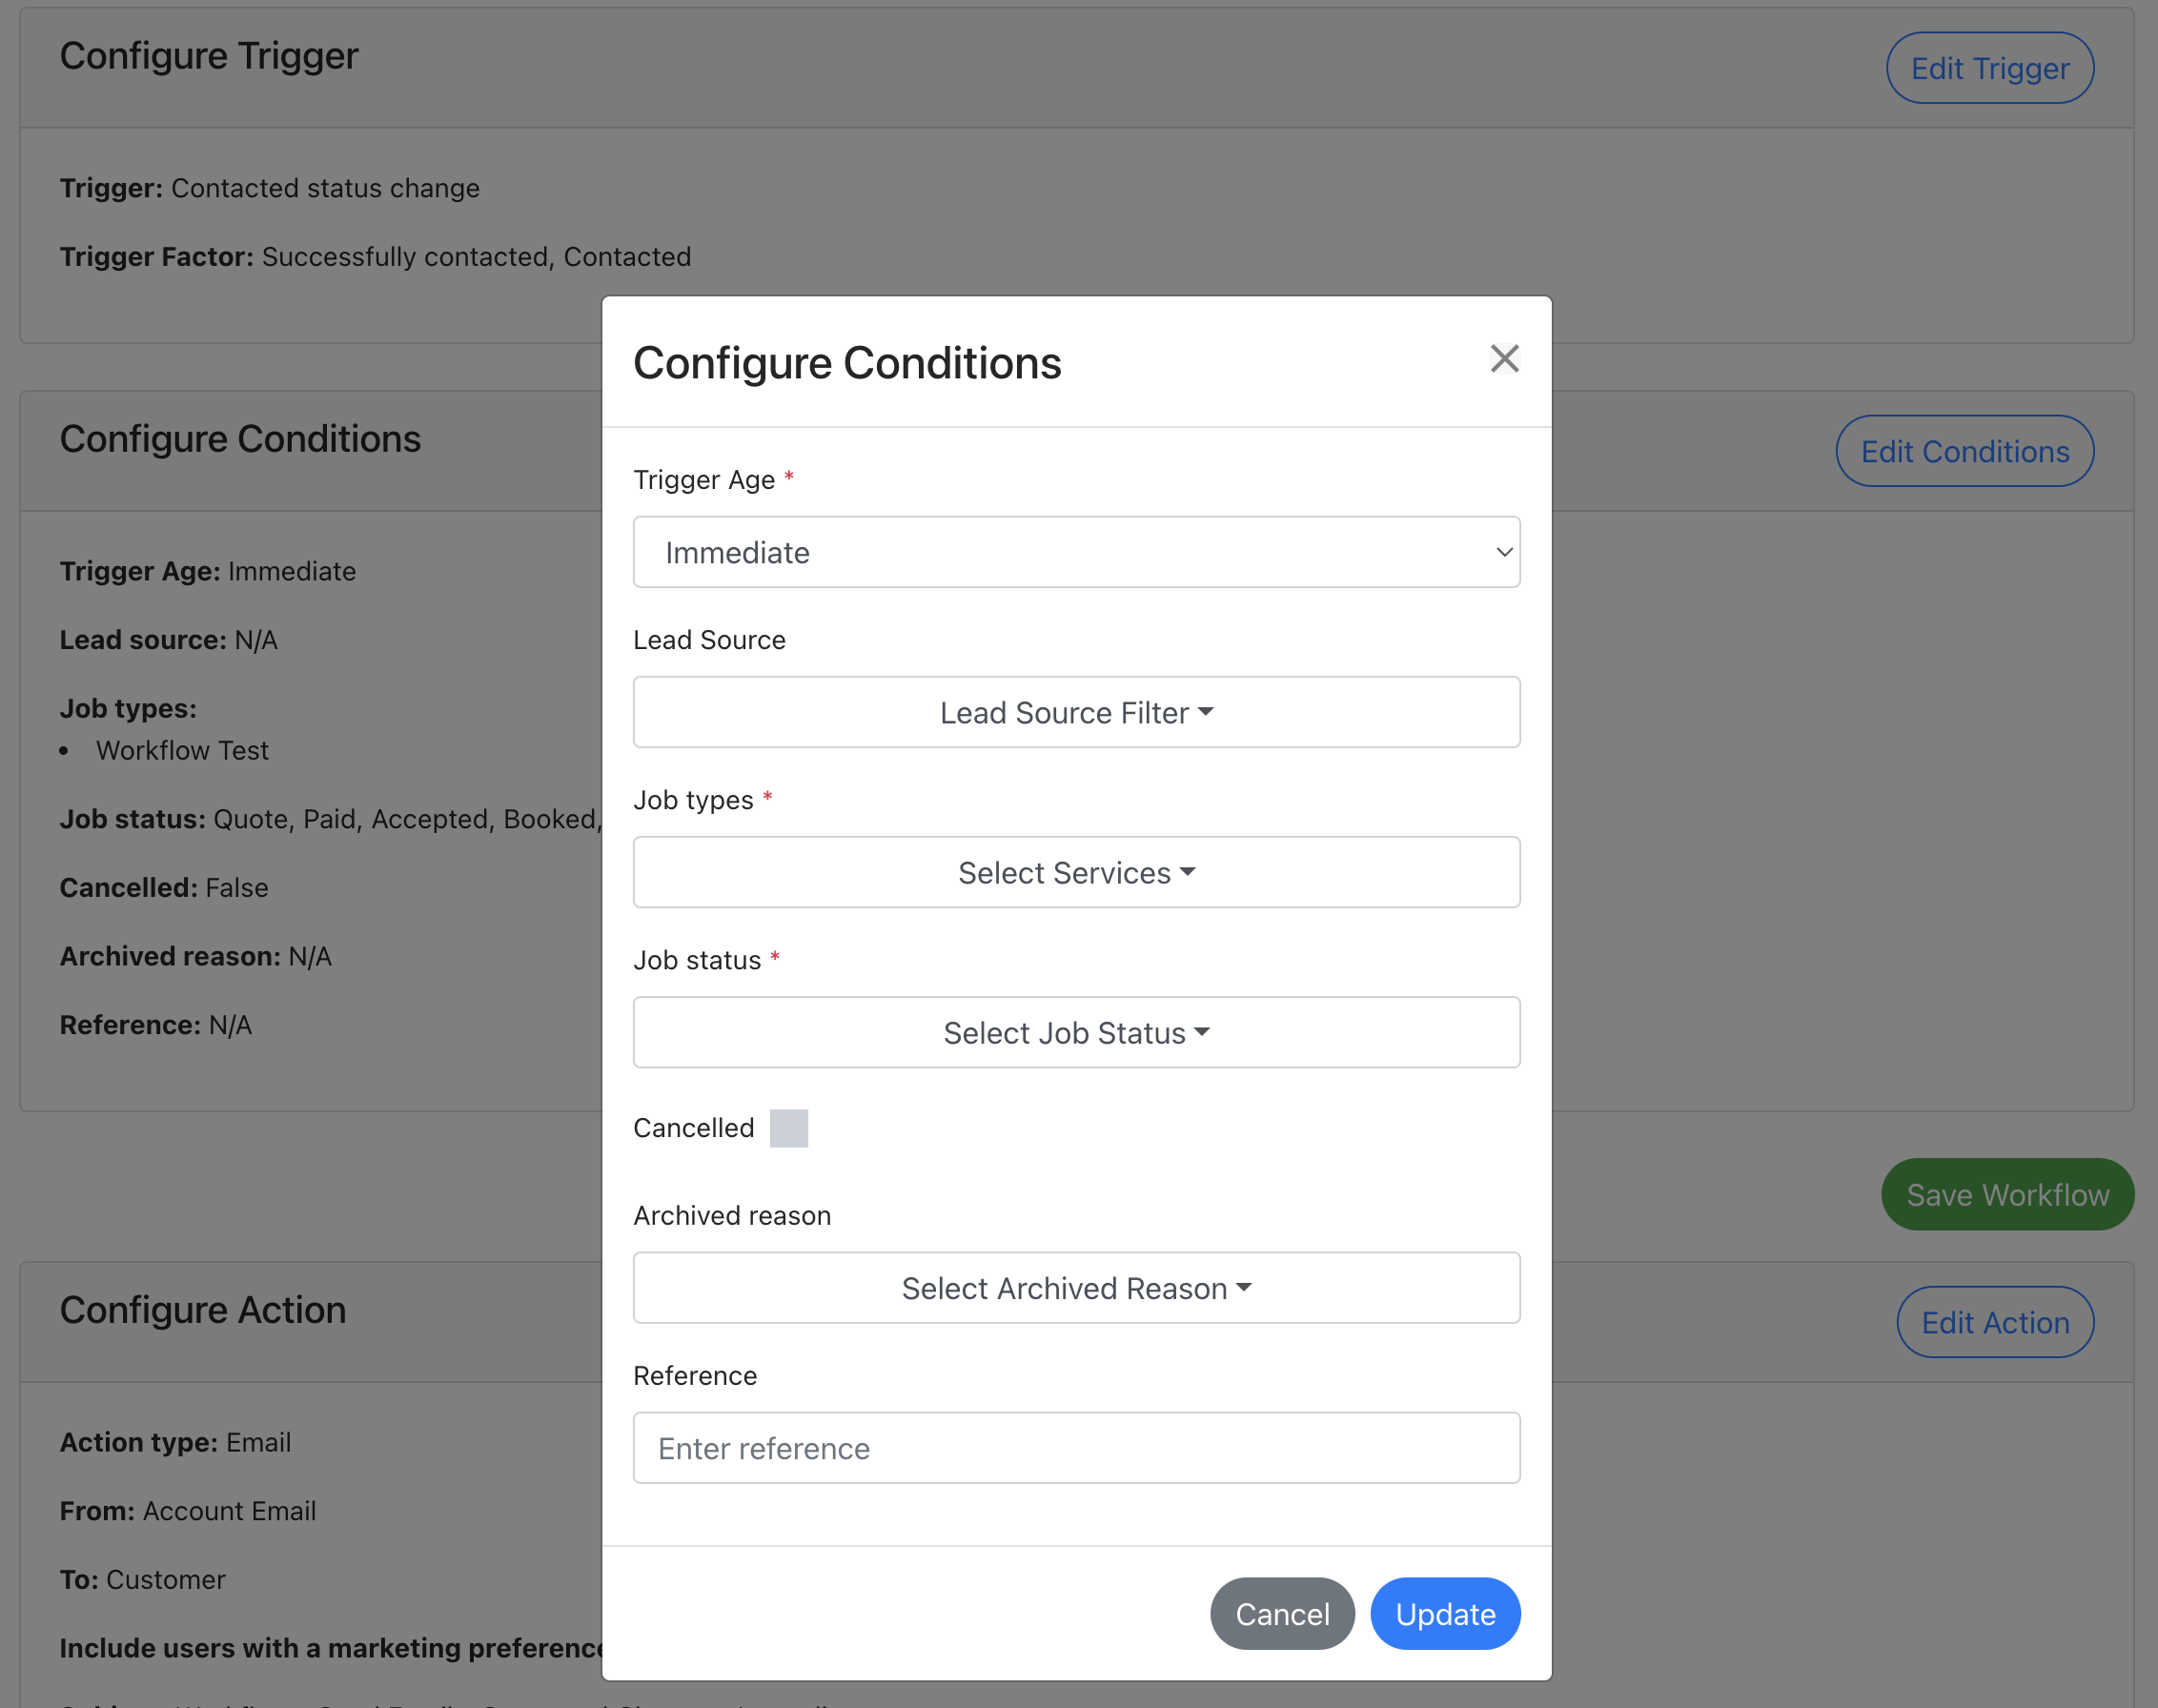
4. Configure Conditions
These conditions are important – they determine for which scenarios you want to run your automation. For example, you may want to trigger an email to be sent on a job record but only in certain circumstances. These conditions allow you to narrow down the records included and set up much more tailored automations. The conditions depend on the record type being used but some are common:
Common Conditions:
- Trigger Age:
- Immediate – the automation will run straight away
- Delay – choose how long after the workflow is triggered that it should run (e.g. set it to run in 2 hours). The workflow will only run in 2 hours IF the conditions on the record still match the ones set on this workflow and if the trigger type still matches (e.g. if the trigger is a status such as referrer “Active” then the workflow will check the record is still active when it goes to run).
- Minutes/Hours/Days – set how long after the trigger time that the action should run
- Date – set a fixed date for this workflow to run (useful for one-off workflows like a newsletter)
- Day of the month / Day of the week – good for recurring workflows like a monthly newsletter
- Inspection date / Report due date – set if the action should run X days before the date, on the date or X days after the date (useful for job reminders)
Survey / Project Conditions
- Lead source:
- Leave both dropdowns unselected to include all sources
- Include – use this to set the workflow to only run for selected sources
- Exclude – use this to set the workflow to run for all sources other than the ones selected
- Job types – the workflow only runs for the selected job types (Required)
- Job status – the workflow only runs for the selected job stages/statuses (Required) – only available if the trigger step isn’t a change in job status. If using a delay, the workflow will check the status of the job is the same as the trigger status when it runs.
- Only send if job is cancelled – only run the workflow if a job is cancelled (otherwise only includes active records)
- – set for which archived records, the workflow can still be run (if not selected, runs only for unarchived records)
- Reference – the workflow will run for any jobs that contain the text entered in the reference field (e.g. “ABC” is set, if the reference on a job record is TB-ABC-2025 this would run.
Referrer Conditions
- Referrer Group – includes all groups if no referrers are selected or choose specific referrers the workflow should be run for
- Referrer Level (Referrer Plus) – set which referrer levels the workflow should run for – select all, one, or a combination
- Industry – set if the workflow should only run if certain referrer industries are selected
- Status – select if the referrer must be a certain status for the workflow to continue
Important: Press Save Workflow before moving on to edit your Action. If editing and saving changes to your action before saving your workflow settings, the workflow settings will not be saved and will need to be re-entered
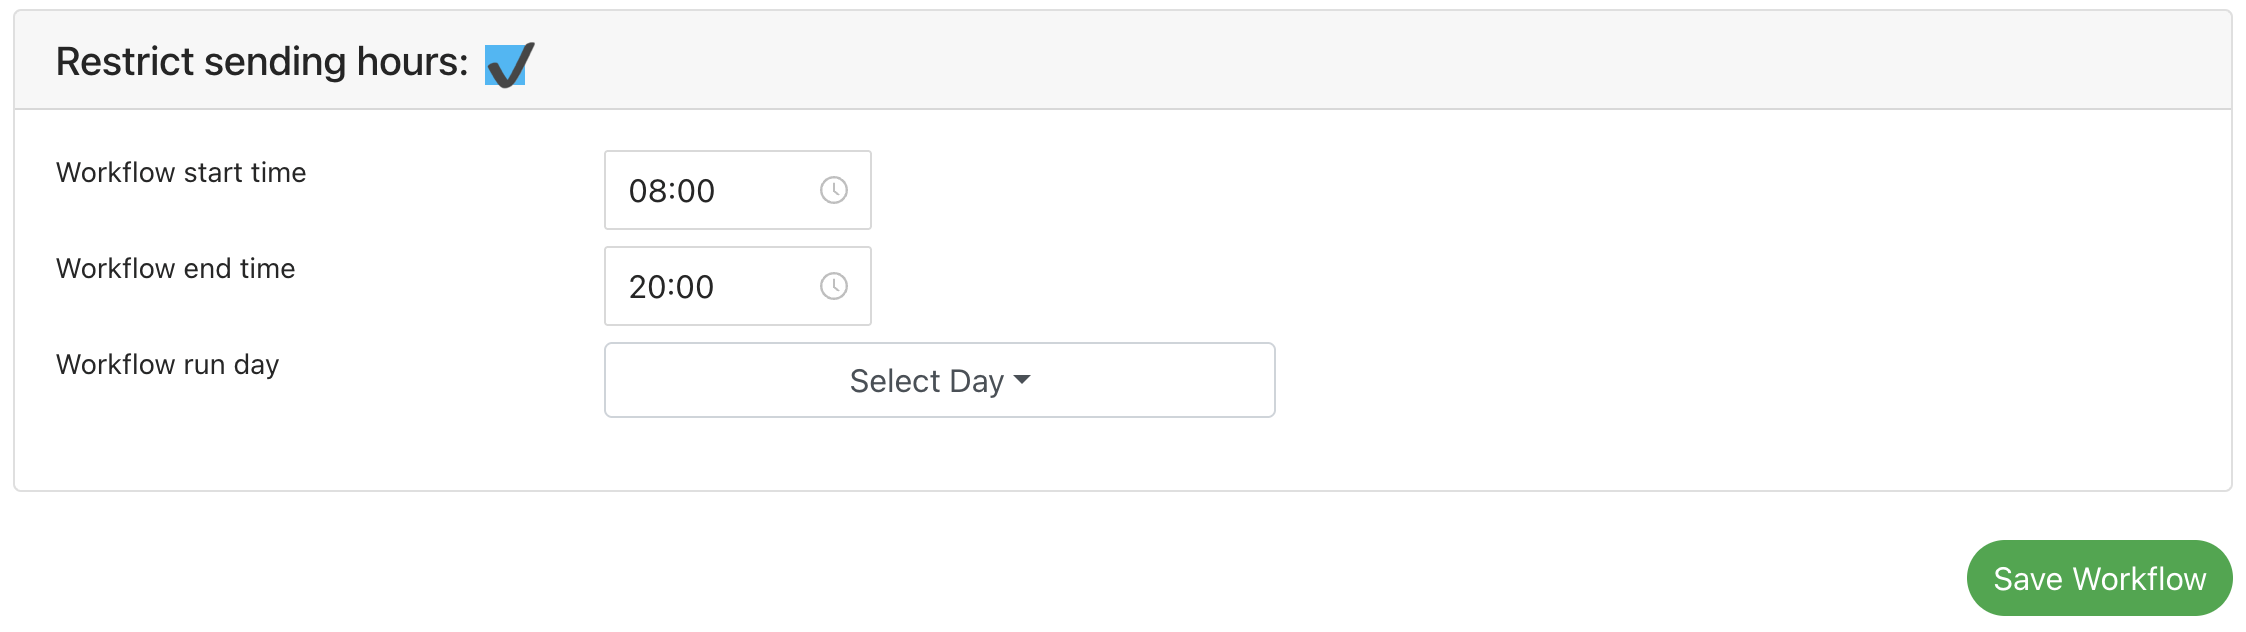
5. Restrict Sending Hours (Delay Condition Only)
When you have selected to run an automation on a delay, instead of immediately, you can set if the workflow should run on a restricted time or at any time.
A “Restrict sending hours” section will appear.
Unticked – the workflow till run 24/7 and process at the relevant time.
Ticked – you can set between which times and on which days of the week that your workflow should run (e.g. only send an email between 08:00 – 20:00, Monday to Friday).
How it works:
If you set the workflow to run 08:00 – 20:00, Monday to Friday and your record meets the Conditions at 22:45 on Thursday, the Workflow will hold and run at 08:00 on Friday. Records will still run but be held until your set hours allow.
Important: Press Save Workflow before moving on to edit your Action. If editing and saving changes to your action before saving your workflow settings, the workflow settings will not be saved and will need to be re-entered
6. Configure Action
There are 4 types of action you can take once you have records that match your trigger and conditions. How to set each one up is listed below.
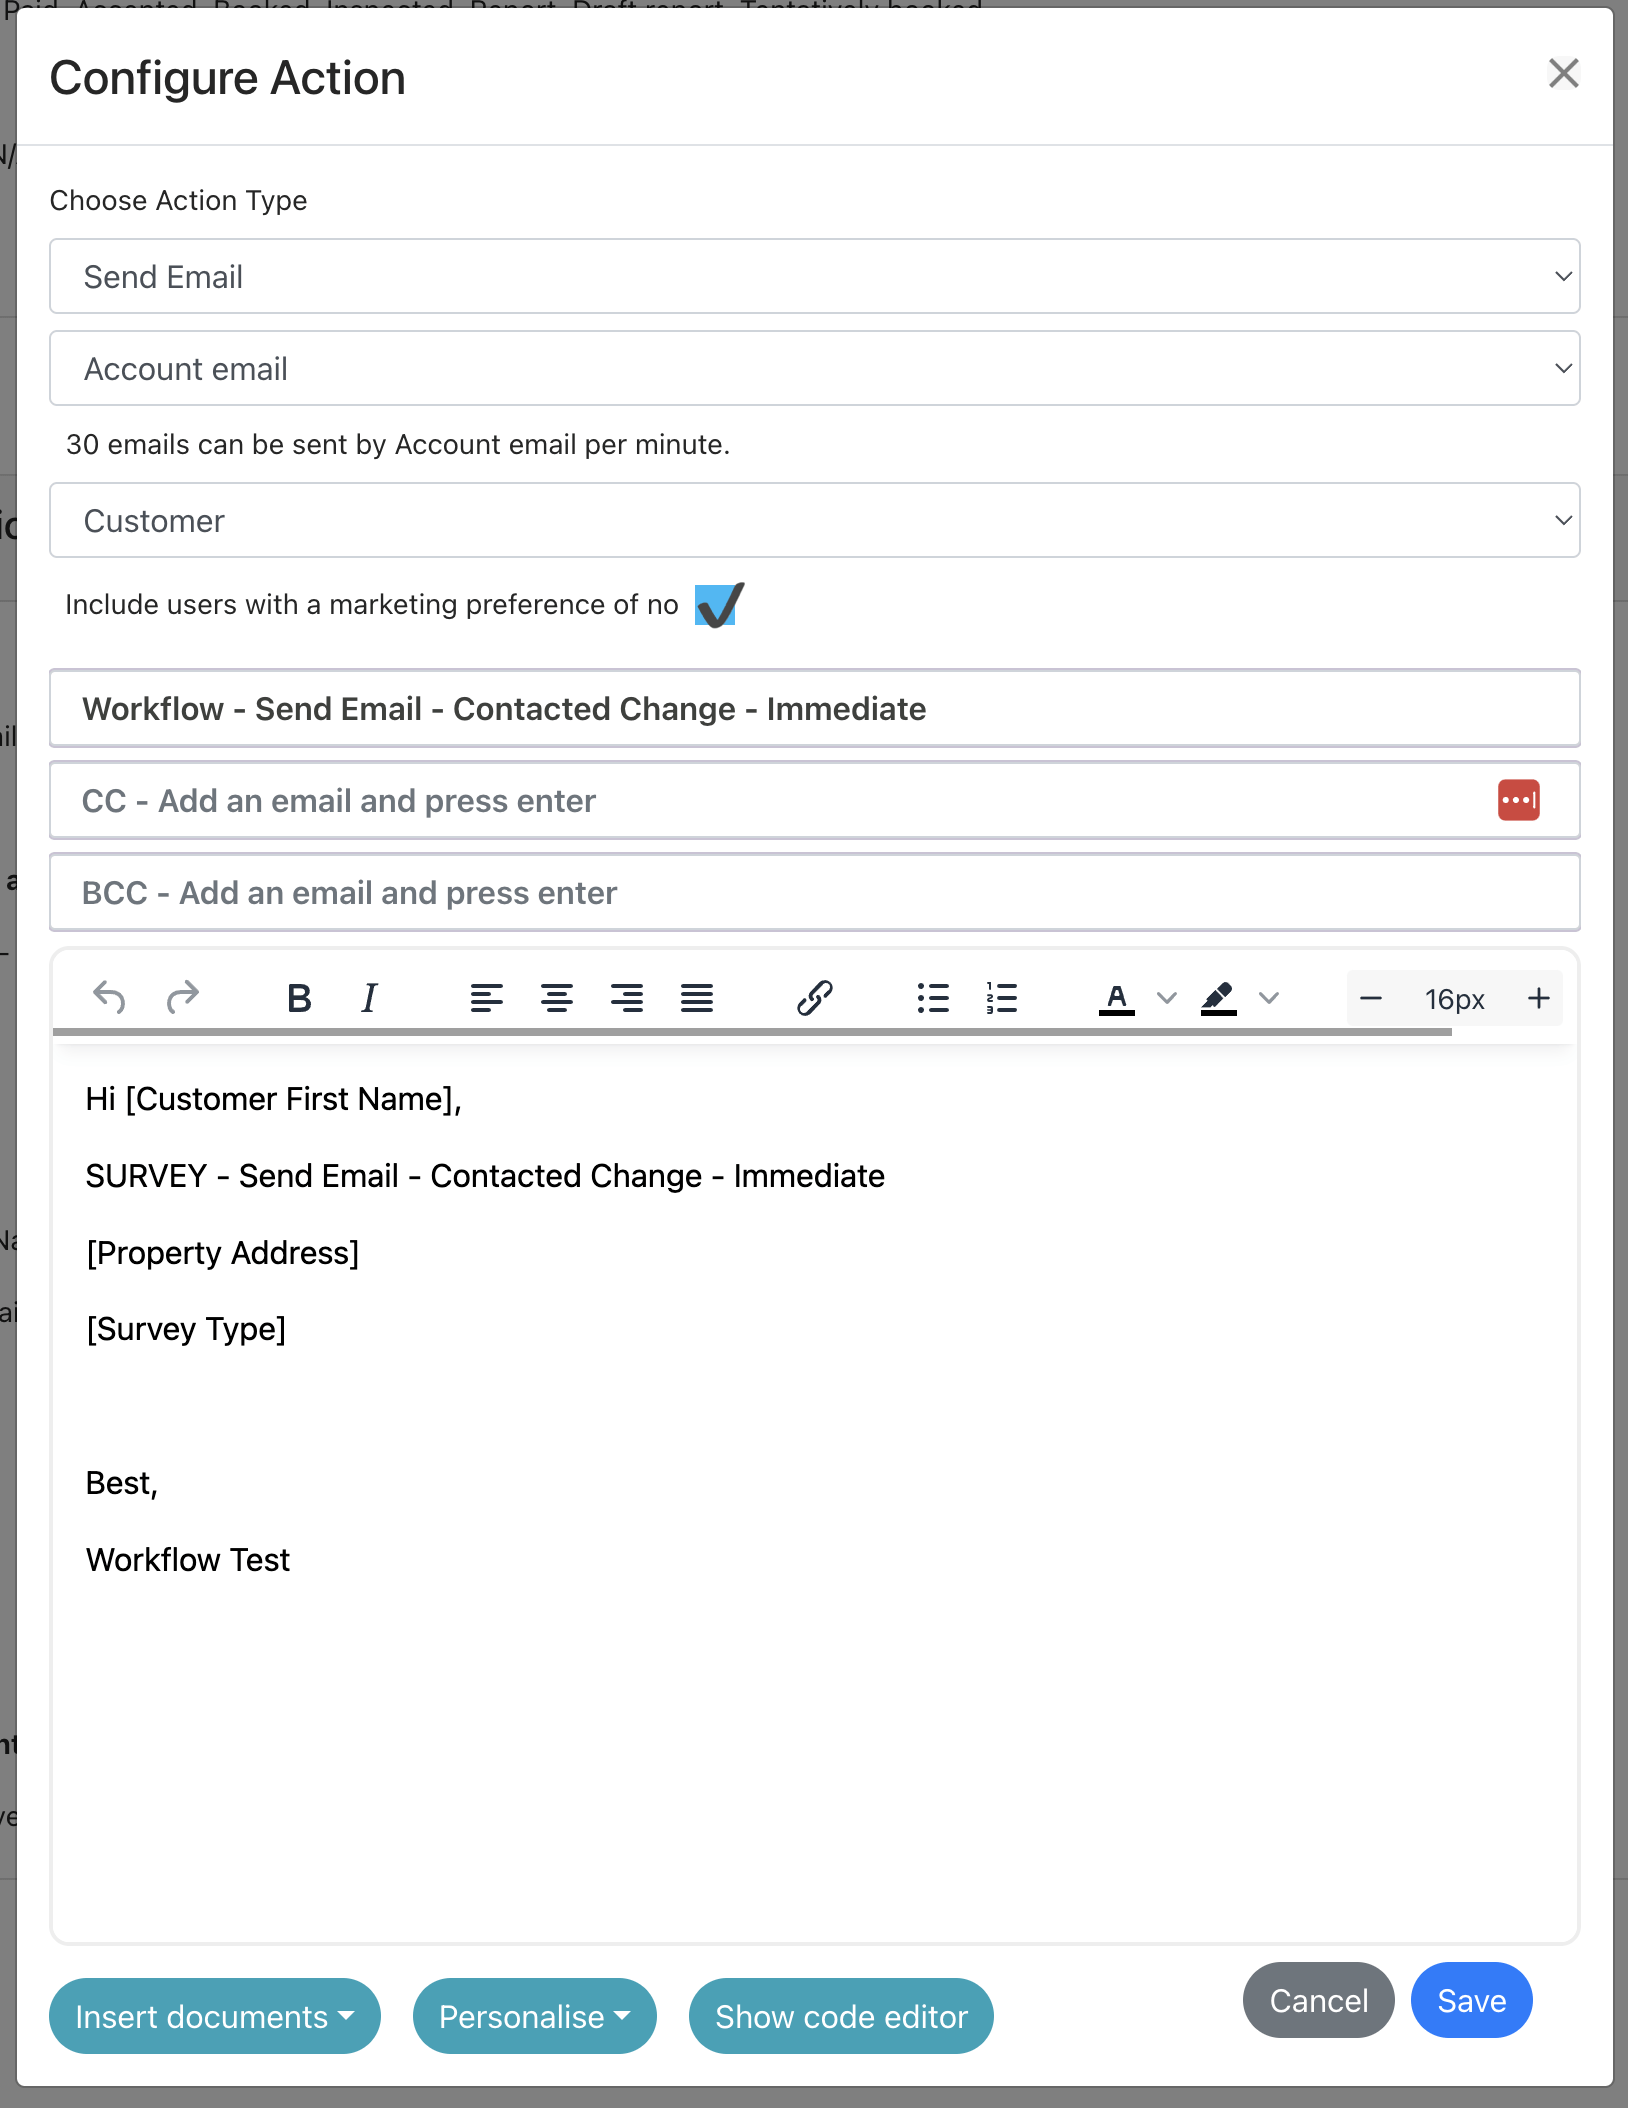
Option 1: Send Email
Set your “From email”
- Account email – the central account email connected in your settings
- Assigned user email – the assigned user’s connected email (uses the account email if not set)
- SendGrid – recommended route when you are sending emails in bulk due to rate limiting rules
Note: due to rate-limiting rules, use SendGrid if you expect more than 30 emails to be sent on a workflow (and generally via other means) within 1 minute. SendGrid can handle much higher volumes and can be connected in the Integration settings.
Send to email: choose from:
- Customer – this will send the email to the customer listed on the job (Survey or Project only)
- Access – this will send the email to the access contact listed on the record (if one has been set, Survey or Project only)
- Referrer – this will send the email to the referrer listed on the job (Survey, Project and Referrer)
- Assigned user – this will send the email to the user assigned to the job (Survey or Project only)
- Account manager – this will send to the account manager assigned to a referrer (Referrer only)
- Other – this allows you to set a fixed email address to send the email to (Survey, Project and Referrer)
- CC/BBC
- Surveys
- Set if the assigned user (to the job) or account manager (or the associated referral partner) should be copied in
- Referrers
- Set if the account manager should be copied in
- Surveys
Include users with a marketing preference of no
This setting is important for GDPR reasons. If the email is transactional, you can send emails to a customer or referrer regardless of their marketing preference. However, if it is a marketing email, you’ll need to ensure you only send emails to users who haven’t opted out of marketing.
- If the email should only send to customers opted in to marketing – leave the box unticked
- If the email can send to any user regardless of marketing preference – tick the box
Setting up your email template is the same as editing your regular email templates. You can add standard documents, use shortcodes to personalise the content and use HTML code to style your emails. Note – only one cc and one bcc address can be added.
Once edited, press “Save”
Then press “Save Action”
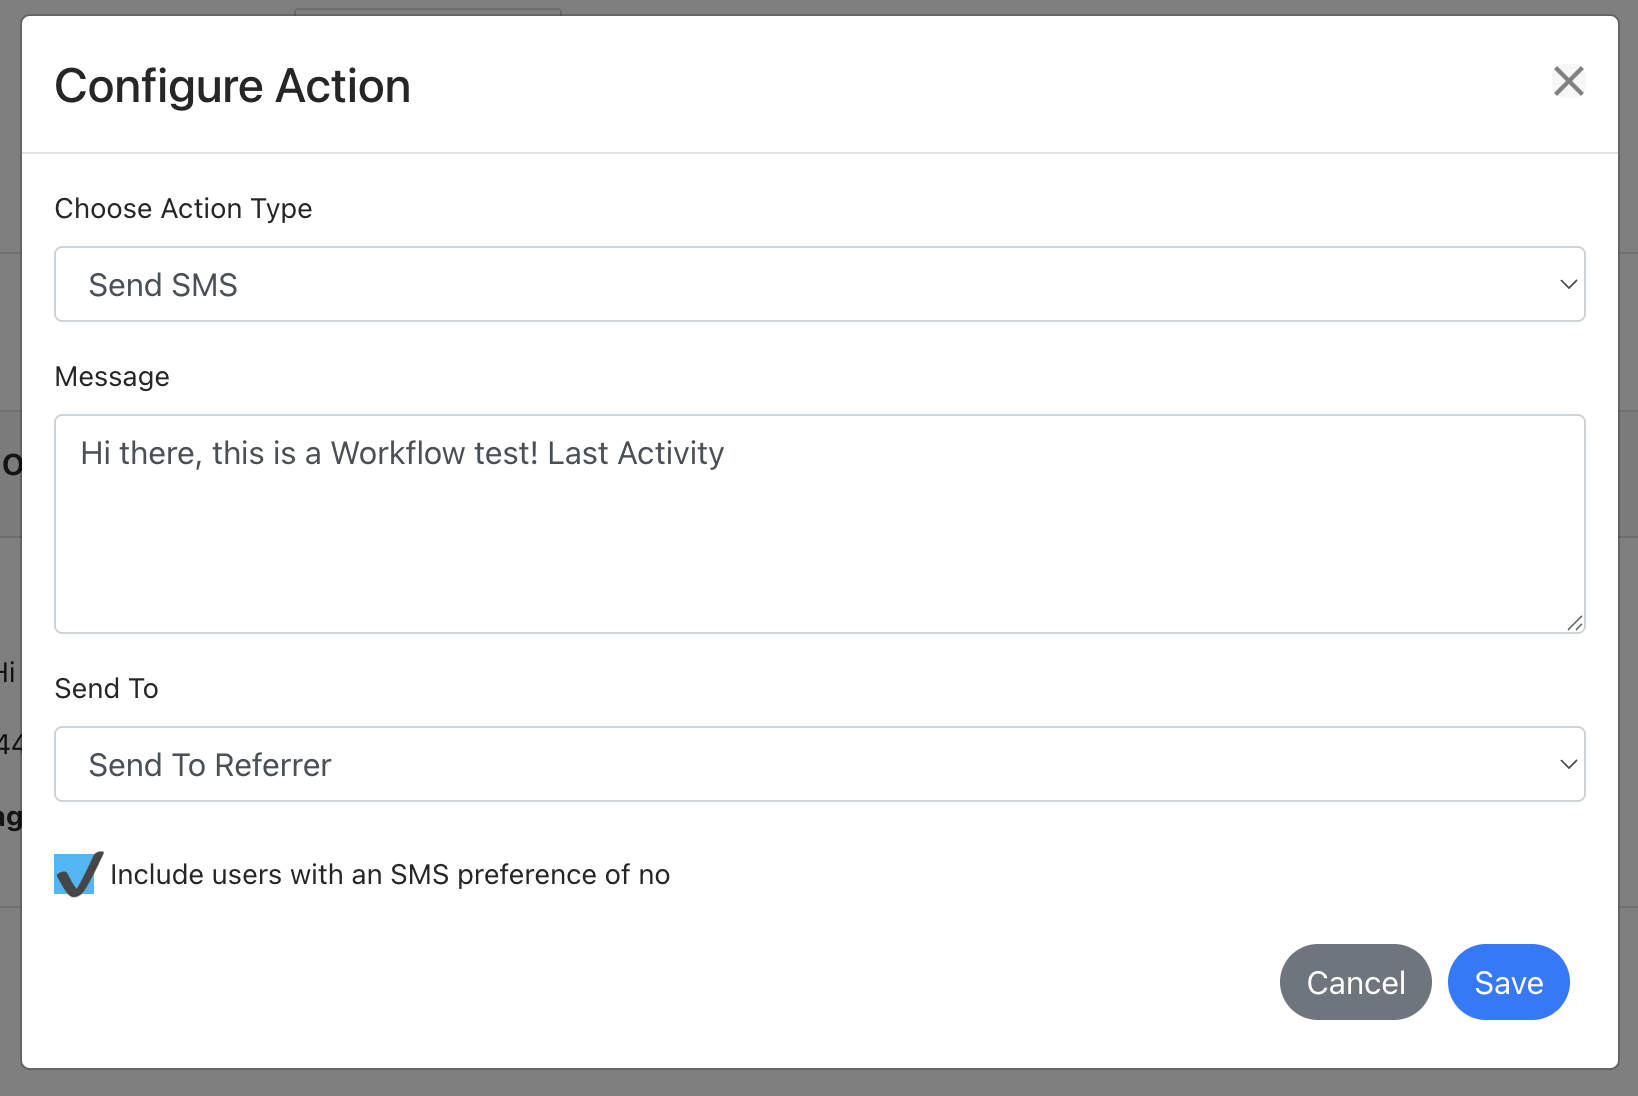
Option 2: Send SMS
Message text – enter the text that you want to include in the SMS. You can include shortcodes that are relevant to the workflow (e.g. customer name shortcodes on a survey workflow. However, a customer name or job type shortcode won’t work in an SMS for a referrer record as there are no job details to look up.
Save in Message System – this will save the message sent in the message system to be viewed. Note: this shouldn’t be set if you don’t want the customer to be able to view it.
Send to:
- Customer – this will send the SMS to the customer listed on the job (Survey or Project only)
- Access – this will send the SMS to the access contact listed on the record (if one has been set, Survey or Project only)
- Referrer – this will send the SMS to the referrer listed on the job (Survey, Project and Referrer)
- Assigned user – this will send the SMS to the user assigned to the job (Survey or Project only)
- Account manager – this will send to the account manager assigned to a referrer (Referrer only)
- Other – this allows you to set a fixed number to send the SMS to – enter as 447123123123 (Survey, Project and Referrer)
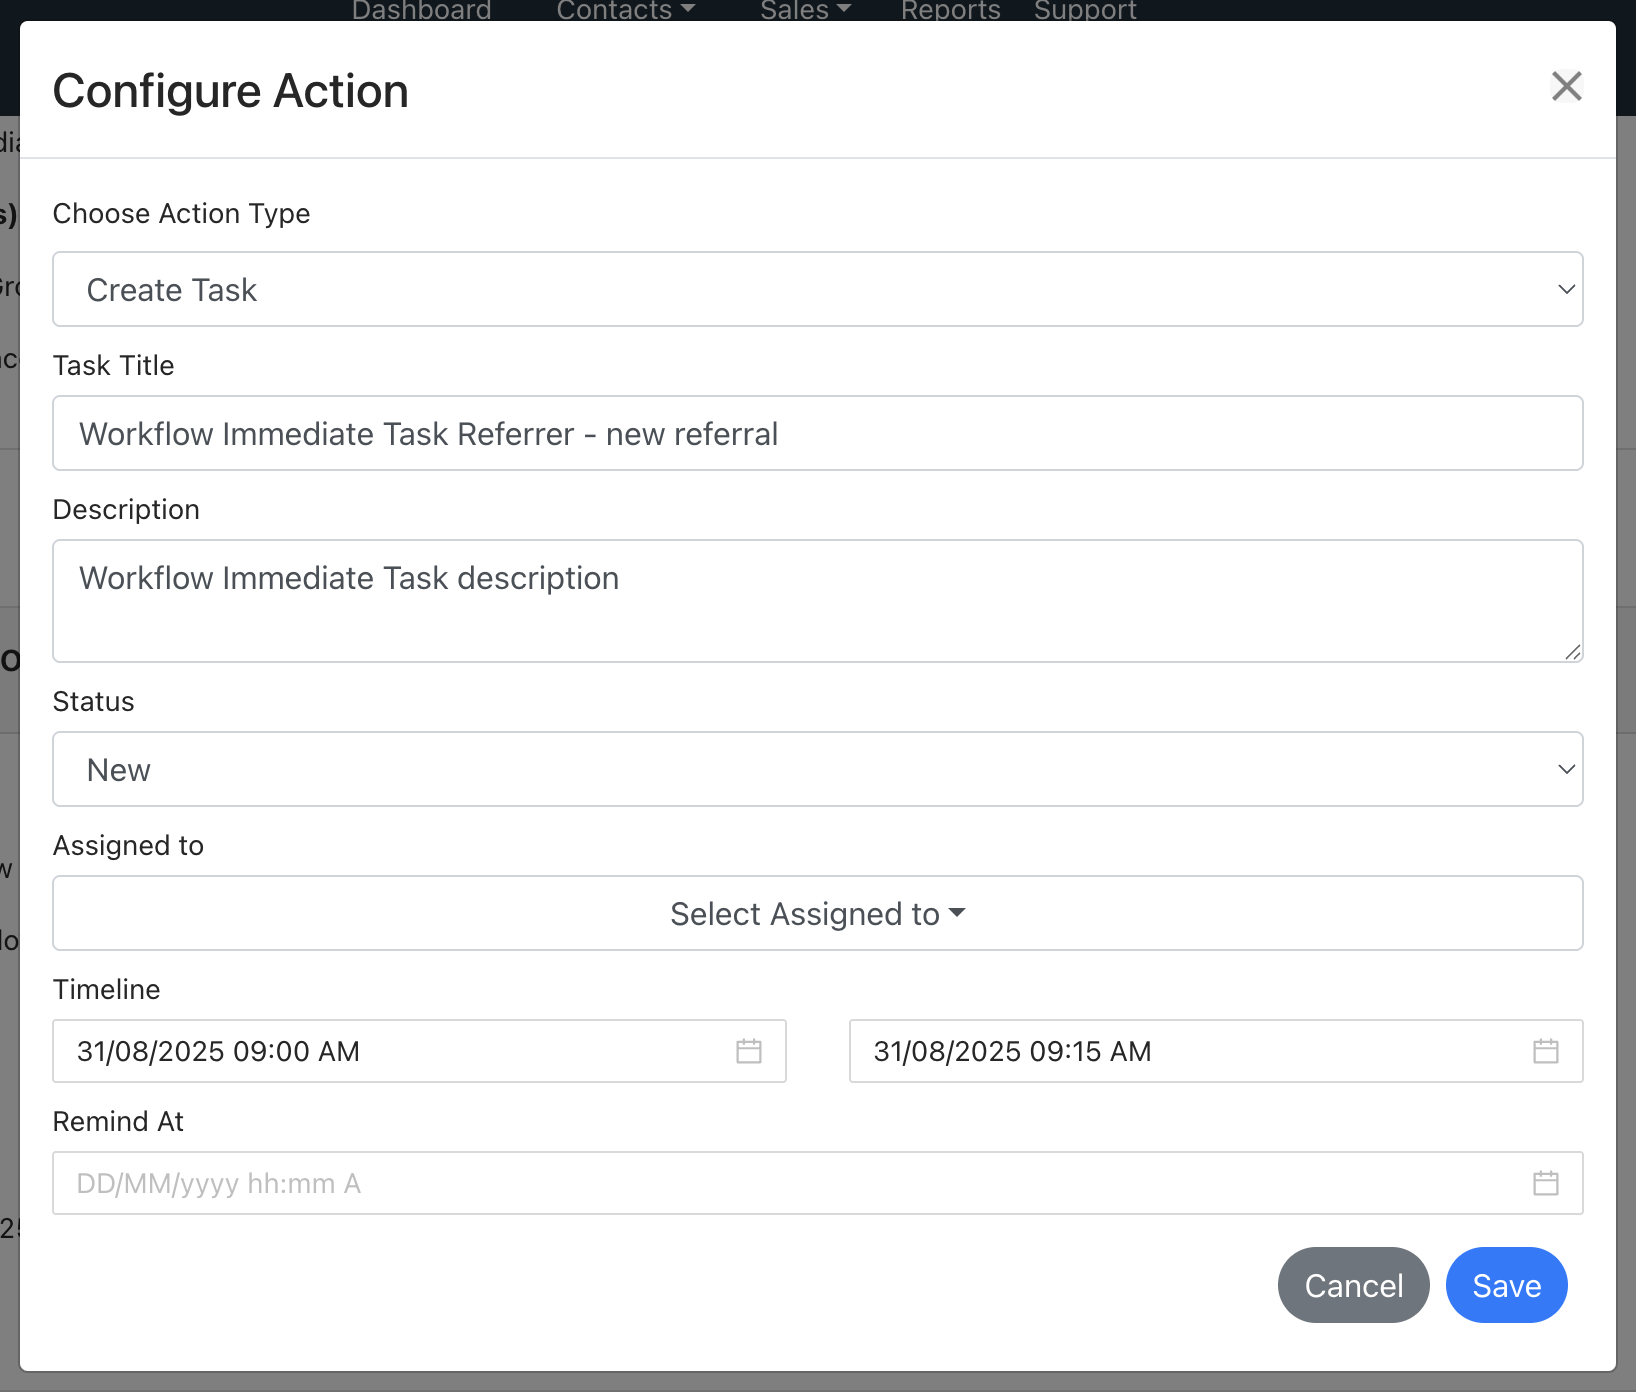
Option 3: Create Task
Task Title: Set the title of the task so users know what you want them to do for this task
Task Description: This can provide further details about the task requirements
Status: Choose the standard status (usually set as “New” ahead of the user starting it)
Assigned to:
- Choose a fixed user
- Choose Assigned user to set the task for the assigned user on a survey/project
- Choose Account manager to set the task for a referral partner account manager
Timeline:
- Set the number of hours or days from the task creation time that the date should be set
- Set the task length
- Set a number of days after the task start date the reminder should be
- Set no value for no reminder
- Set “0” for the reminder to be the task date
- Set “1”, “2”, etc for the number of days after the task date to have a reminder
Remind at: the same settings as above
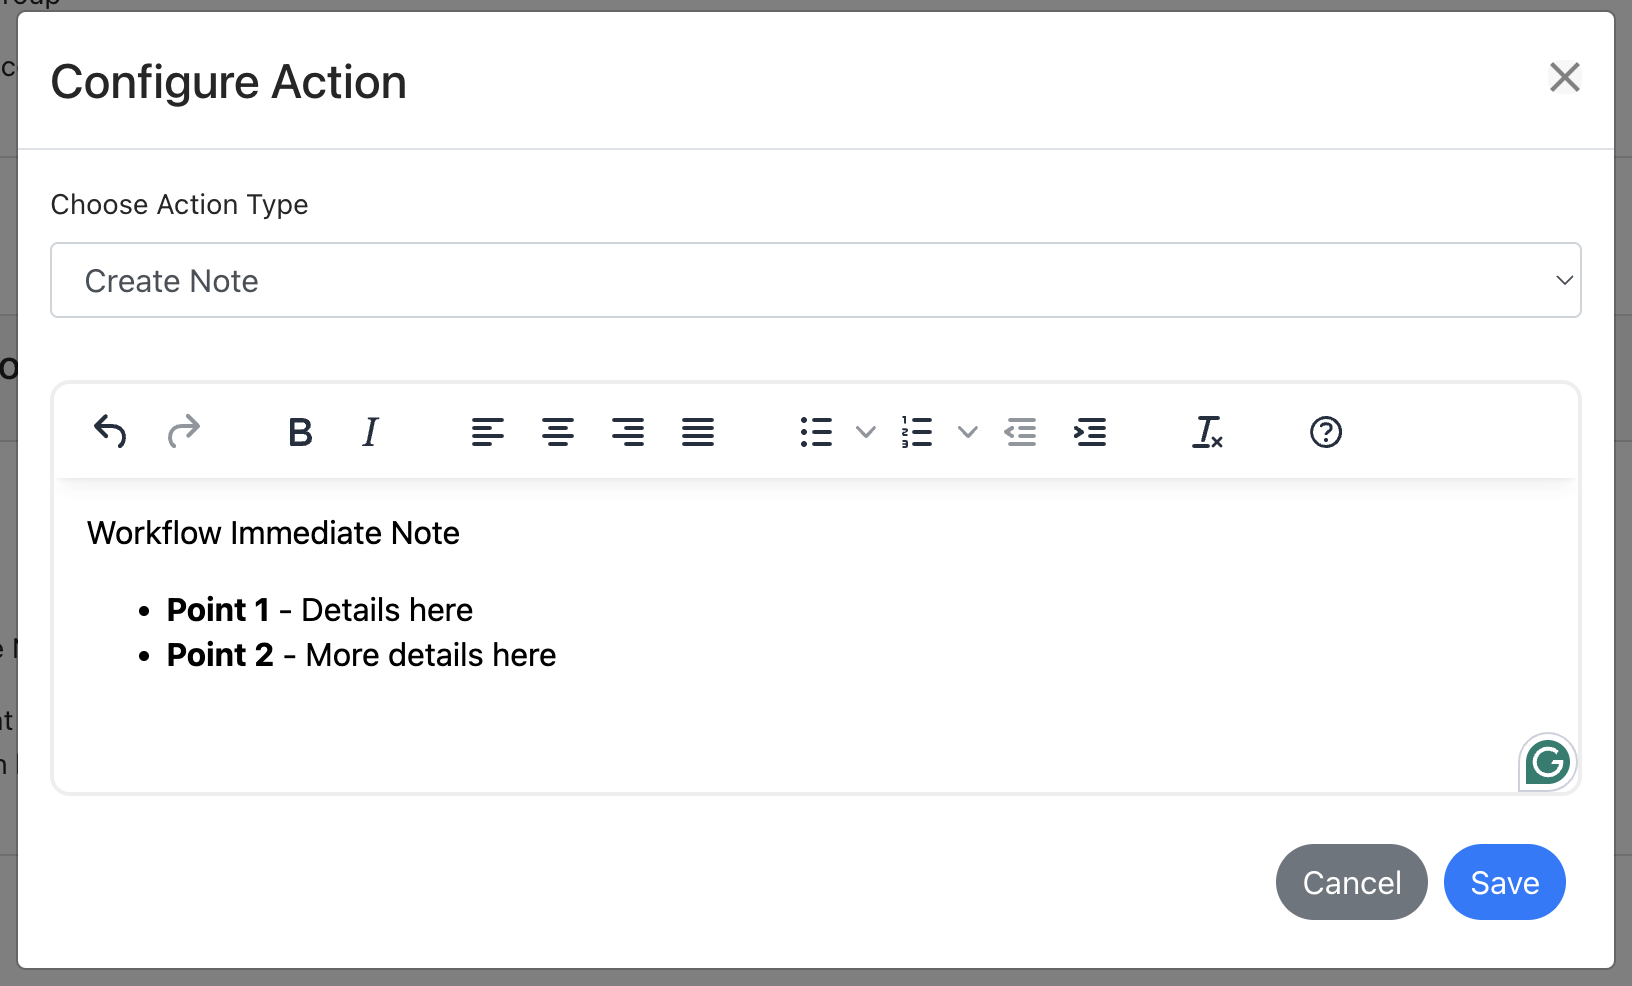
Option 4: Create Note
Write the note that you want to add to a record. You can format the note as you would normally on a record.
Tagging users:
After typing in the @ symbol, you can:
- Tag a fixed user each time
- Tag the ‘Assigned user’
- Tag the ‘Account manager’
Billing
Billing – how am I charged?
Each plan has a free allowance of automations you can run. After this, you can pay per automation used over your allowance or pay for a workflow allowance, which is cheaper per workflow automation run.
Workflow Free
Workflow 500
Effective £/Action: £0.015000
Overage £/Action: £0.0180
Workflow 1K
Effective £/Action: £0.013500
Overage £/Action: £0.0160
Workflow 2K
Effective £/Action: £0.011500
Overage £/Action: £0.0140
Workflow 5K
Effective £/Action: £0.010000
Overage £/Action: £0.0120
Workflow 10K
Effective £/Action: £0.008800
Overage £/Action: £0.0100
Workflow 15K
Effective £/Action: £0.008000
Overage £/Action: £0.0095
Workflow 20K
Effective £/Action: £0.007500
Overage £/Action: £0.0090
Workflow 25K
Effective £/Action: £0.007100
Overage £/Action: £0.0088
Workflow 30K
Effective £/Action: £0.006800
Overage £/Action: £0.0086
Workflow 35K
Effective £/Action: £0.006400
Overage £/Action: £0.0084
Workflow 40K
Effective £/Action: £0.006100
Overage £/Action: £0.0082
Workflow 45K
Effective £/Action: £0.005800
Overage £/Action: £0.0080
Workflow 50K
Effective £/Action: £0.005400
Overage £/Action: £0.0078
Workflow 50K+
FAQs
Billing – how am I charged?
Each plan has a free allowance of automations you can run. Each time a workflow runs and sends an email or SMS or creates a task or note, this adds to your automation usage. E.g. I have two workflows that run 10 times each – this would be 20 automations.
How do I manage automated deletion or records/data?
Please see our other guide on Workflows – Data management!
My workflow didn’t run
Please check that your record meets all your conditions and the trigger value. For example, if you set your workflow on a Delay, when the delay time is met, the workflow will only run if the trigger is still in the same status. For example, you set an email to send after a 2-hour delay, on a “Quote” trigger. If the job has moved to another status when the delay time is met as is no longer at your selected trigger stage of “Quote”, the workflow will not run. If it is still at “Quote” stage, the workflow will run.
After activating a workflow, which records will be included?
After activating a workflow, the workflow will only run for records where the trigger was met after the workflow was activated. E.g. if you have a record that met the trigger value before the workflow was turned on, it will not be included, even if it meets the conditions for a “Delay” workflow later on. The record must hit the trigger after a workflow is turned on.
If you make a workflow Inactive and then Active again, any historic records that met the trigger before being turned off will not be included. The workflow will reset and only include records that meet the trigger value since it was made active again.
What type of processes can I automate with Workflows?
There are a lot of processes that you can automate with workflows, and we completely understand you might not know where to start. We’ve shared a list of ideas below that could provide some inspiration for the type of workflows you could set up.
Sales conversion
Lead nurture – when a new record is created at the ‘Quote’ stage, you can set up your own custom email or SMS content to be sent out based on the job type, lead source and more.
High converting sources – you could set up a task for team members on leads that come in from higher converting sources to ensure they focus on these records first
Contacted status – you can create your own contacted statuses in your Quoting Preferences settings. When setting different ‘contacted’ statuses you can set a task for the next follow-up attempt and/or a message to your customer. For example, a ‘contacted’ status of “Unsuccessful – Attempt 1” creates a task for 3 hours time to remind you to try again. When setting a contacted status of “Unsuccessful – Attempt 2” this could trigger an SMS to the customer saying you’ve tried to contact them to discuss their survey needs and how to get in touch.
Update a job status late at night without alerting customers until working hours – with our standard automated emails, they are triggered and sent as the job is updated in real-time. Using the workflows feature, you can set a delay on the workflow email so it only runs on certain days of the week between certain times (e.g. working hours). This allows you to upload a report late at night or very early in the morning, with the email only processing once the job reaches your set sending hours on the workflow so it is sent at a more professional-looking time and looks less automated. This could also be set for new quote emails, lead nurture and more.
Compliance
As the job moves to booked, you could create a task for the assigned surveyor/user to complete the desktop research or to complete their own conflict checks.
Admin
When a booking moves to “Tentatively Booked” you can set a task to automatically created with a delay (e.g. for 2 days time), if the job is still at the tentatively booked stage to remind you to contact the access contact again. If the job is no longer at the tentative stage, the task won’t be created helping you to only follow-up on the records that need it.
You could also create an email to be sent to the Access Contact to remind them to get in touch about confirming the access.
Customer support
Report follow-up – instead of using our 7-day follow up template, you can create an email to send to the customer X days after their report is uploaded to see if they need anything or request a review.
Valuation extension – create a task in X-days time or an email to send in Y-days time to follow up and see if the customer needs a desktop extension on their valuation (E.g. a Help to Buy valuation).
Moving tips – you could set up various emails to be sent to the customer at various date ranges after the report due date to share useful tips and tricks for maintaining their property once moved in (if a condition survey) or other useful information for other job types. This helps you stay in touch to remind your customer to recommend you to others or use you again if needed.
Engagement
Lapsed partners – set up a task for your team member to contact a partner X days after their last referral, or if they moved to the Lapsed status create a task to see if you can help encourage more referrals. Alternatively, you could set an email to be sent to touch base with your partner automatically.
Last activity – set up a task to create for your team member if it becomes too long since an activity was last carried out on a referrer record.
New live partners – once a new partner is set to Live, set an email to automatically be sent to your new referrer with details on their referral links, login and how to refer. Every touch point can be used to engage partners further and support their journey with you.