

Workflow - Event Automation Example: Lead Nurture
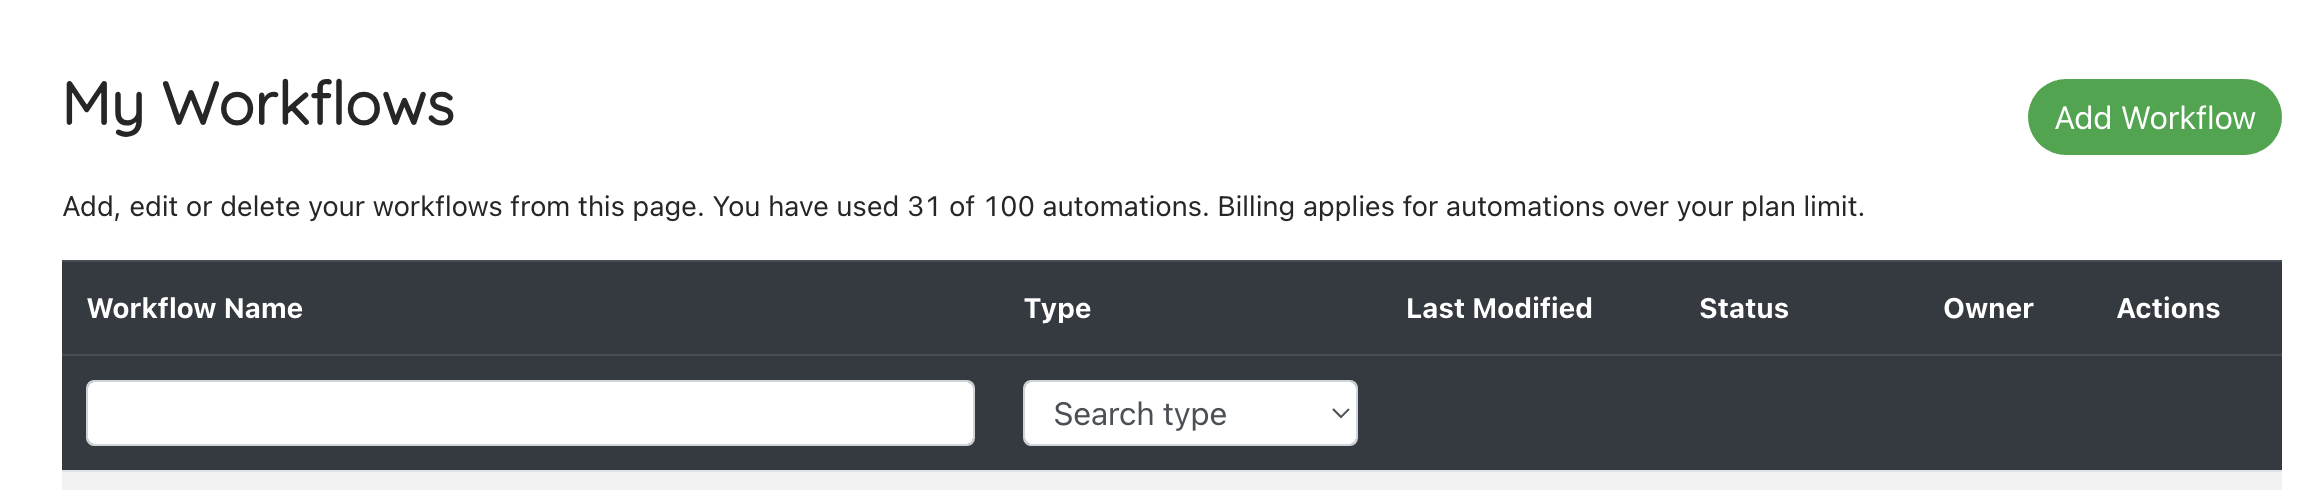
1. Click "Add Workflow"
Click “Add workflow”
Enter the name of the workflow so you can identify it later. E.g. “My lead nurture email flow”
Select the type of task to run (Email, SMS, Task Note) – “Send email”
Press “Add Workflow”
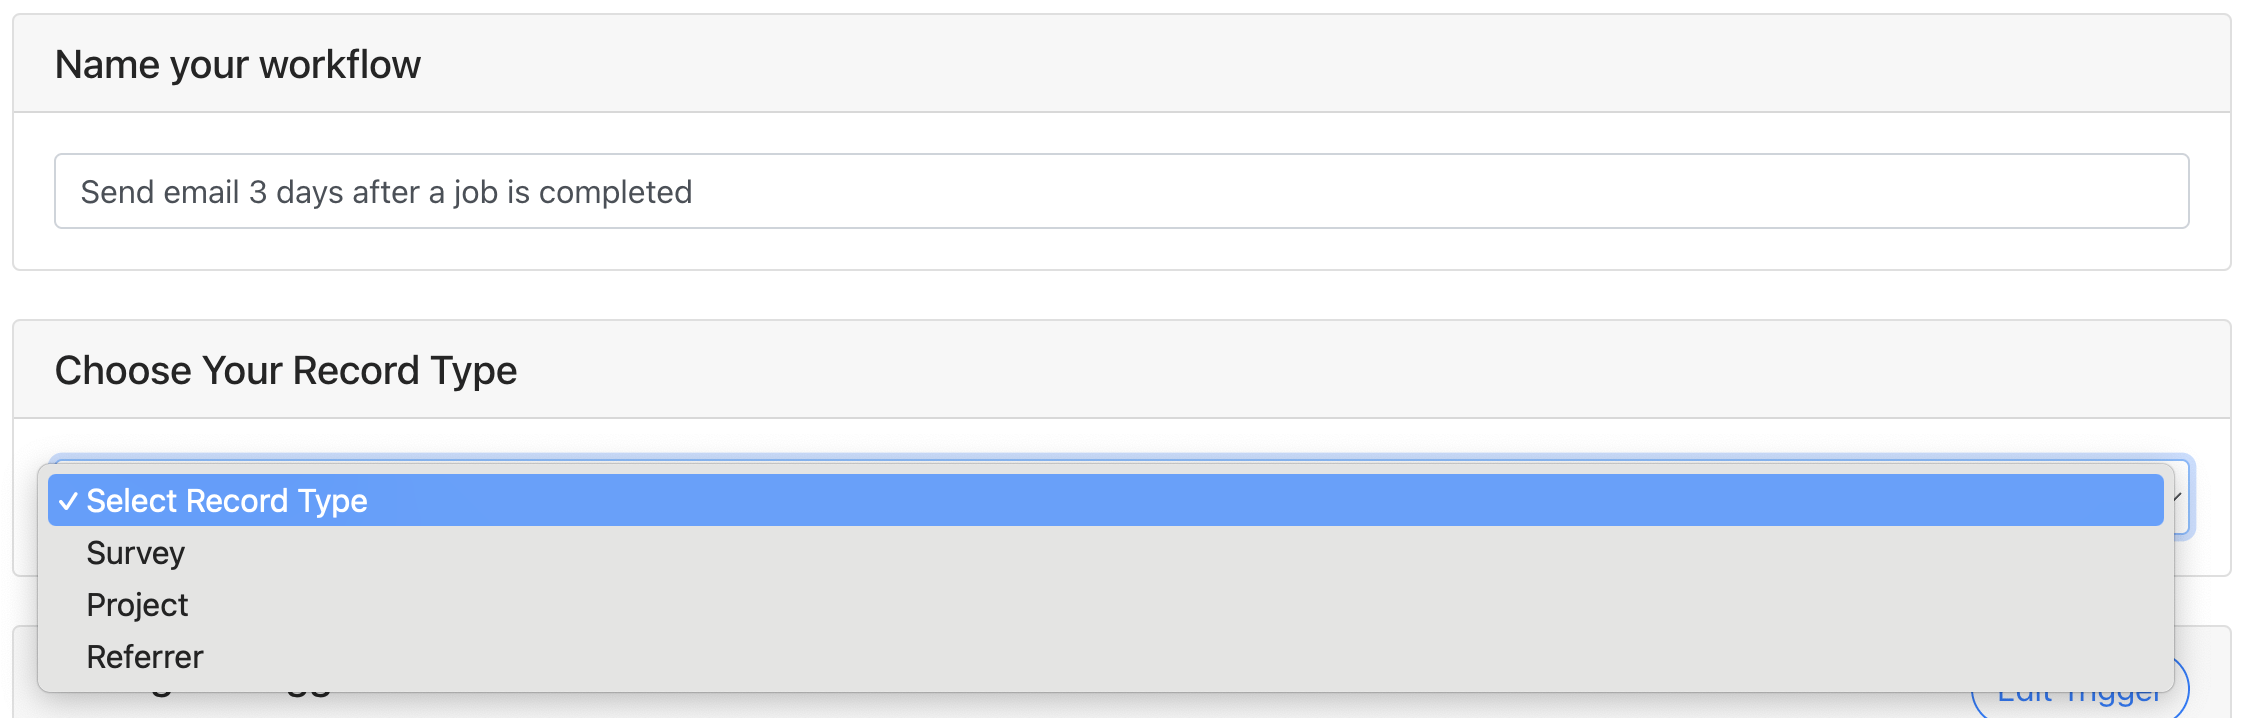
2. Choose The Record Type
Select “Survey” from the dropdown list.
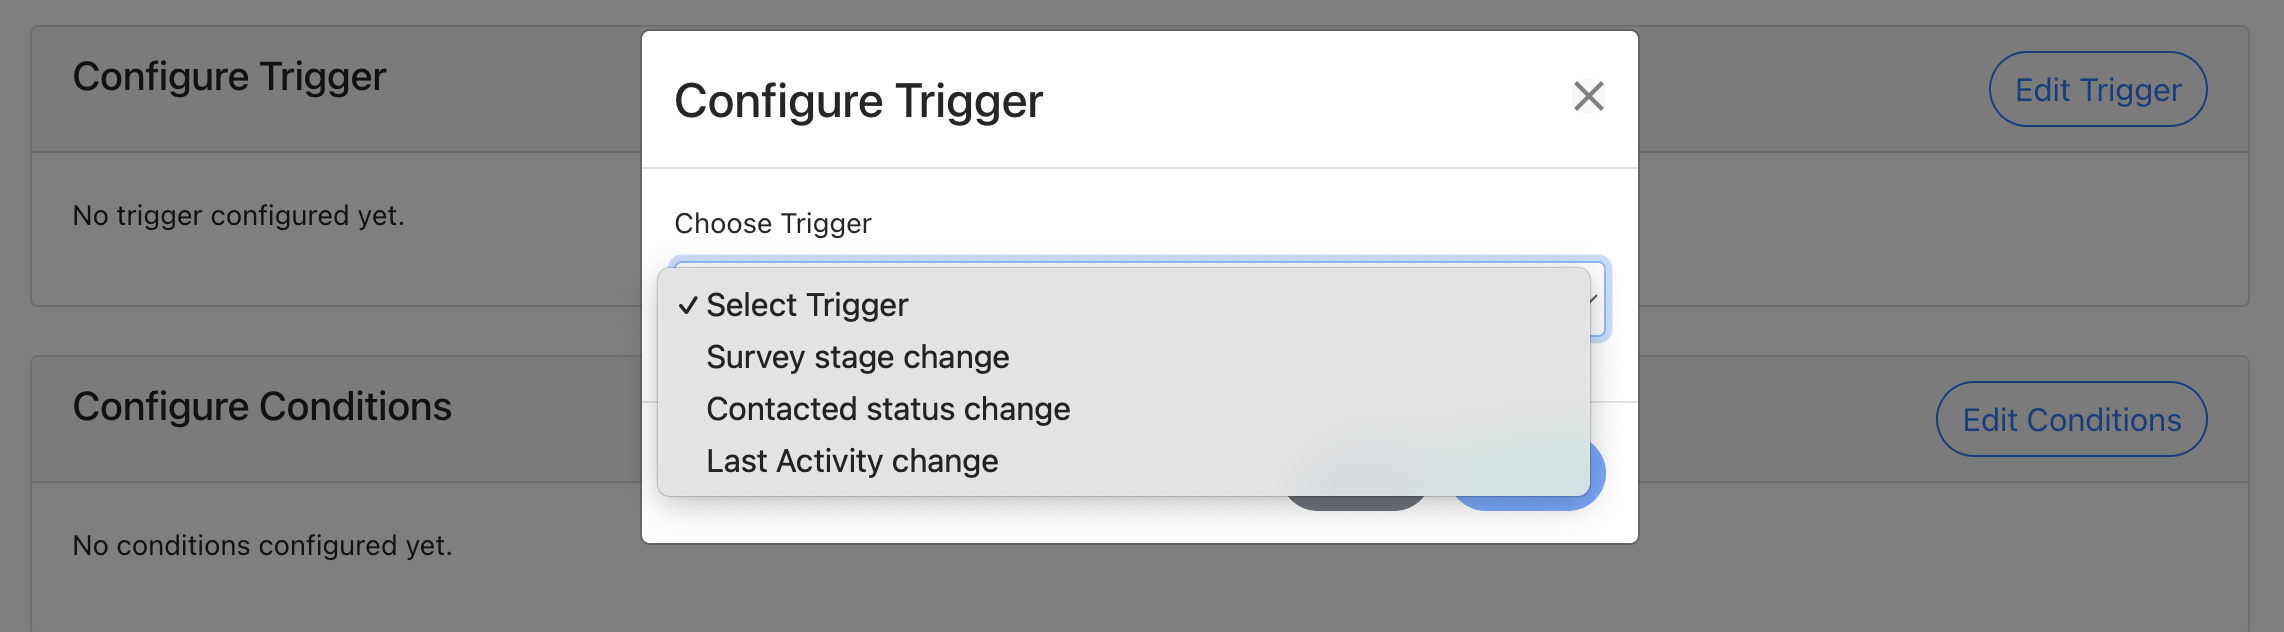
3. Configure Trigger
The trigger is the change in status for that record that should cause the workflow automation to run. These vary by record type. To create a lead nurture flow you can select:
- Survey stage change
- Then “Quote” as the stage you want the flow to trigger for (i.e. a new record is created, this triggers this workflow to run at your chosen time)
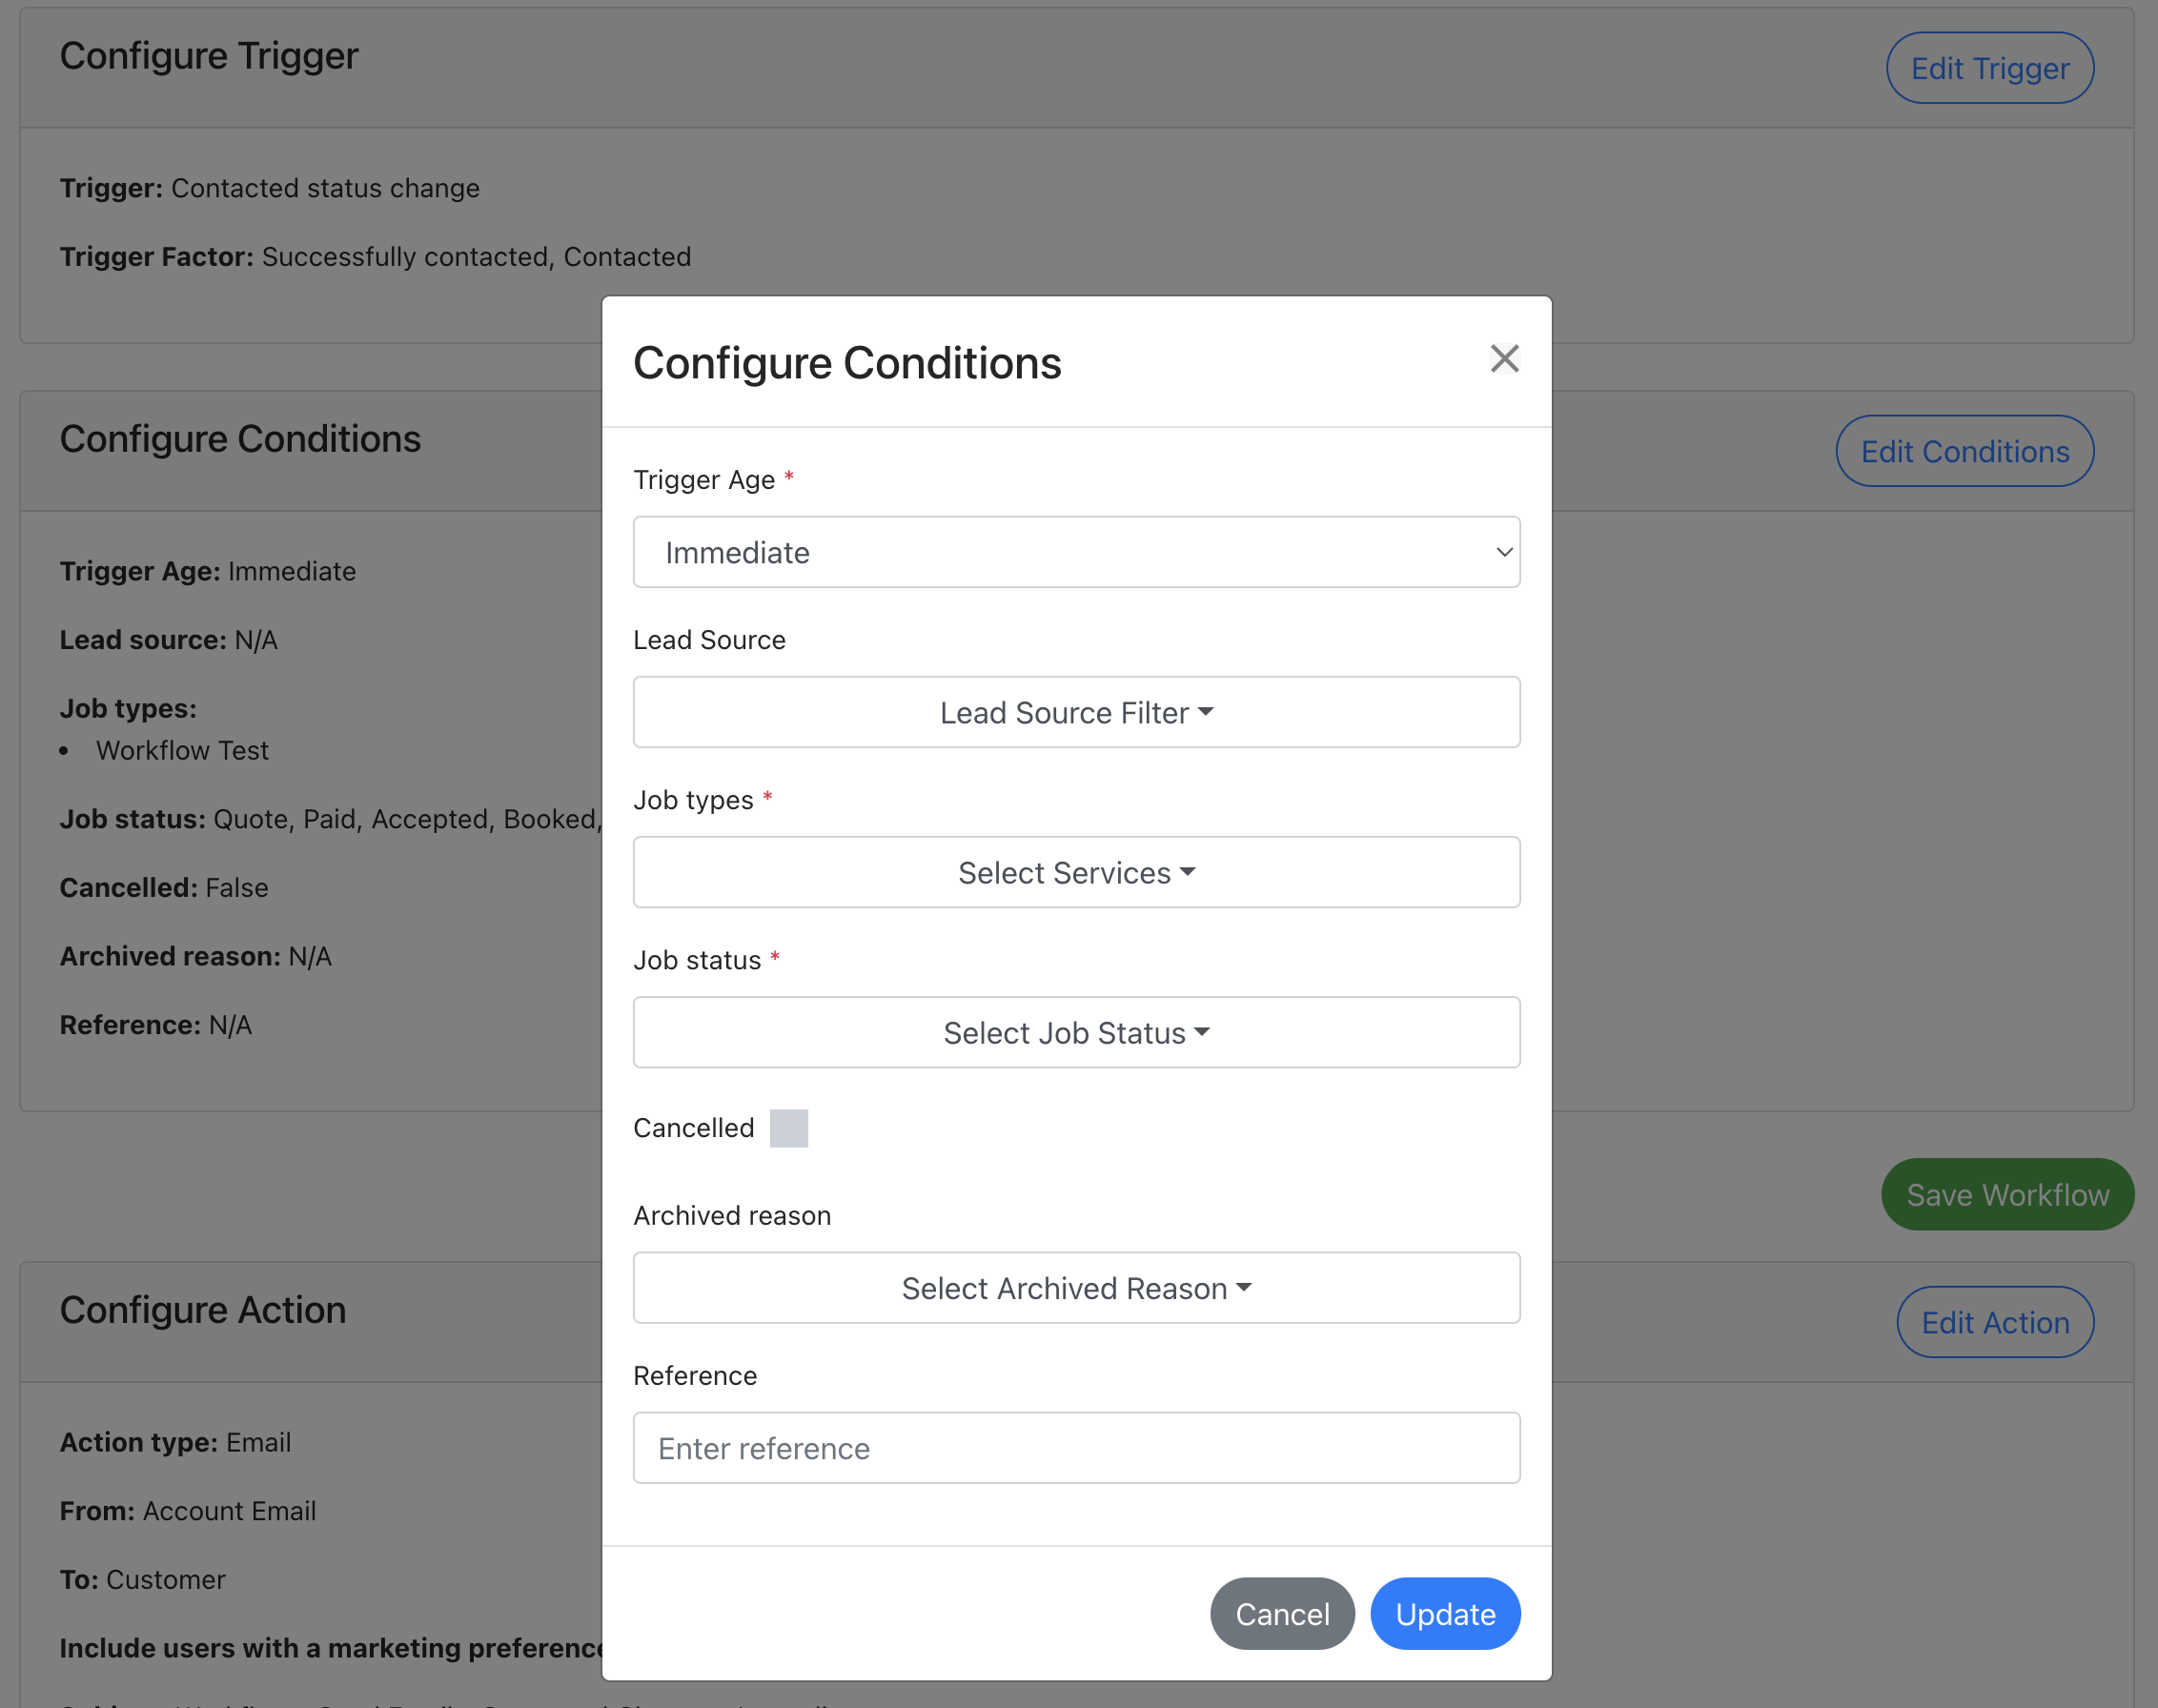
4. Configure Conditions
Key Conditions (this sets when and for which leads the workflow runs)
- Trigger Age: DELAY – Choose Hours or Days and set how long after the lead creating this workflow should run
- Job types – select which job types this workflow should run for (select all or select 1 job type to send a much more tailored and high-converting email later)
Conditions you can ignore for this example:
- Lead source
- Only send if job is cancelled
- Reference
To understand what each condition controls, see our full guide here.
5. Restrict Sending Hours (Delay Condition Only)
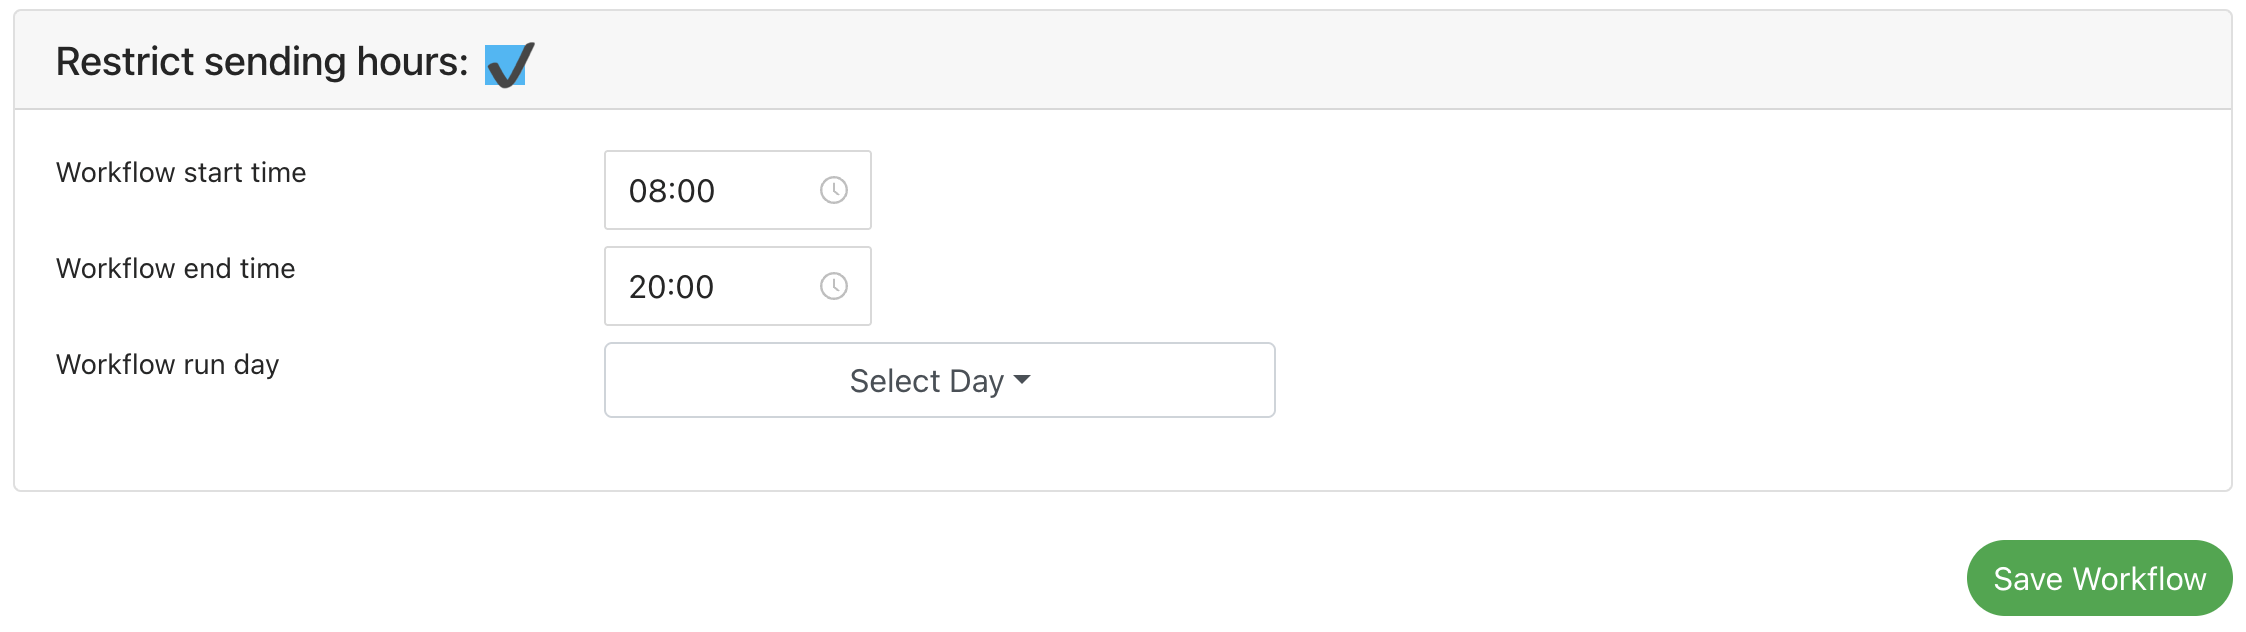
When you have selected to run an automation on a delay, instead of immediately, you can set if the workflow should run on a restricted time or at any time.
A “Restrict sending hours” section will appear.
Unticked – the workflow till run 24/7 and process at the relevant time.
Ticked – you can set between which times and on which days of the week that your workflow should run (e.g. only send your lead nurture email between 08:00 – 20:00, Monday to Friday).
Important: Press Save Workflow before moving on to edit your Action. If editing and saving changes to your action before saving your workflow settings, the workflow settings will not be saved and will need to be re-entered
6. Configure Action
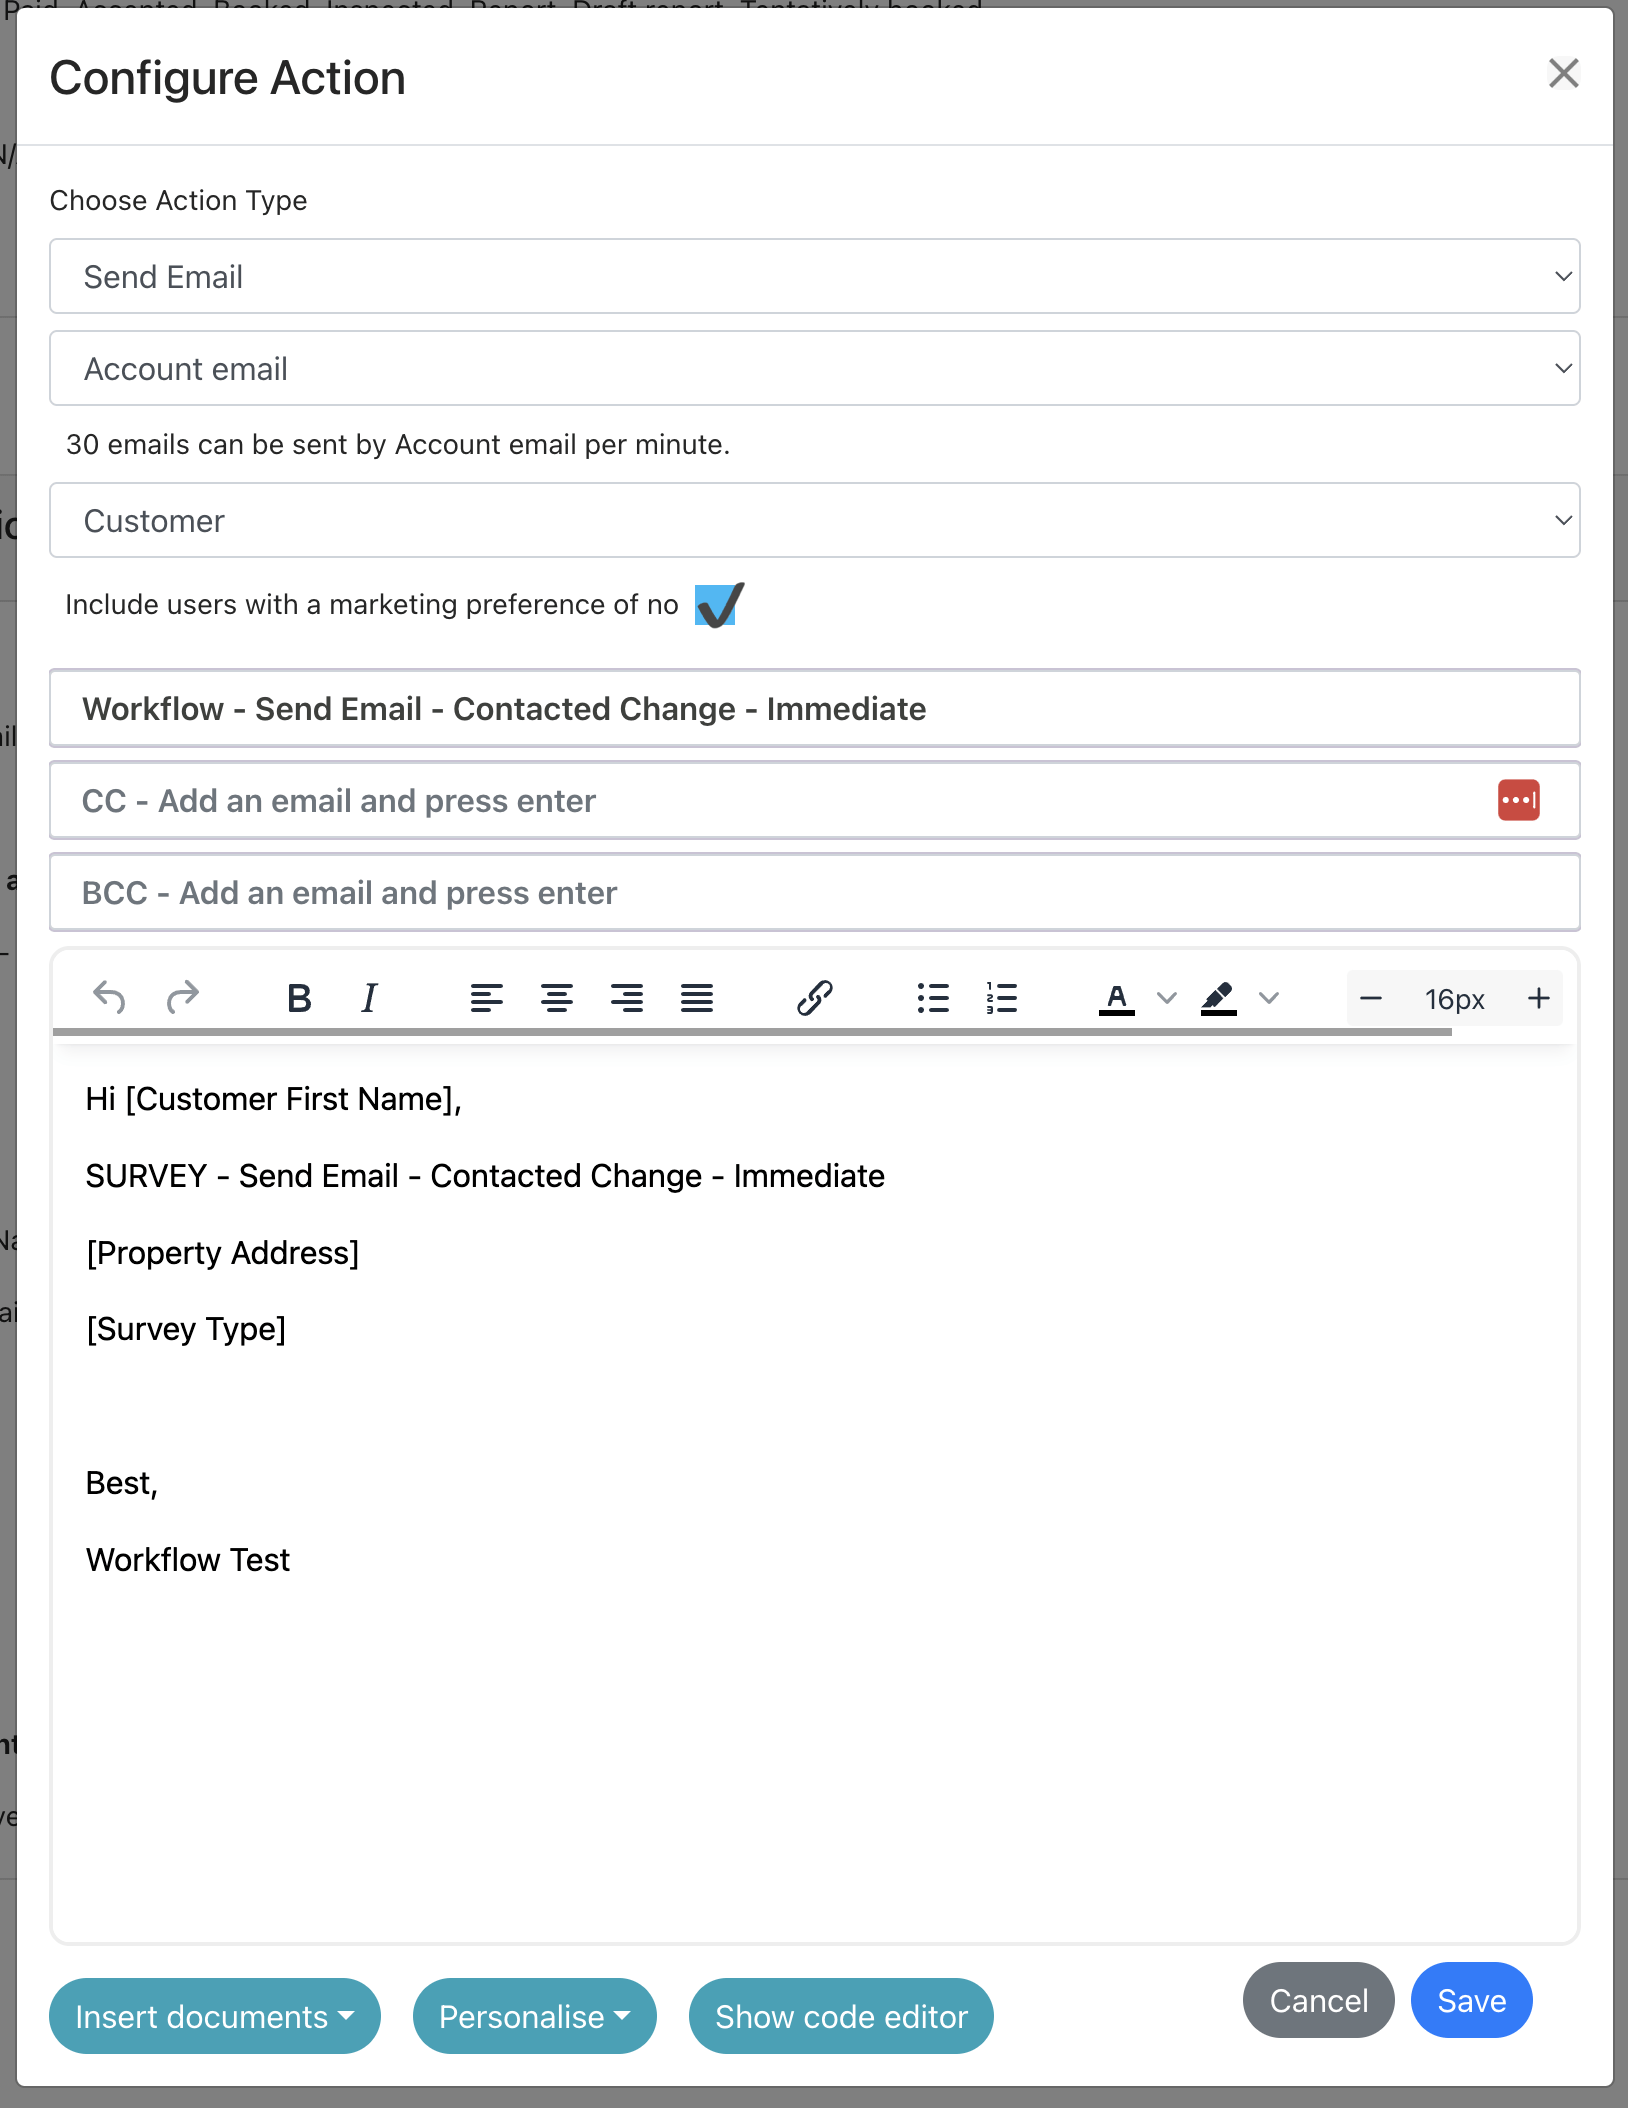
There are 4 types of action you can take once you have records that match your trigger and conditions. We’ll focus on emails for this example:
Option 1: Send Email
Which email address are we using to send the email?
- Select “Account email” – the central account email connected in your settings
Who are we sending the email to:
- Select Customer – this will send the email to the customer listed on the job (Survey or Project only)
- You can use or ignore the cc/bcc fields
- You can ignore the options to cc/bcc the assigned user or the referral partner account manager
Include users with a marketing preference of no – leave this UNTICKED. This will ensure emails aren’t sent to users who have opted out of marketing emails / previously unsubscribed.
Write your email content:
Setting up your email template is the same as editing your regular email templates. You can add standard documents, use shortcodes to personalise the content and use HTML code to style your emails. Note – only one cc and one bcc address can be added.
To get started, you can copy a template from your email settings and tailor it.
Once edited, press “Save”.
Then press “Save Action”
Duplicate the workflow and repeat!
If you want to create a lead nurture email for each job type and/or add further follow-ups (e.g. a 3-day and 5-day) you can go to the Workflows table, click the 3 vertical dots next to your workflow and press Duplicate.
The workflow will be a copy, and you can simply edit your conditions and email template!