

Setting up custom table views - view your data your way
In this guide, we look at how you can set up table views that you can toggle between to see quickly see data how you need it as well as setting up a default view that controls how the table loads each time you open it.
Quotes, Jobs Referrer, Notification and Task tables
Using this feature, you can have various preset table views to help you quickly find data that meets different criteria without needing to manually select different filters. You can also set a default view to load your table by each time you open it. This saves you time filtering the table.
Setting up your first table view:
Apply the table filters you want – this includes dropdown filters (multi-select), along with any text filters.
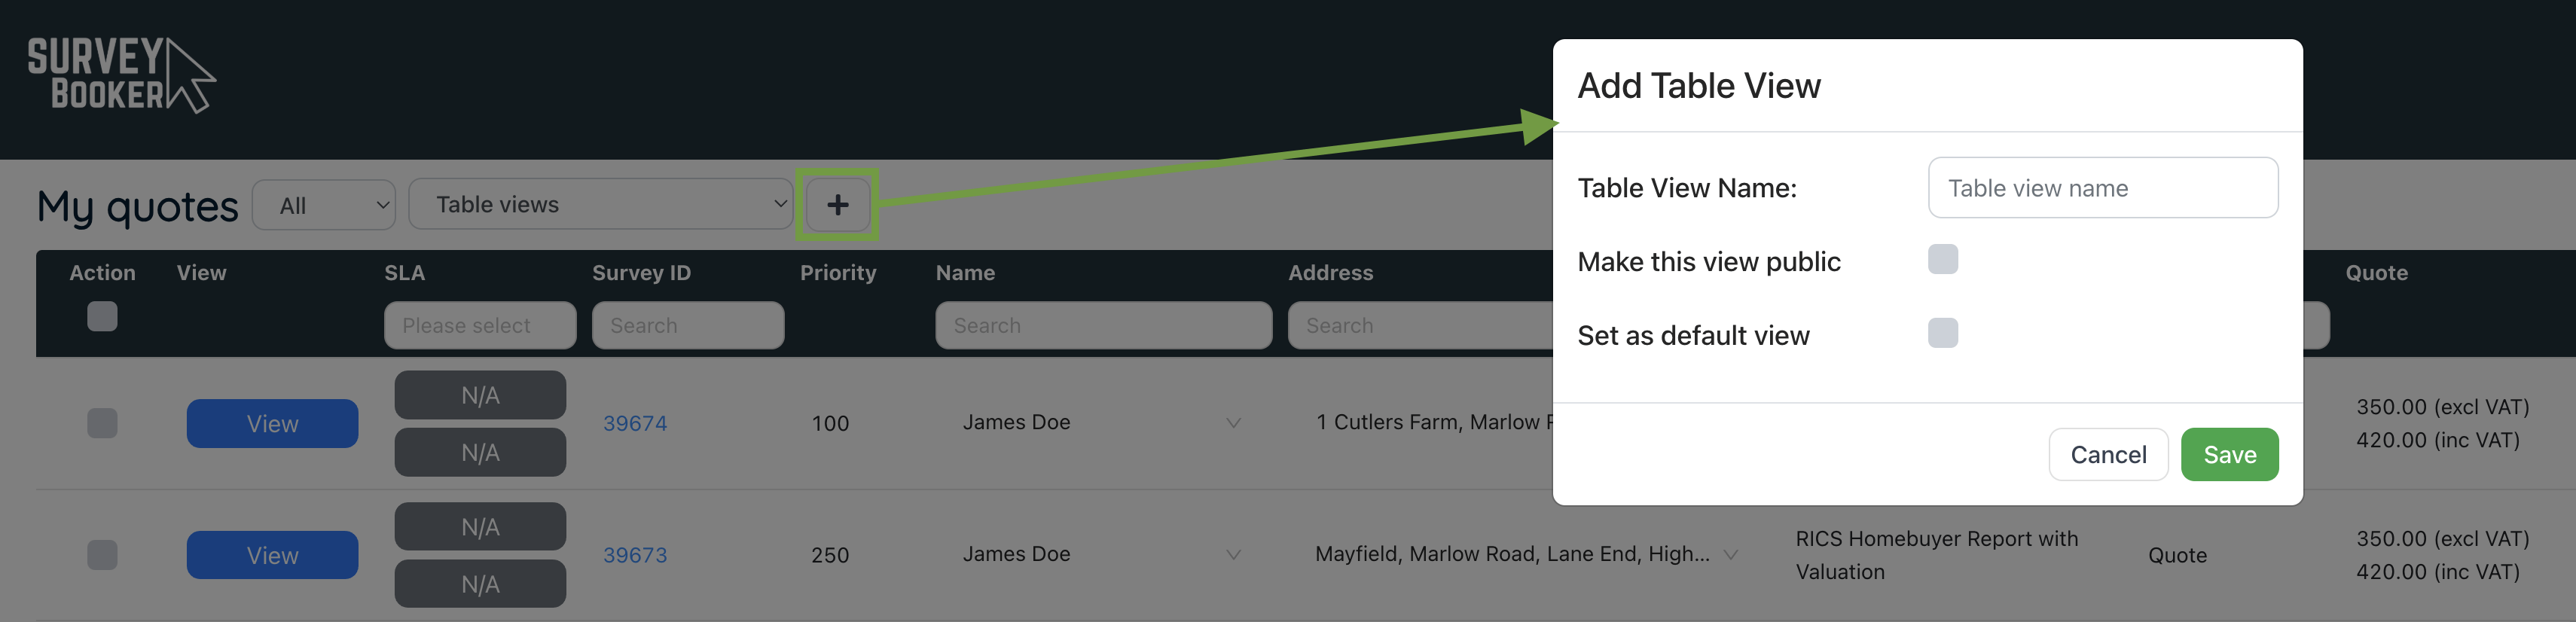
Press the + button next to the table views dropdown
Type in a view name and select if the table view is:
- Public – other team members can also use the view you’ve created
- Default view – the filters that are selected are automatically applied each time you load the table. You can only have one default view.
Press “Save”.
Add a new table view
To add a new table view, you must click on the table views dropdown and select the “None” option.
Apply your filters as above, and press the + button to add your new view.
If you are already on a selected view, you will see a pencil icon to edit the selection of your chosen view.
Editing a table view
Select the table view you want to edit from the dropdown.
Change the filters on the view.
Click on the pencil icon next to the table view dropdown.
Adjust any values like the name, if it is public or your default view and press “Save” to update your view.
Deleting a view
Select the table view you want to edit from the dropdown.
Press the pencil icon next to the table view dropdown.
Press “Delete”.
Setting which columns appear (including custom fields) and your column order
See our guide on customising your table columns: https://support.surveybooker.co.uk/customising-your-quotes-and-jobs-tables/
FAQs
Clear filters button – removes any filters added back to your settings for the loaded view (the views standard filters will remain applied, with any extras added removed). It does not reset your view back to no view selected. To go back to no filters, select “None” under the table views dropdown.
What does ‘public’ view mean – this setting allows you to share the view you’ve created with other team members so that they don’t need to set up the view themselves. If left unticked, the is private to your user.
When I return to the table, text filters are still applied – for ease of use, if you type data into filters, when you return from a timeline page, those filters will still be shown. Simply press the clear filters button to reset the table to your current table view’s filters.
How can I change the table header and text colour – this is controlled by your customer portal settings using:
- Table header colour
- Table header title colour
To edit these, go to Settings > Customer portal settings > Styling tab > Menu bar colour and menu bar text colour. Edit the colour values and press “Save”.