

An Overall Guide to Processing a Survey
In this guide we show you how to handle every stage of the survey process. To see what you customer will see throughout a survey please see our guide on the customer flow.
Adding a quote
In this video, we look at how to add a survey quote and a project quote to the system. Click through to view a more detailed guide on adding quotes below.
Adding a survey quote
Adding a project quote
Viewing your survey tables
In this video, we will look at how to use your different tables and search for data at different job stages.
We also have guides on:
Sending terms
An important part of the process, this video shows you how to send terms out to customers.
Payment – online or manual
Once terms are signed customers can pay online if you offer this option. In this video, we show you how payments are made on the customer portal and how you can process bank transfers on your side.
Click here to view details on how to add part payments.
Progressing a survey
In this video, we look at how to accept a survey booking, set the inspection date, confirm an inspection went ahead and upload your report.
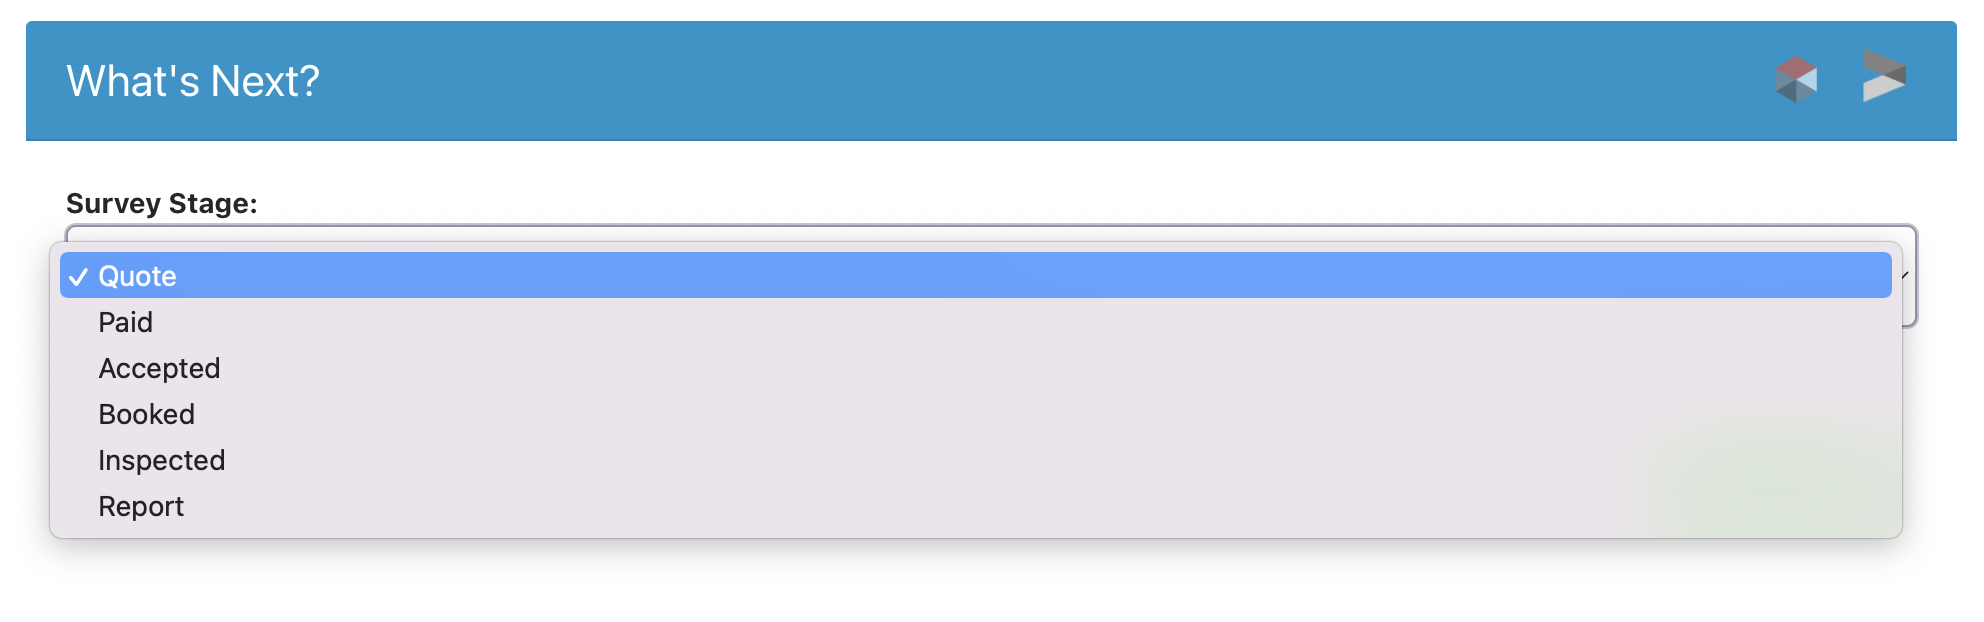
You can also manually move the status forward without sending out an email to the customer by clicking on the job stage in the ‘What’s next’ section, selecting a future stage, and pressing ‘Update’. This will progress the job status without sending out an email.
Further guides:
Adding/removing/refunding payments – https://support.surveybooker.co.uk/adding-payments-removing-payments-and-processing-refunds/
Reverting back to a previous stage
In this video we look at how to move back to a previous survey status if you have updated the wrong job or clicked too far.
Viewing or adding in extra details
In this video we look at how you can:
- View email logs to see which emails a customer has received and viewed
- Add notes
- Set tasks and reminders
- Add supporting documents such as site notes
Changing the customer or property associated to the job
In this video we look at how to change the contact/customer or property associated with a quote / job record.
Changing the associated customer record
Changing the associated property record
Step-by-step guide:
Adding a new property to the job record:
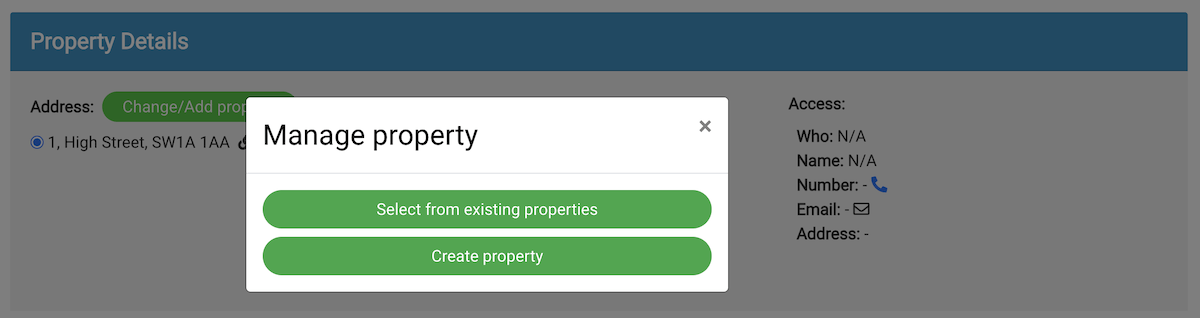
Click “Add/Change property” in the Property Details section.
Select “Create property”
Enter the main property details (Line 1, Line 3, Postcode)
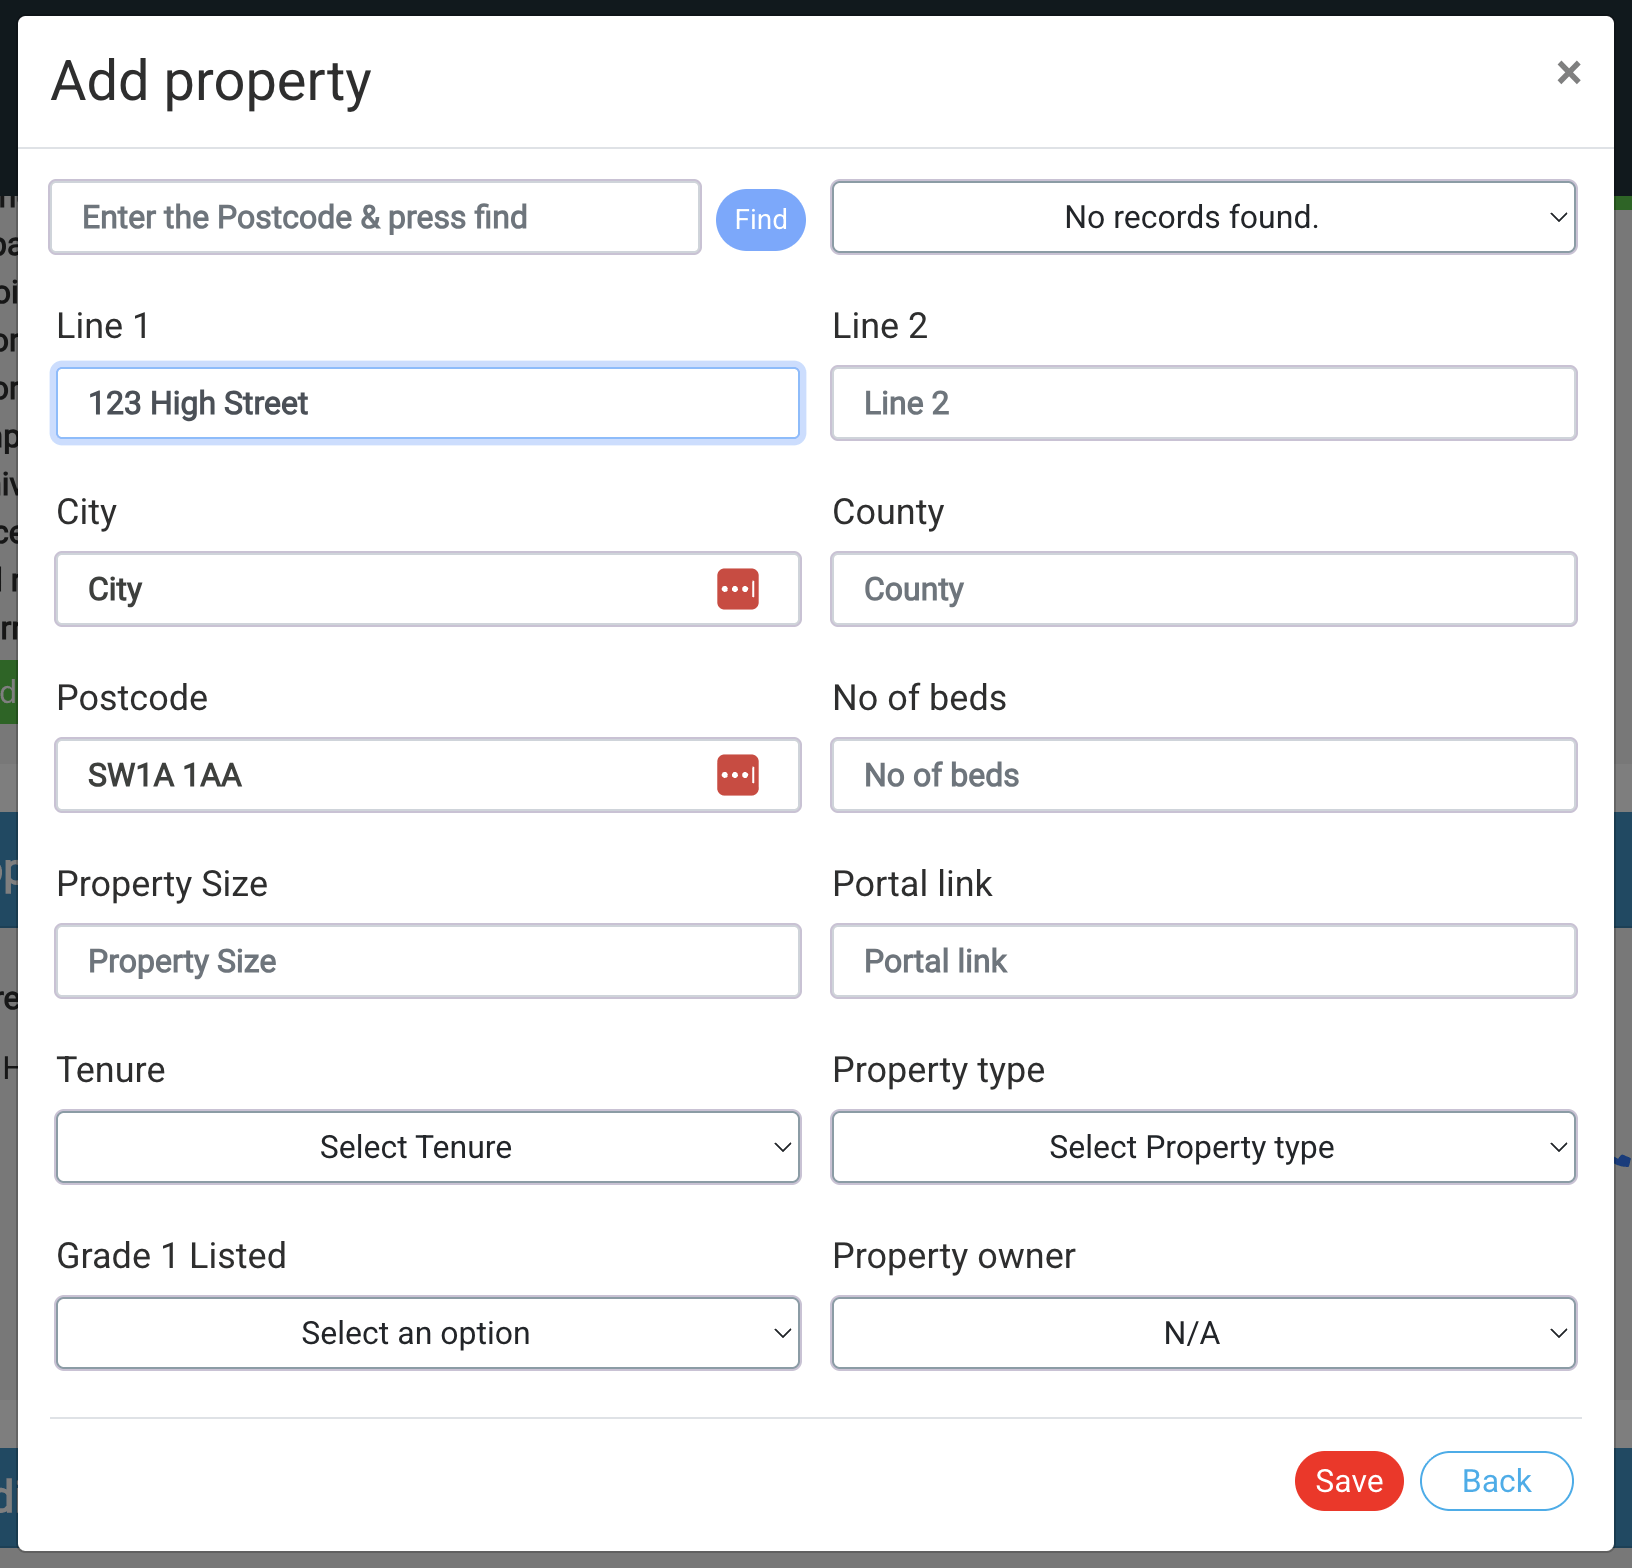 Press Save.
The property record will be created and automatically appear on the job record. If it doesn’t show automatically, follow the steps in the next part below.
Switching the property record to an existing record and removing the current one:
Click “Add/Change property” in the Property Details section.
Select “Select from existing properties”
You will see the current properties that have been selected and a tick next to the “primary” record.
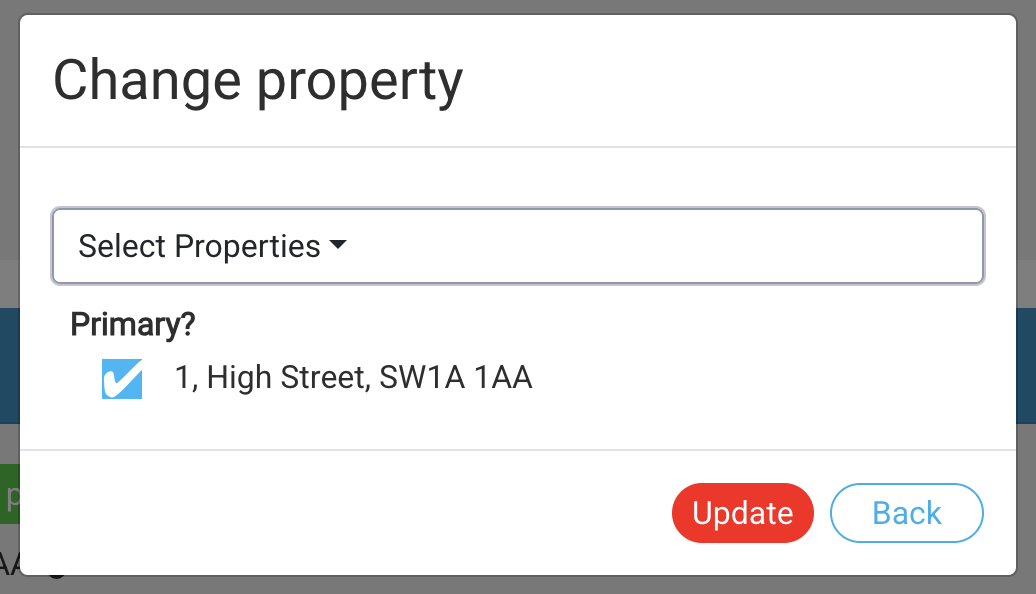
In the dropdown (which will initially be empty), search for the address of the existing record.
Allow 1-2 seconds for results to load.
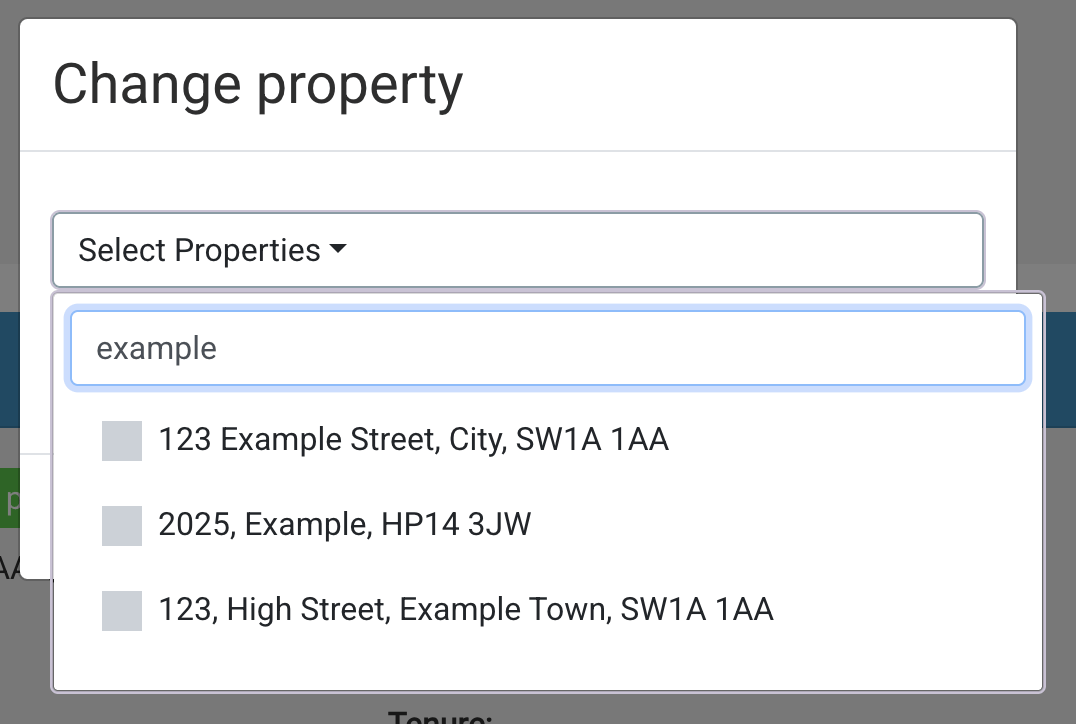
Tick the address you want to add to the job.
You will see this record and the current address listed.
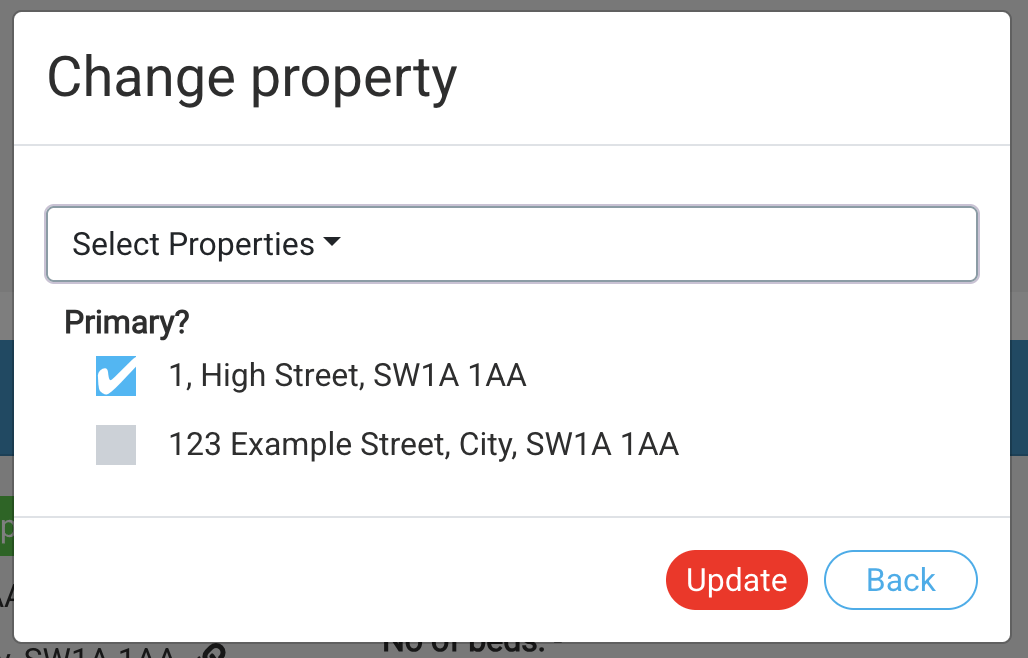
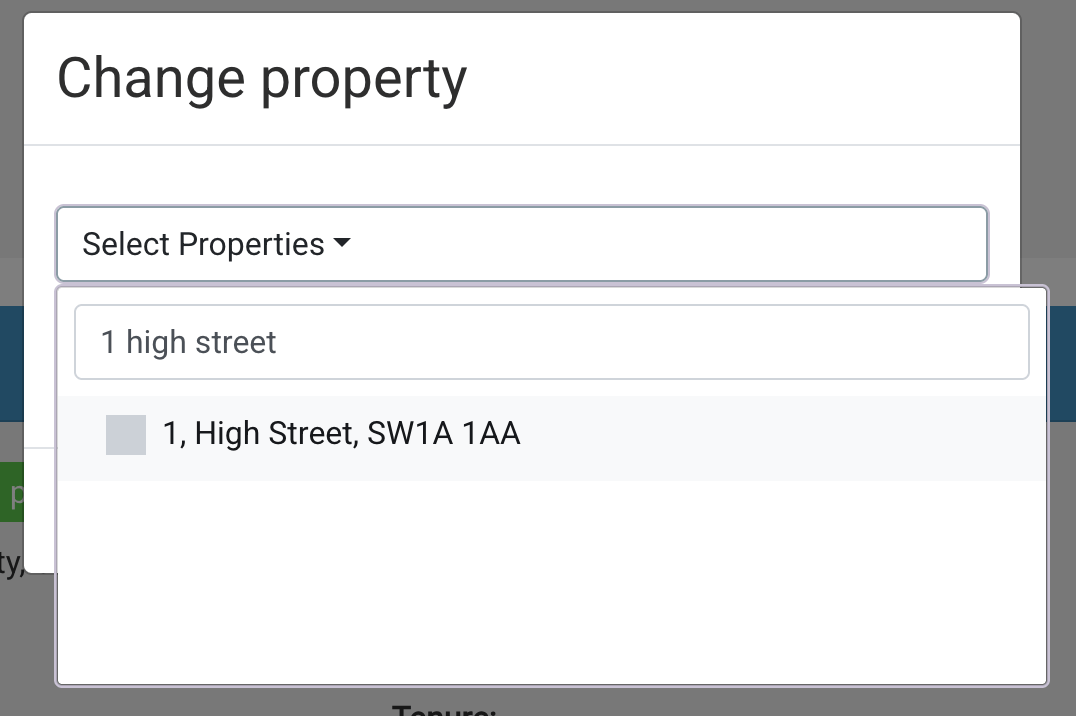
Search again for the record you want to remove.
Untick that result.
Close the search dropdown, and you will see the address removed. Note: Tick the address shown to make it the primary record
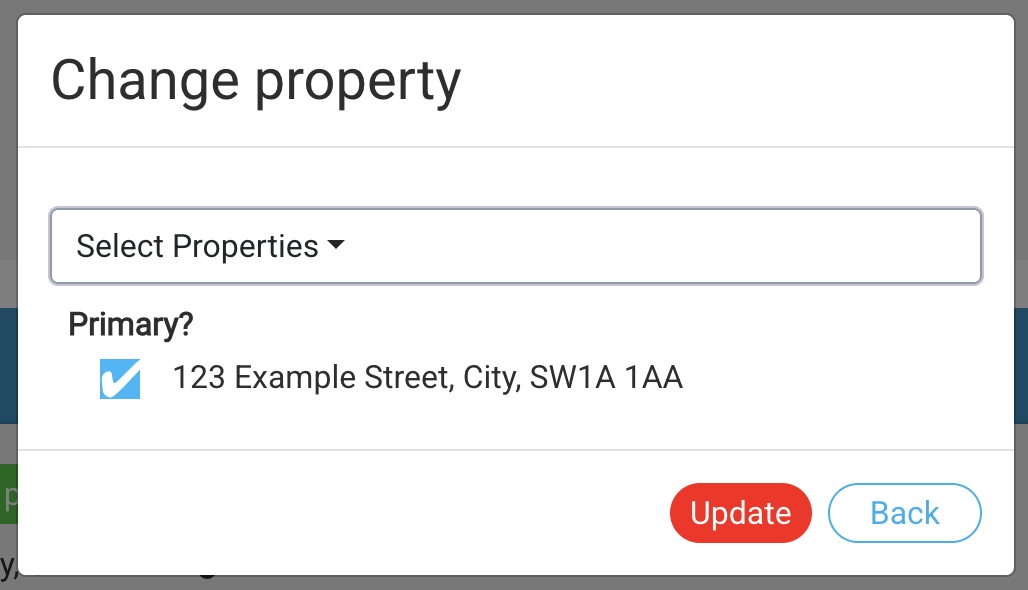
Press “Update”.