1. Enter your email
Enter your login email on the first screen. The system will then either bring up any accounts you belong to so you can choose which account to login to or if you’ve not activated your account, advise you on the next steps to take.

2. Confirm the account you want to login to
The pop up will ask you to confirm which account you want to login to. Select and press confirm.

3. Enter your password
Enter your password and you can log in.
If you use 2FA you’ll be prompted to enter the authenticator code. If you use SSO, you’ll be redirected to Azure to login.
Your login via the mobile app lasts for up to 30 days.

Dashboard
From here you can view:
- All records – this opens a list of cards for all records on your account starting with the most recent.
- Quotes to submit – this provides a list of cards for all jobs needing a quote.
- Terms to send – jobs where terms need sending or marking as not required.
- Jobs to book – a list of jobs where an appointment needs to be set (jobs at paid, payment skipped or accepted).
- Appointments – a list of jobs booked in.
- Reports to upload – a list of jobs needing a report.
- Notification preferences – settings for your push notifications (please see below for full details).
The counter shows the total count for your account and in brackets the count for your user.

Jobs table and adding new quotes
This page provides a list of cards for the jobs in your account after clicking through from the dashboard.
The card displays the key information about that job.
Click on a card to open the job timeline.
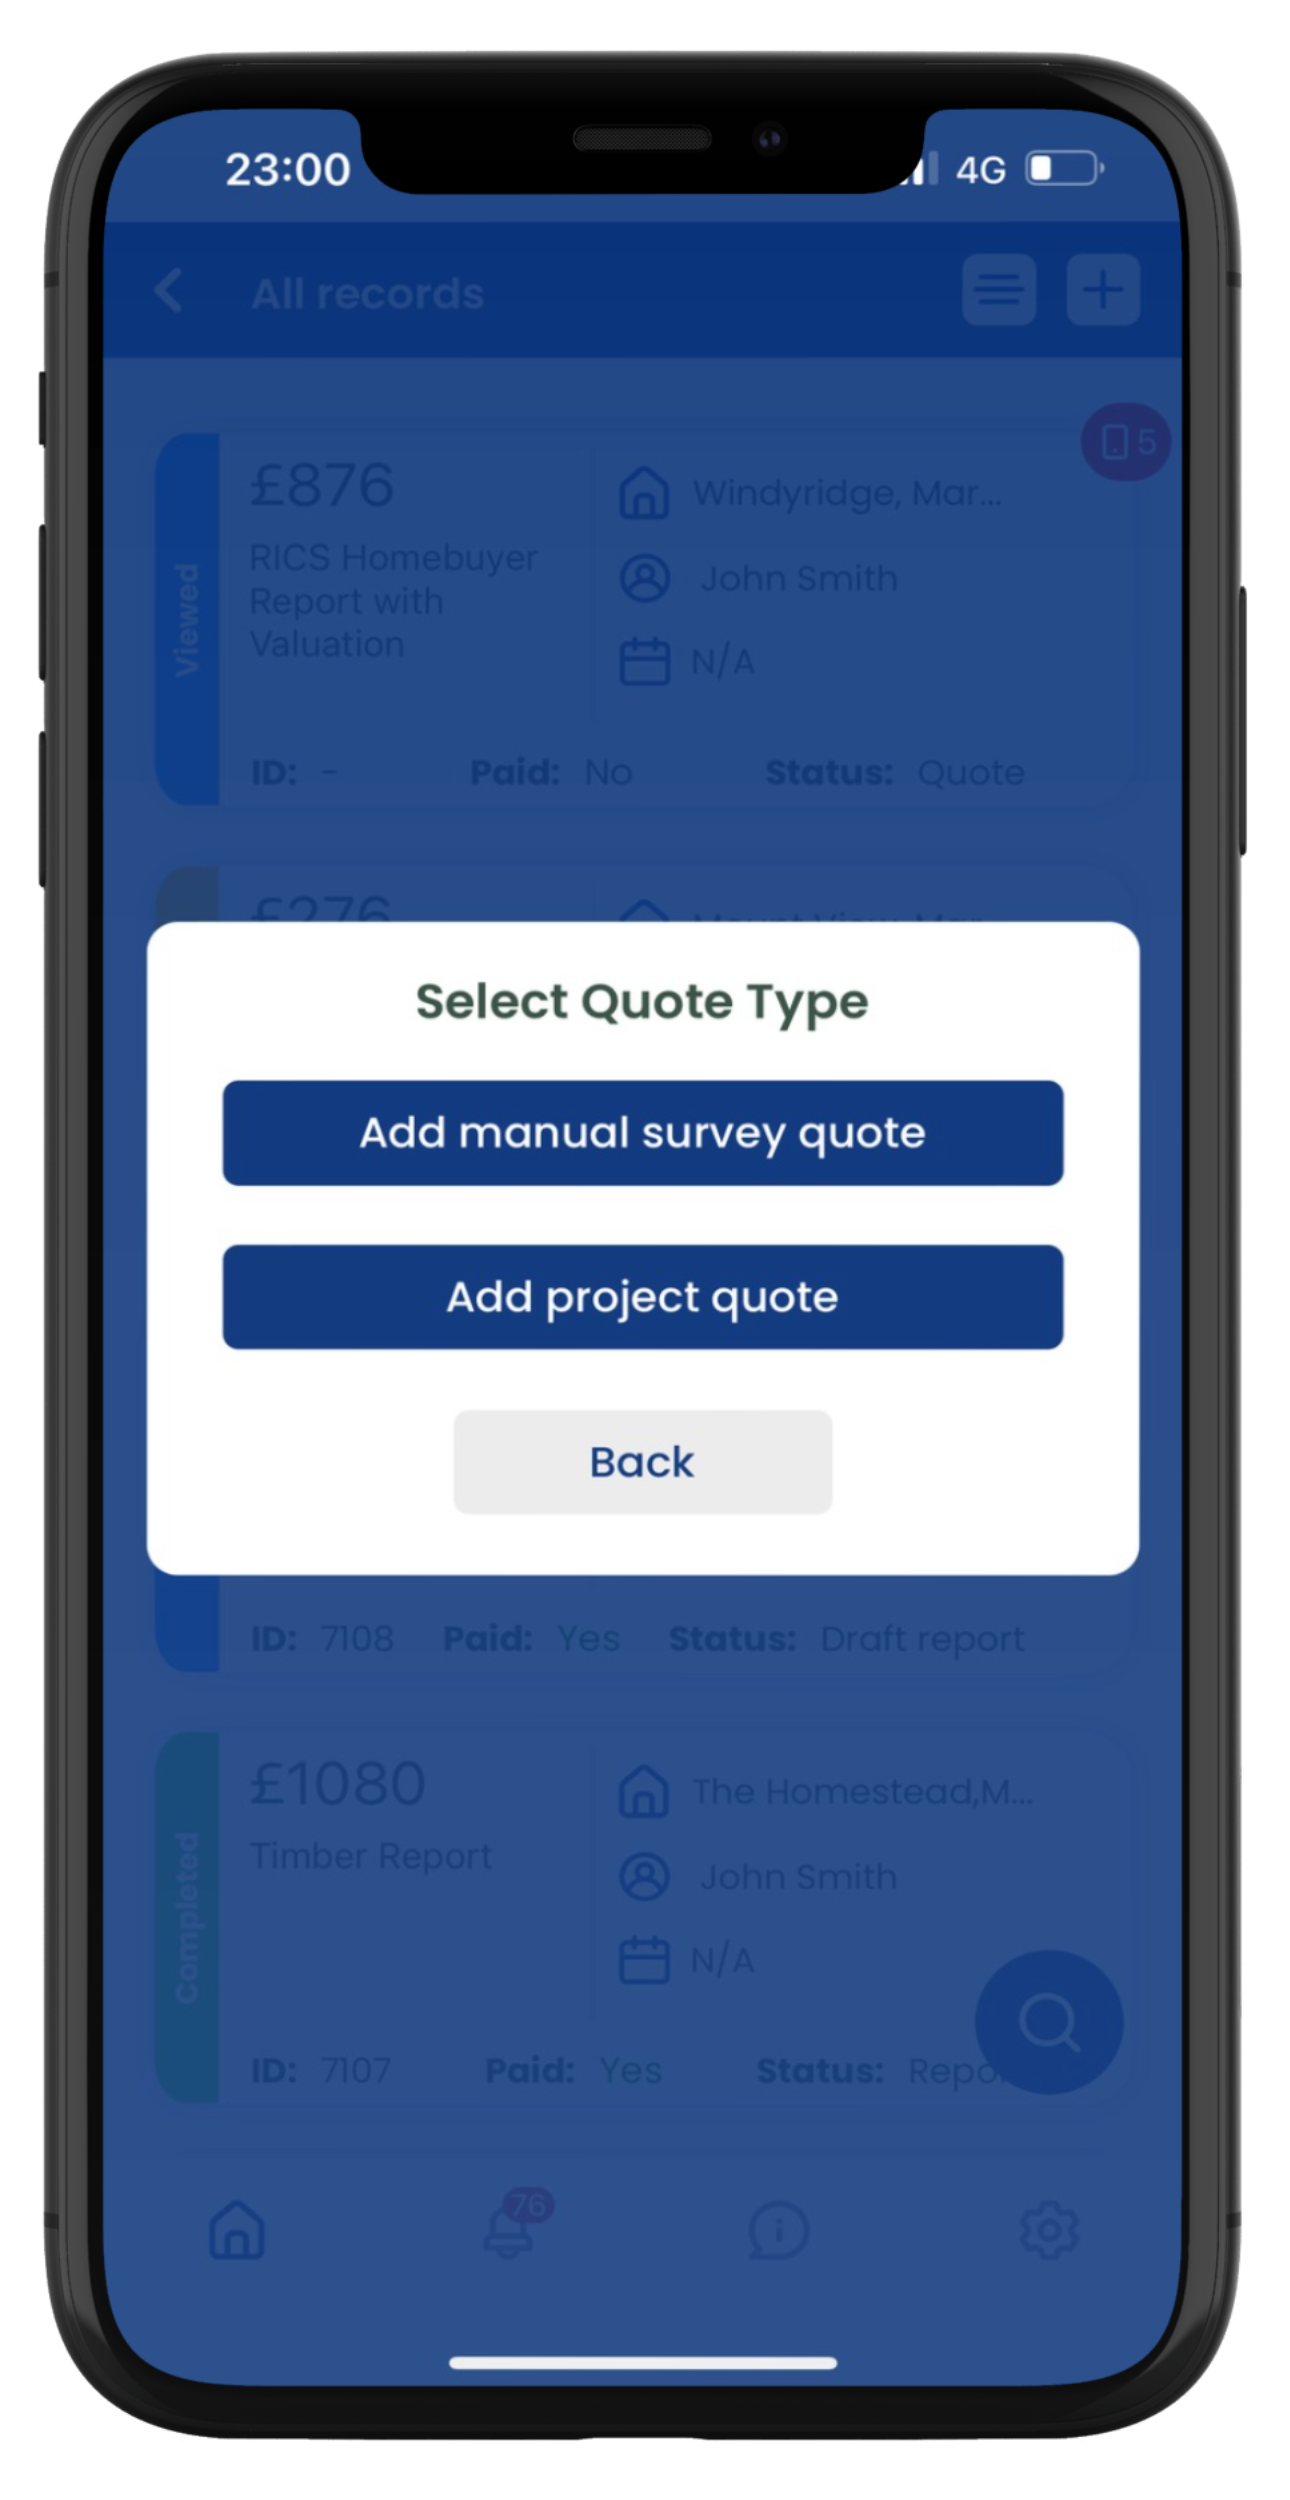
Use the + symbol (top right) to add new quotes.


Search filters
Use the icon with 3 horizontal lines (top right) to filter by surveys or projects.
Use the search glass icon (bottom right) to search for a particular job or list of jobs. After pressing the search glass icon you have two search options:
- 4 quick search options – enter your search term in the search field, select what you want to search (ID, name etc) and press search
OR - Press “Other filters” to search by other factors such as job type, job stage, assigned user and more.


Jobs timeline
The job timeline is largely similar to the web app job timeline in mobile view.
The key difference is that there is an “edit” button on each section. Click the edit icon to bring up the edit pop-up for that section. Make your changes and press “Save”.
Where there is no edit button such as custom timeline fields sections you’ve created, click on the field to edit it and press save on the pop-up for that field.
You can send terms, emails, messages etc as normal from the relevant section on the page.

Calendar and tasks
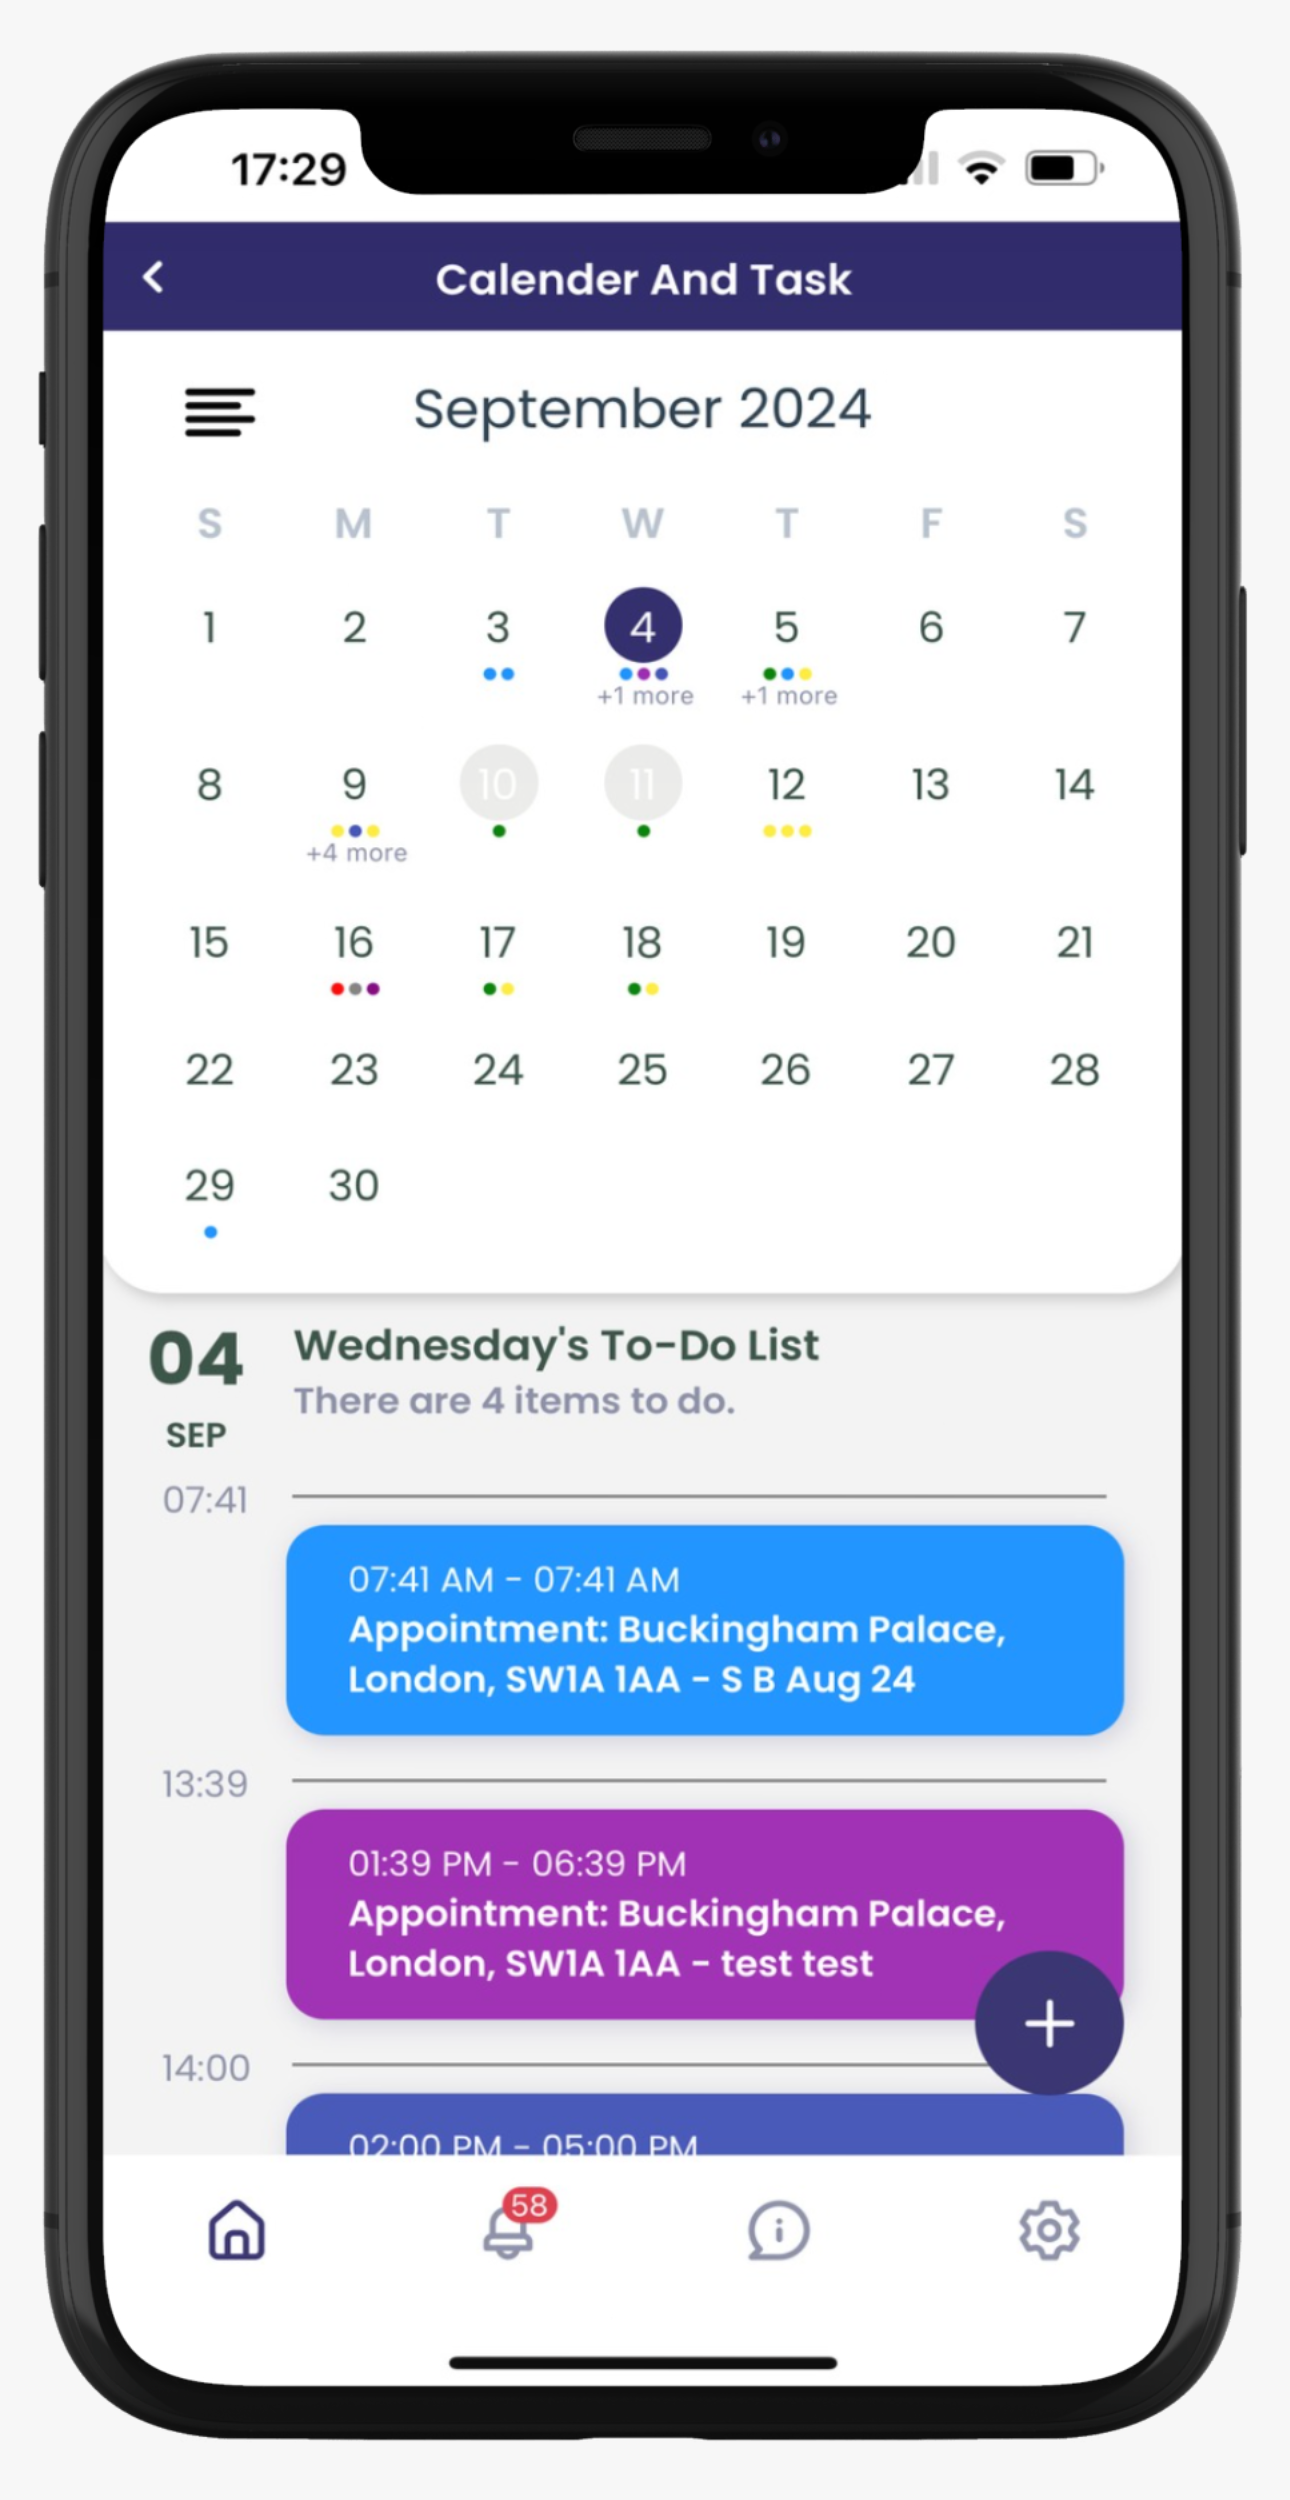
Select “Calendar and tasks” from the homepage.
Click on a date to view the events in place. This will show inspection dates, report due dates and tasks based on your calendar settings in the web app (e.g. if you’ve turned off showing tasks, they will also not show in the mobile app view).
Swipe left or right on the month to view a different date.
Click on the menu lines at the top left to filter the calendar by user.
Click the plus icon to add a custom event to the diary. To add appointment dates or tasks, this is done as usual via the job record.

Notification preferences – push notifications
The notification preferences here are separate from the preferences set on the web app. The mobile app notification preferences control which push notifications you receive whereas the web app notification preferences control which email notifications you receive.
When are you sent push notifications:
When you get sent push notifications depends on your web app account notification settings (set by super admin level users):
- All super, regional and assigned regular users notified: all users are sent push notifications (for regional users if you are allowed to view that job type and location. For regular users, if you are assigned to the job).
- Send notifications to a central email only: NO users are sent push notifications – alerts will only be sent via email to the address specified in the web app settings
- Send notifications to assigned users only. If no user is assigned, send notifications to: push notifications will only be sent to you once you are assigned to the job
- Send notifications to assigned users and a general email address: push notifications will only be sent to you once you are assigned to the job

Notification table
Like the web app, this provides a list of jobs where there are unread emails, messages, tasks due etc.
Click on a card to open the job record (apart from custom events – these must be viewed via the web app.
To clear a notification, swipe left and confirm you want to clear the notification via the pop-up that appears. Like the web app, this will clear the notification for all users.

Navigation bar
At the bottom, there is a navigation bar.
Home icon – takes you to the dashboard
Bell icon – takes you to your notifications page
Speech bubble – takes you to our support options
Settings gear – provides the option to logout of the app


Menu bar, button and text colours
The colour of the menu bar, menu bar text, buttons and button text are set in your Customer Portal Settings under the ‘Styling’ tab. You will need to set the colour preference you want to see if you do not like the colours that are appearing. This allows you to customise the colour scheme to suit your app and customer portal.
The following fields control the app colours:
- Menubar background colour – this sets the colour of the dashboard background, logout button background and any checkbox highlights
- Table header title colour – this sets the text colour on the top bar bar and the job page buttons
NOTE: if these are set to white (#FFFFFF), this could cause some visibility issues.
Please refer to this guide on setting the app colours under the settings tab. Note: changes made here will update the colours displayed in your customer portal. We recommend logging in as a customer using a test customer record to see how the changes adjust your customer portal. If you have any settings without a colour set, this could prevent the colours from updating for you in the mobile app. Please ensure all customer portal settings have a colour code set.
Note: You must log out of your account and back in to see the colour changes take affect on the mobile app.

