

Release Note - February 2023
Release note - take a look at the big and small changes on their way
This update offers more flexible ways for managing your referral partners to increase engagement and the volume of leads sent through. We’ve also made smaller refinements to streamline the adding and managing of tasks and more.
Introducer accounts
Why have we made this update?
There are two key drivers behind this update. Based on feedback this new table layout will make it much easier and faster to find the right introducer record, to update settings and see how engaged your referral partners are with you. See the full list of updates below:
Standard introducer feature (Pro plan upwards):
- New table layout
- Search filters for each column
- Last referral date filter
- Last activity date (when you last added a note, task, call or sent an email)
- Status: see which introducers are active referrers and which are prospects that you are working on becoming referral partners to you.
- Filters remain applied when you go back from an introducer record to the main table and you can also open introducer records in a new tab.
- Reassign option to reassign the contact owner or the group a record belongs to.
- Centralised settings
- Settings are currently adjusted on each individual introducer record making it hard to quickly adjust fees.
- New: centralised settings button on the introducer table. Here you can create settings groups and assign multiple introducers to each one. This way you can easily bulk-update settings for introducers instead of needing to adjust one by one.
- Export
- Export a list of introducers based on filters applied to the introducer table
- Introducer record:
- Set industry:
- Job role:
- Address:
- Send and log emails to introducers to track your discussions with partners
- Log calls made to introducers
- Simplified notes, tasks and documents tabs (removing related notes, tasks and documents for jobs sent through)
- Referral fees:
- Can be set for firms where a custom fee scale is being used
- The system will now calculate referral fees when manually submitting a quote instead of just on instant quotes
- Adding introducers:
- Select if an introducer should be sent an activation email or not when adding them to your list.
- Simplified adding of introducers to the system by being able to select a preset settings group instead of having to set them each time
Introducer Plus (Enterprise or bolt-on):
- Group hierarchy: you can now add introducers at group, branch and contact levels for managing larger groups that refer leads to you more easily.
- Extra referral link: as well as the current customer quote form we’re adding a more basic link for sending just the customer details and address. This will save the lead for you as a draft that you can set the job type and quote after speaking with the customer and send your welcome email out.
Move the slider to compare the before and after views
Tasks table
Why have we made this update?
Based on feedback, we’re reducing the steps needed to create and assign a task. You can also set the task time rather than it defaulting to an hour task at midnight. This means you can customise exactly when a task is scheduled in the calendar view too. The task table will also give you easier options for filtering tasks and seeing how many are in place at each stage.
Creating a task
- Easier task creation – based on your feedback, we’ve updated the tasks to make it easier to create a task. You can now create the full task from the task pop-up instead of just setting the task name and then needing to separately add in details.
- Set task times – tasks used to default to 12:00am. We’ve updated tasks so you can set a task time with a preset time of 9am to 9:15am for ease.
Task table – we’ve added counts to each task filter (open tasks, due today, overdue etc) so you can see what volumes of tasks team members need to deal with. We’ve also added a completed date on the completed filter so you can easily see if tasks are being completed on time or late.
Move the slider to compare the before and after views
Quote table
Why have we made this update?
Based on popular feedback were making it easier to see the information you need from your quotes table and to hide the information you don’t need making it easier to either simplify or filter your data as you see fit. We’ve also refined it to make it easier to understand what jobs will appear under each stage filter so you can more confidently view your jobs list.
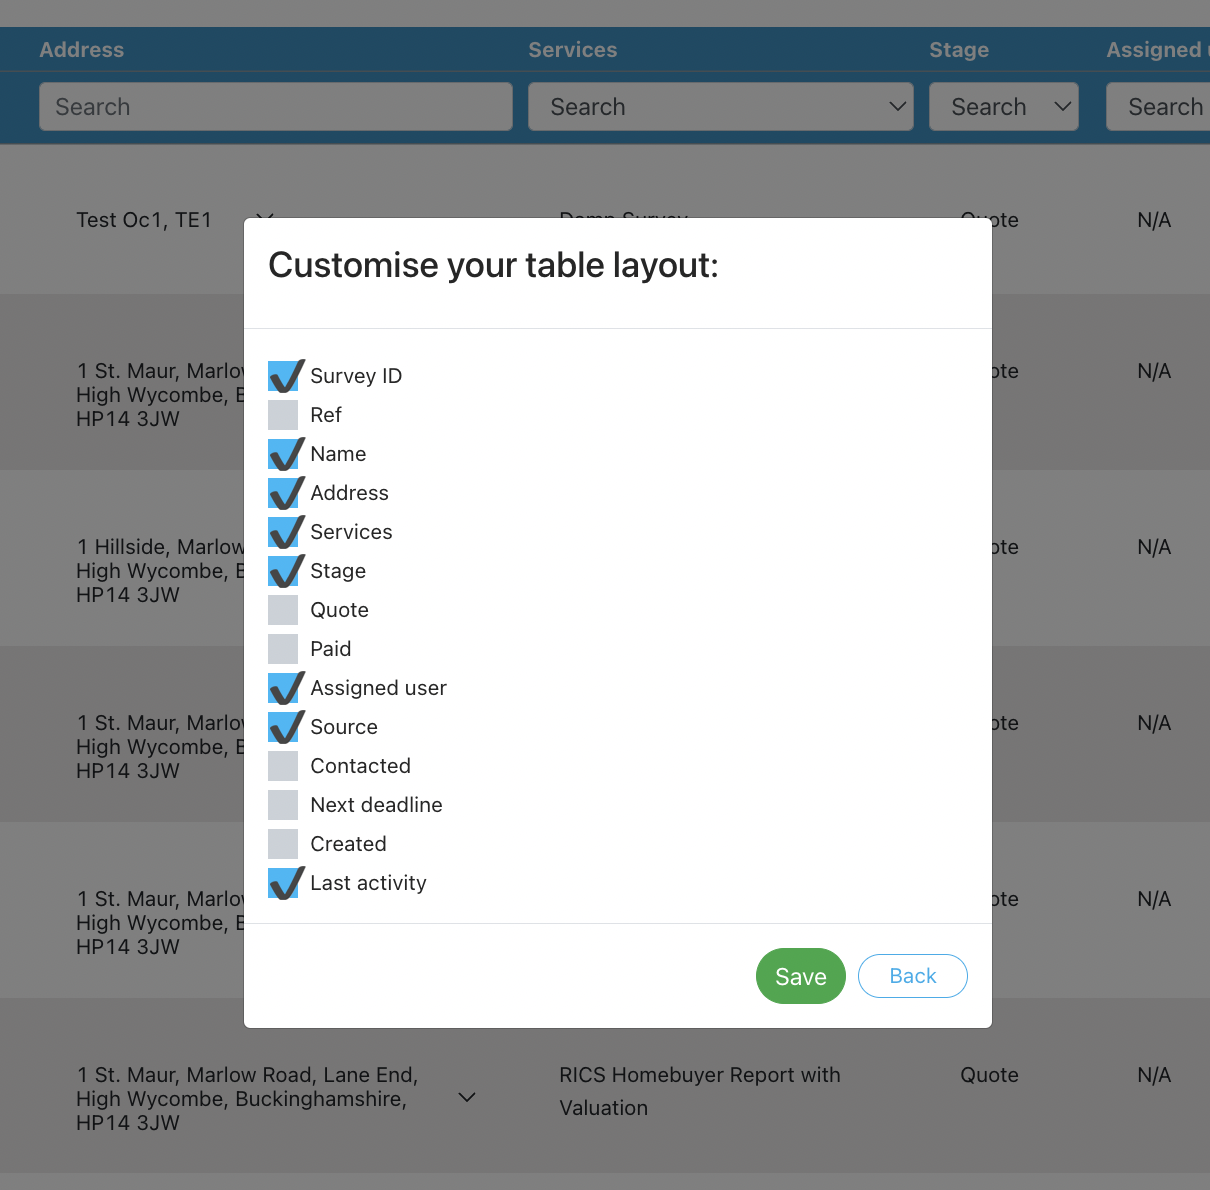
- Column customisation – use the settings icon above the quotes table to show or hide different columns so you remove what you don’t need and display what you do need.
- New: last activity column: quickly see when you or your team last left a note, task, call or sent a manual email on a job record so you can see which leads have had recent engagement and which haven’t.
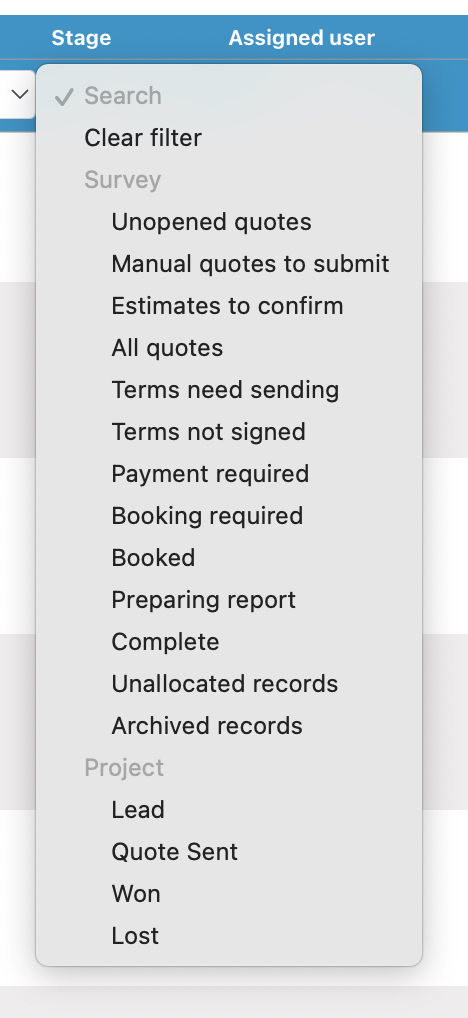
- Stage filter refinement – the stages of the “stage” filter have been renamed to more closely match the button text so you can easily understand what data is being displayed when that filter is selected. Take a sneak peak.
Quote form – Find address button
A minor refinement based on your feedback, the form has been updated so that the “Find” address button remains visible if an error displays about the format of the postcode added. This removes the need to refresh the page to enter the address again.
Booking calendar
Why have we made this update?
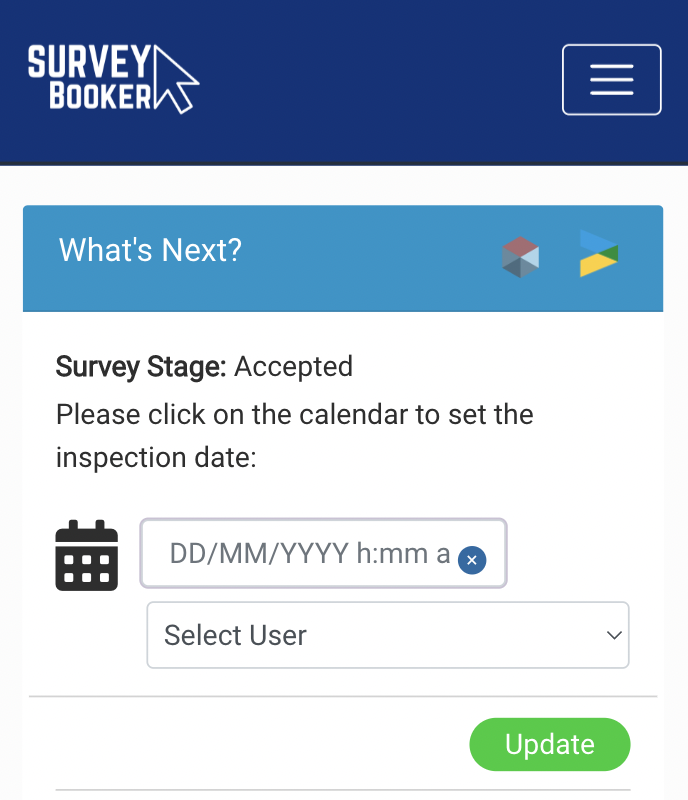
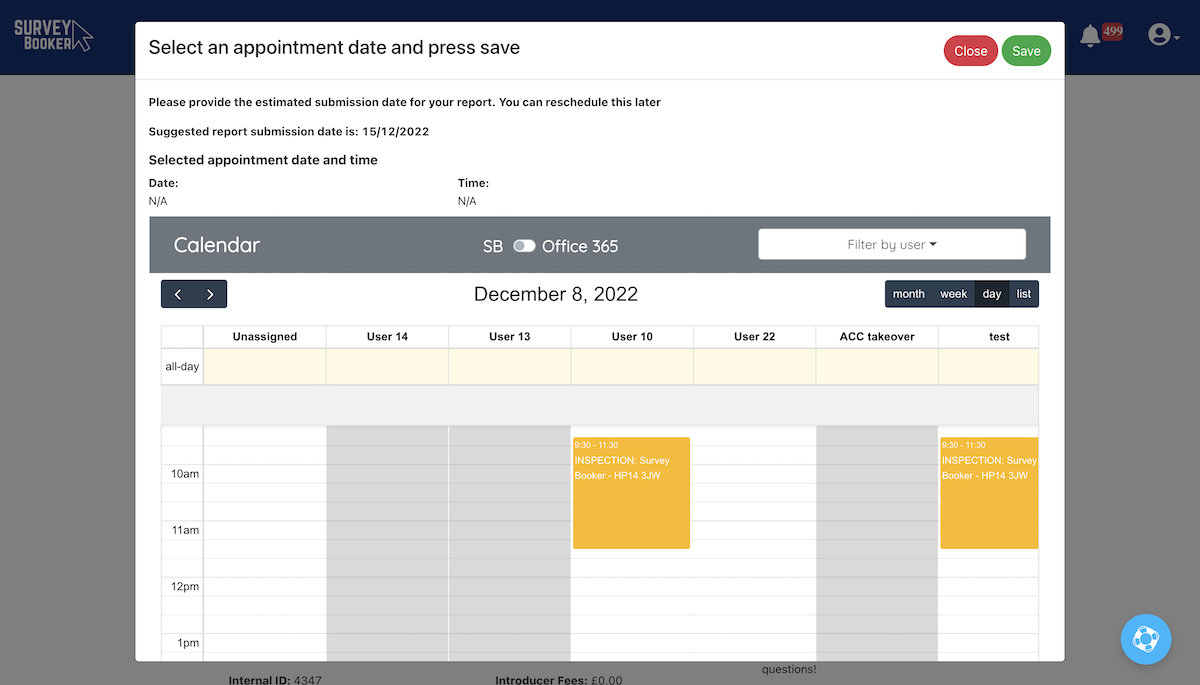
Based on feedback we’ve made the mobile version of the appointment selector simpler for selecting the appointment date/time and who it’s assigned to. This makes it cleaner but requires checking the calendar page separately. On desktop we’ve made the pop up full screen.
- Mobile – a simple date/time selector and a dropdown to choose which user the job should be assigned to. This removes the calendar view for seeing what is booked in but makes booking on mobile simpler to do.
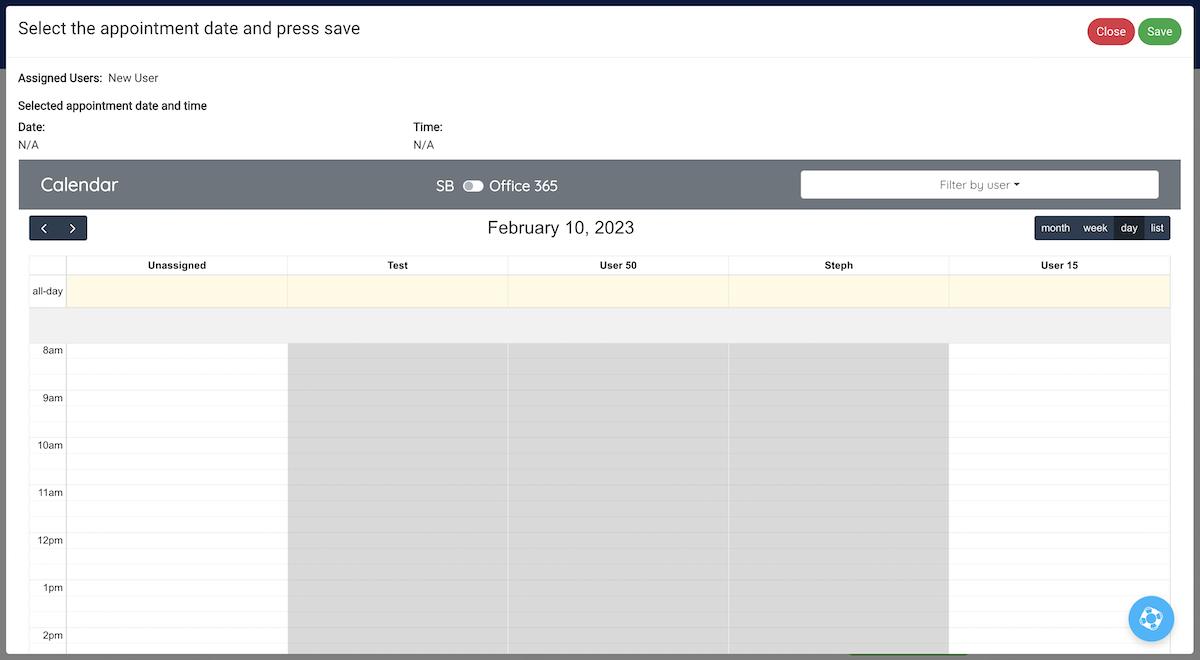
- Desktop / tablet:
- Pop up is now full screen to show more of the calendar when selecting an appointment
- On selecting a time, the selected slot appears on the calendar.
- If trying to save without selecting a time slot, the pop up will ask you to set the appointment time to be able to save.
Worldpay replaced with Opayo
Why have we made this update?
Worldpay has deprecated the current payment feed due to changes in industry standards around 3D Secure payments. In order to bring the integration up to the latest security standards, we’ve integrated Opayo (formerly Sagepay). Once you have upgraded your Worldpay account to the latest version, you can use your new Worldpay credentials on the Opayo integration to process payments as normal. This also offers an extra payment integration option directly via Opayo too.
Navigate to your account settings page to connect your Opayo account.
Other small refinements
- Access details – when clicking to edit the access details, all fields will become editable to make entering access details faster and easier.
- Local Surveyors Direct – additional lead types have been added to the integration. Pair any other lead types you receive with a job type in your account.
- Logged email replies – these will now show in your notifications table and a new email icon will display on the quotes/job table button.
- Tablet / mobile view – we’ve refined the optimisation of different pages on mobile and tablet to make using the system easier for both customers, surveyors and introducers alike.
Webinar 1 - Managing your team and appointments
Webinar 1 - Managing your team and appointments
Questions asked
If a job is cancelled does it automatically delete from diary when cancelled?
Yes! It will remove from your internal Survey Booker calendar if the job is cancelled. You can archive it afterwards but it must be set to cancelled first.
Can we use the booking calendar without settings availability?
Yes! You don’t need to use have to set user availability to enable booking. Where a user’s availability is greyed out, you can still choose to override it and book an appointment in.
Can the appointment be booked from the Office 365 view?
Yes! The appointment can be booked from either the Survey Booker calendar view or Office 365 calendar view. All that changes is whether we display appointments booked within the Survey Booker calendar or if we display events showing in a users calendar.
Can you still book appointments in for surveyors who don’t normally cover that area / job type?
Yes! By default, we display the users that cover the job type and location. But you can use the user filter to select one of the greyed out users. They’ll then appear in the calendar view and you can book the job in for them.
Does this diary link to Survey Hub?
If you use Survey Hub we can pull the appointment date back for you. This appointment will appear in the internal calendar. We can’t push it through to a connected Office 365 calendar as the surveyor in Survey Hub is not connected currently with a user in Survey Booker.
Release Note - December 2022
Release note - take a look at the big and small changes on their way
This update offers a significant number of new features, integrations and refinements to help continue to make your life even easier!
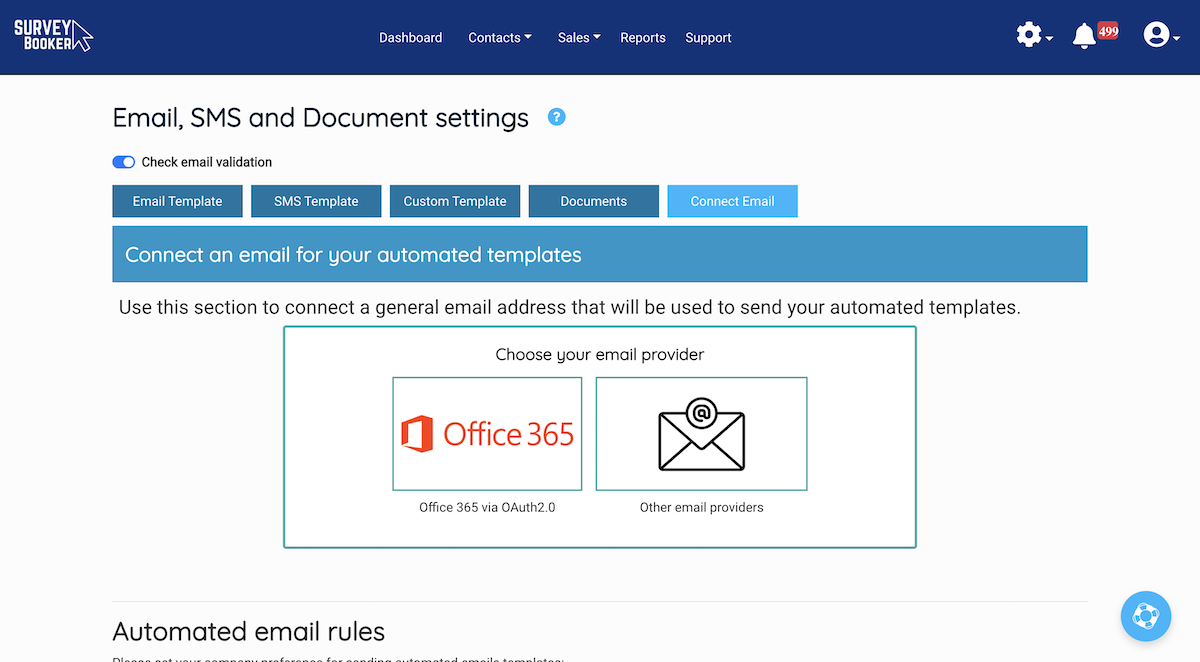
Email update
You can now connect any email address into Survey Booker – both for your account as a whole and by user. This means all your automated emails can be sent from your email address and your team can email customers from any job record to log exactly what has been sent and when.
The benefit? Compliance – being able to automatically log all correspondence sent to customers you don’t have to spend time storing emails separately yourself.
We’ve added sending rules so you can set:
- If automated emails are sent from a central email or assigned user
- If replies should add into the message system like they do now or go directly to your email address
- If team members can send emails from job timelines from their work email or if it must be sent from the central email address
Plans: All
Calendar update
A really big update to our calendar module making it easier to see what’s booked in and to set an appointment on the job record for each user. When setting an appointment for a job, the date selector will now show you the availability of each user that covers that job type and location. You can then select your date, and confirm it. When setting the report due date, the pop up can suggest what the report due date should be to help you choose the right date. This requires some extra settings to be added:
- User settings – tick which users are “surveyors” and set the job types covered, locations covered and their working hours.
- User availability settings – working hours will automatically feed into the user availability settings page. You can personalise availability each week to set annual leave and sickness. This will show on the calendar so you know when a surveyor isn’t available to do a job.
- Appointment length – set your standard appointment length for each job type in your “Select service” settings. We’ll automatically set the total appointment length in your calendar.
- Timeline page – an all new booking pop up to make it easier to choose your appointment date and automatically assign the surveyor to the job.
- Calendar page and settings – toggle which appointments should show in your calendar view – tasks, appointment dates and report due dates. Set custom names for each type of event and view icons to quickly see the status of a job (payment received, terms received and report sent).
Plans: All
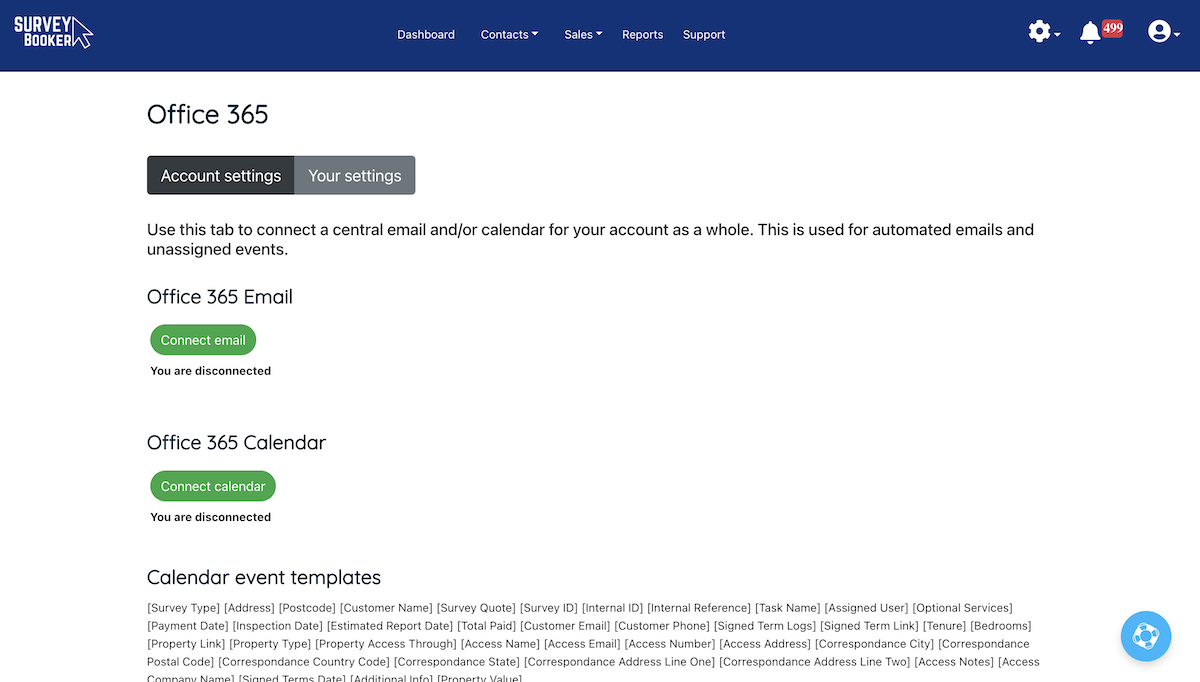
O365 Calendar integration
We’ve added a direct integration for O365 calendars. On setting appointments and tasks, set if these should feed through into a central and/or user’s calendar. Customise the event title and description for each event type so you can easily view details in your external calendars. Users must have an account in order to be assigned to jobs/tasks and to be able to connect their calendar to the system.
Set up the template for each events appears in your calendar with custom titles and descriptions.
Plans: Pro / Large / Enterprise
Various small updates
Dynamic iframe – using a traditional iframe, the height value is fixed. If set too short, the iframe will have a scroll on it as the form gets longer resulting in a scroll on the iframe and a scroll on the web page itself. This can make it harder to use. If set really high, your page will show a lot of empty space. Our dynamic iframe means the iframe will automatically change height as the content on the form changes providing a smoother experience for your customers. View the guide to learn how to install this.
My tasks – we’ve also updated the tasks table to make it easier to see who is assigned to a task, to filter by multiple users and to click through to the task to view it, where ever it has been set.
Select an appointment date in the past – if you have forgotten to update a job and need to set an appointment date in the past, you can use the stage dropdown on the ‘What’s next’ section to progress the stage without triggering an email. You can then edit the inspection date in the ‘Survey details’ section of the timeline to select a date in the past. You’ll see an alert flash up to let you know the date is in the past before you press ‘Update’.
Hints and tours – you’ll have seen we’ve released hints throughout the system that contain guides and tours. We also have a ‘life ring’ where you can enter keywords to find a support guide not listed on our hints. For any new users added to your account, they’ll automatically see a welcome tour explaining the dashboard, and a tour explaining how to add a quote and then how to edit and update it. All designed to make using your account and onboarding new team members easier.
Email validation – email validation has been removed by default. It can be added as an additional feature to your account should you wish to validate new emails added to your account. Pricing is subject to monthly validation volumes.
User drop downs – user drop downs now all list a users full name instead of just the first name to make it easier to identify users.
Stages – the terms requested and terms submitted stage filters on the quotes table no longer includes jobs where terms have been set as ‘not required’
Email short code: new [Inspection Time] short code if you want to provide the appointment time to your customers.
Plans: all
Release Note - September 2022
Release note - take a look at the big and small changes on their way
This update offers a significant number of new features, integrations and refinements to help continue to make your life even easier!
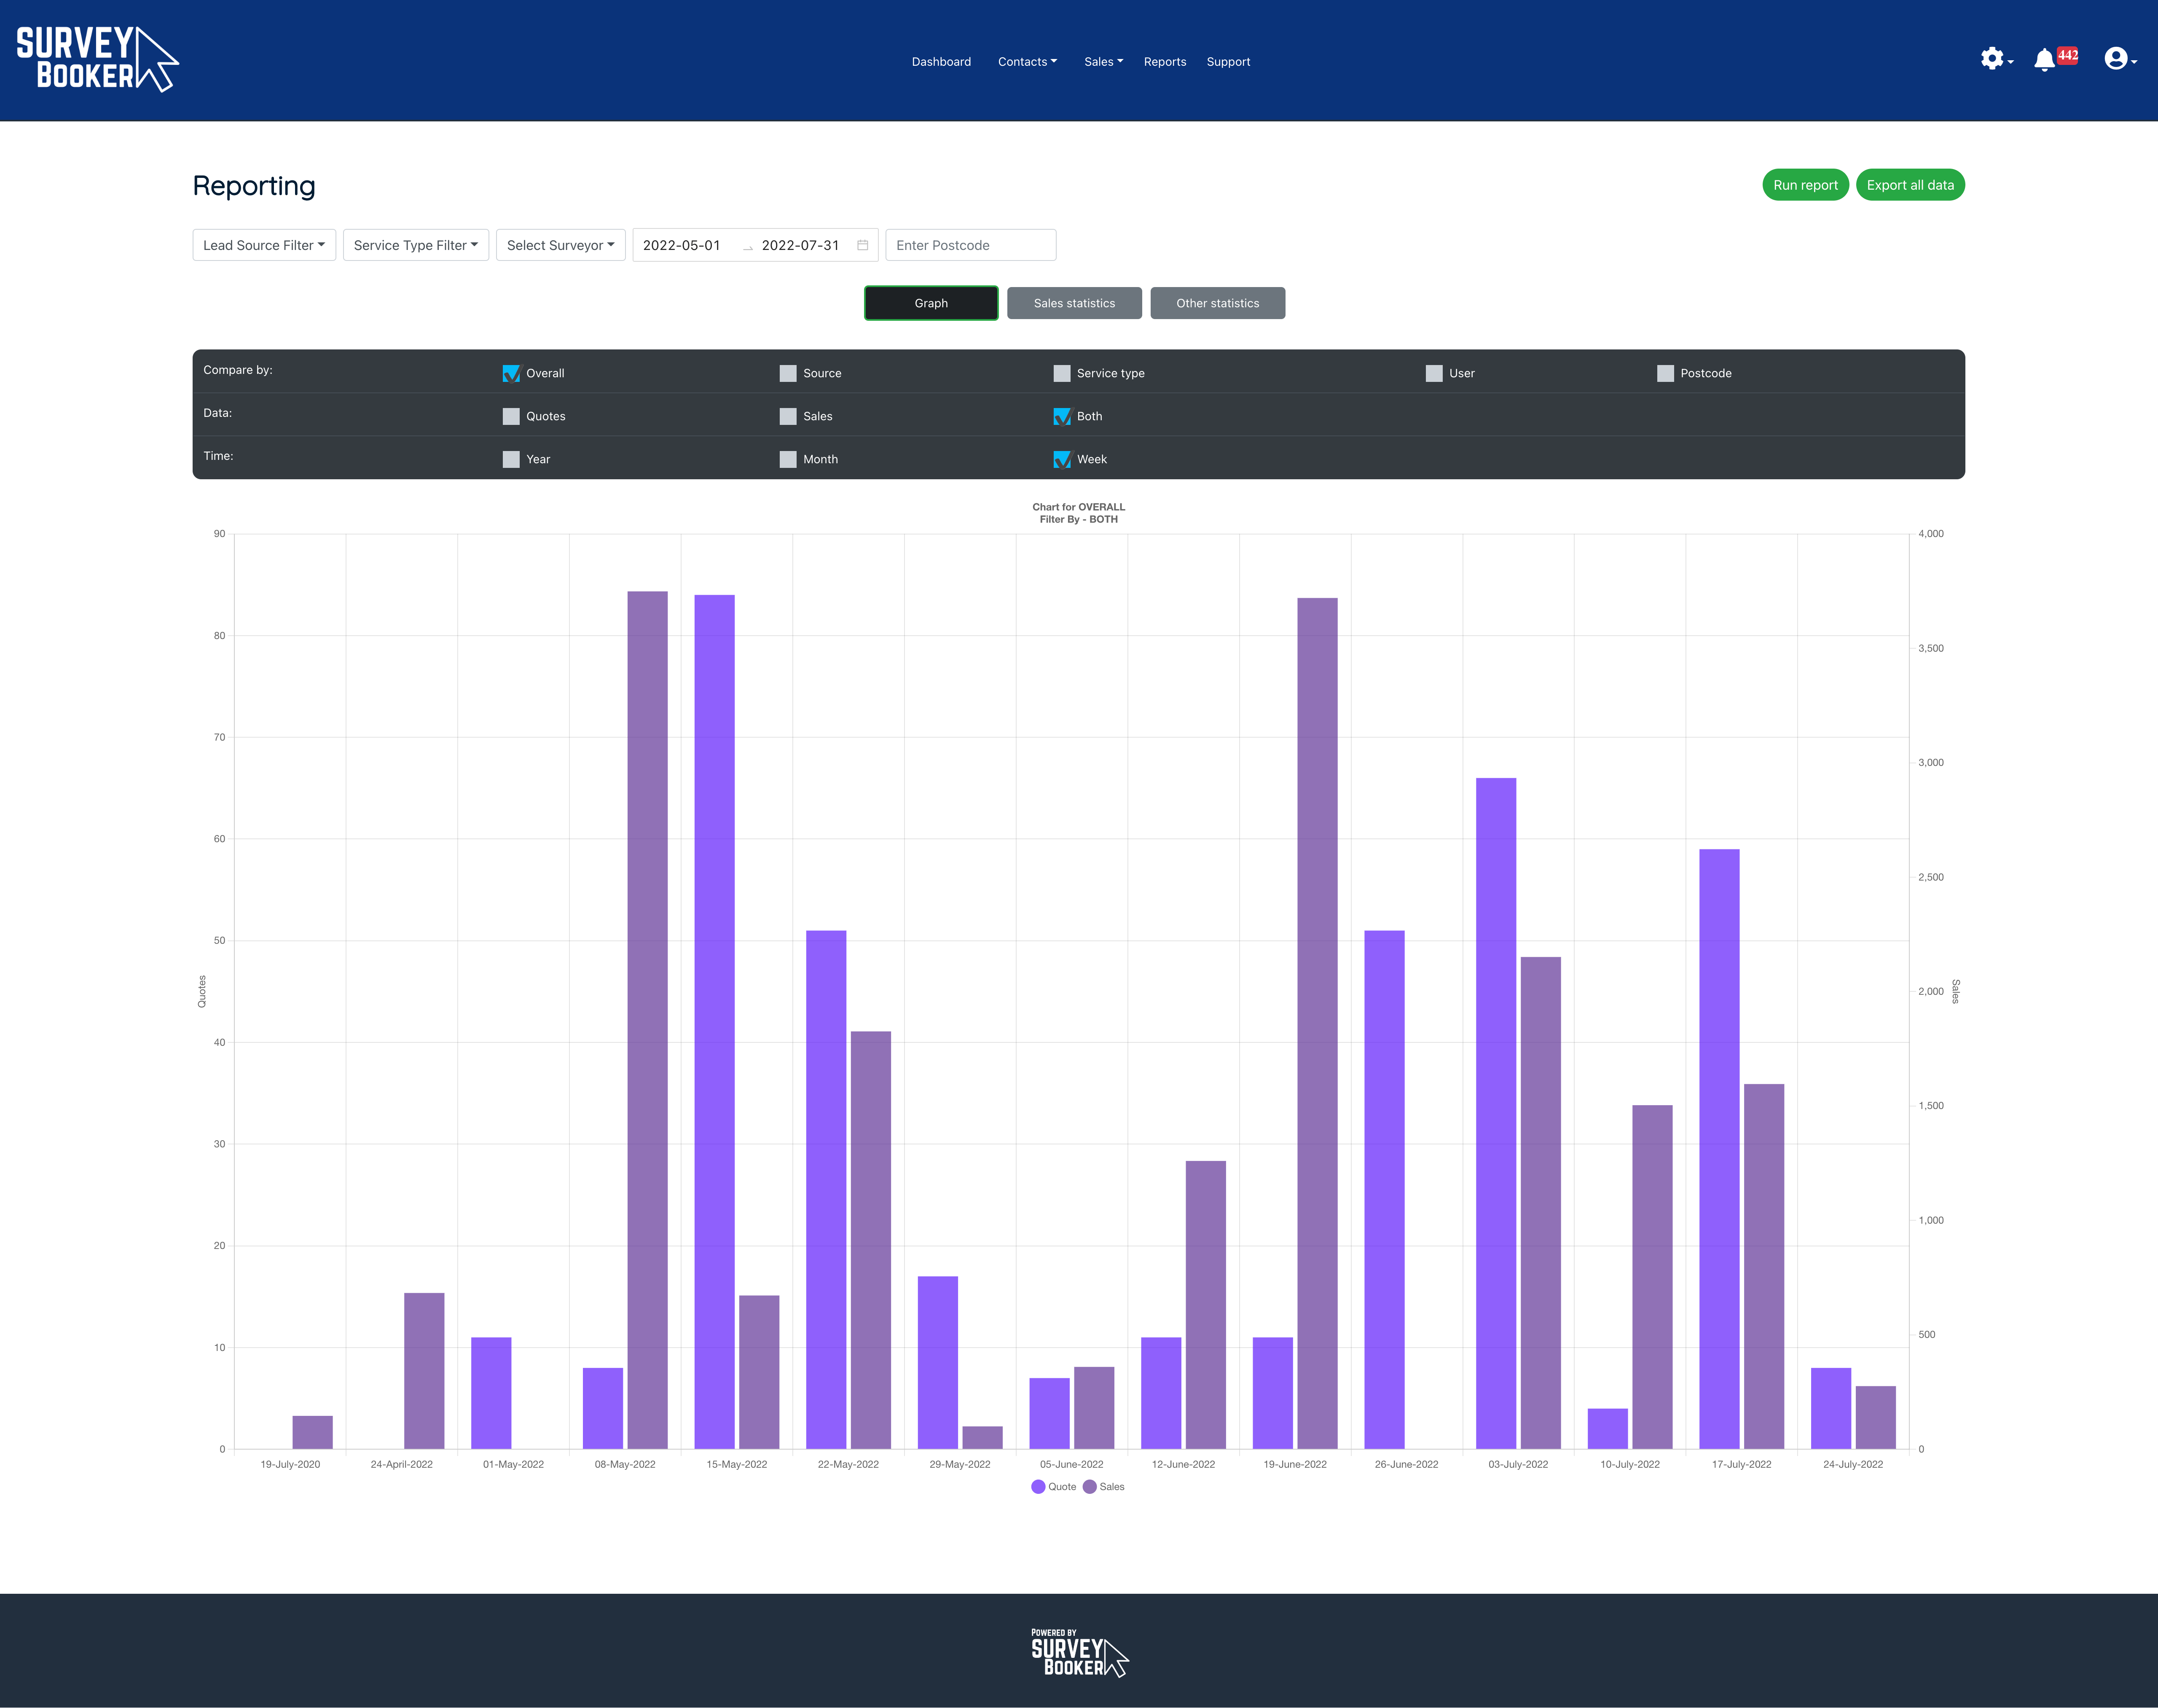
Reporting update
The reporting page has seen a major update to make viewing your reports faster and easier. View graphs and charts that can immediately display a breakdown of your data by lead source, job type, assigned user, location or date.
Export all data related to the report or export data related to specific metrics making it easy to understand the information behind the statistics.
Plans: All
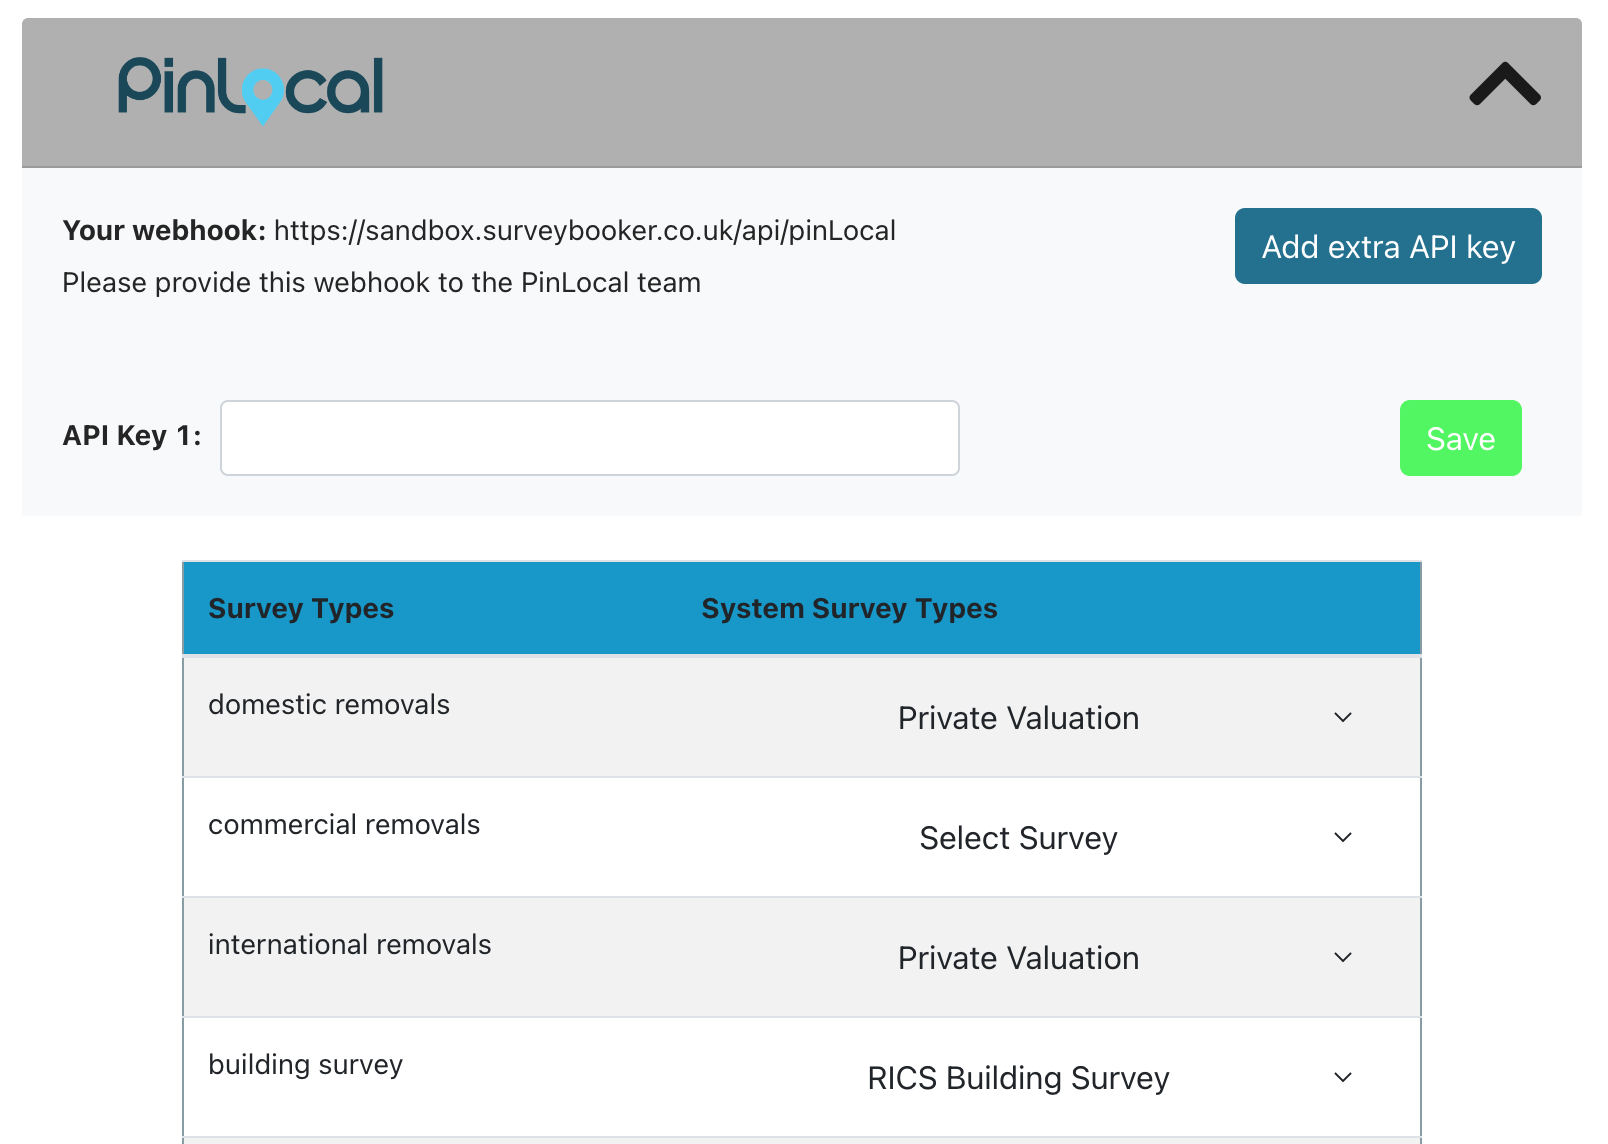
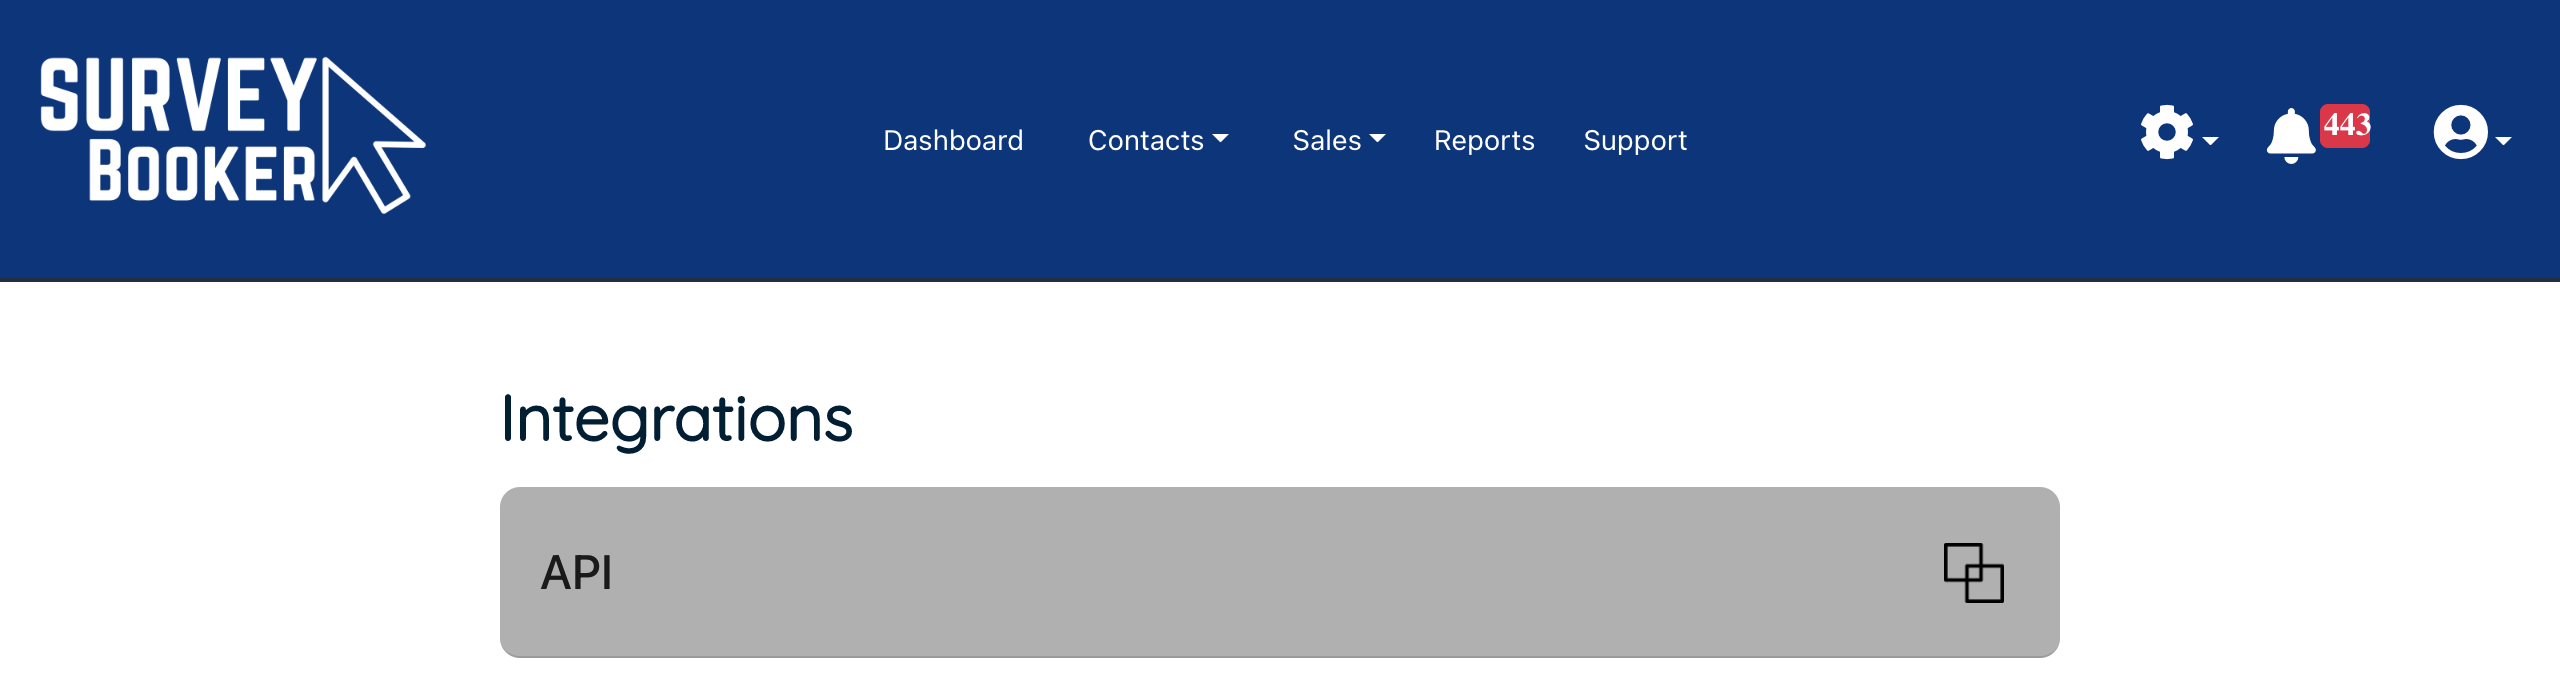
PinLocal Integration
Connect your PinLocal account to automatically save new leads from the PinLocal website. This operates in the same way as the existing feeds. Add your API key, set your pairings and add your webhook in your PinLocal account.
Plans: All
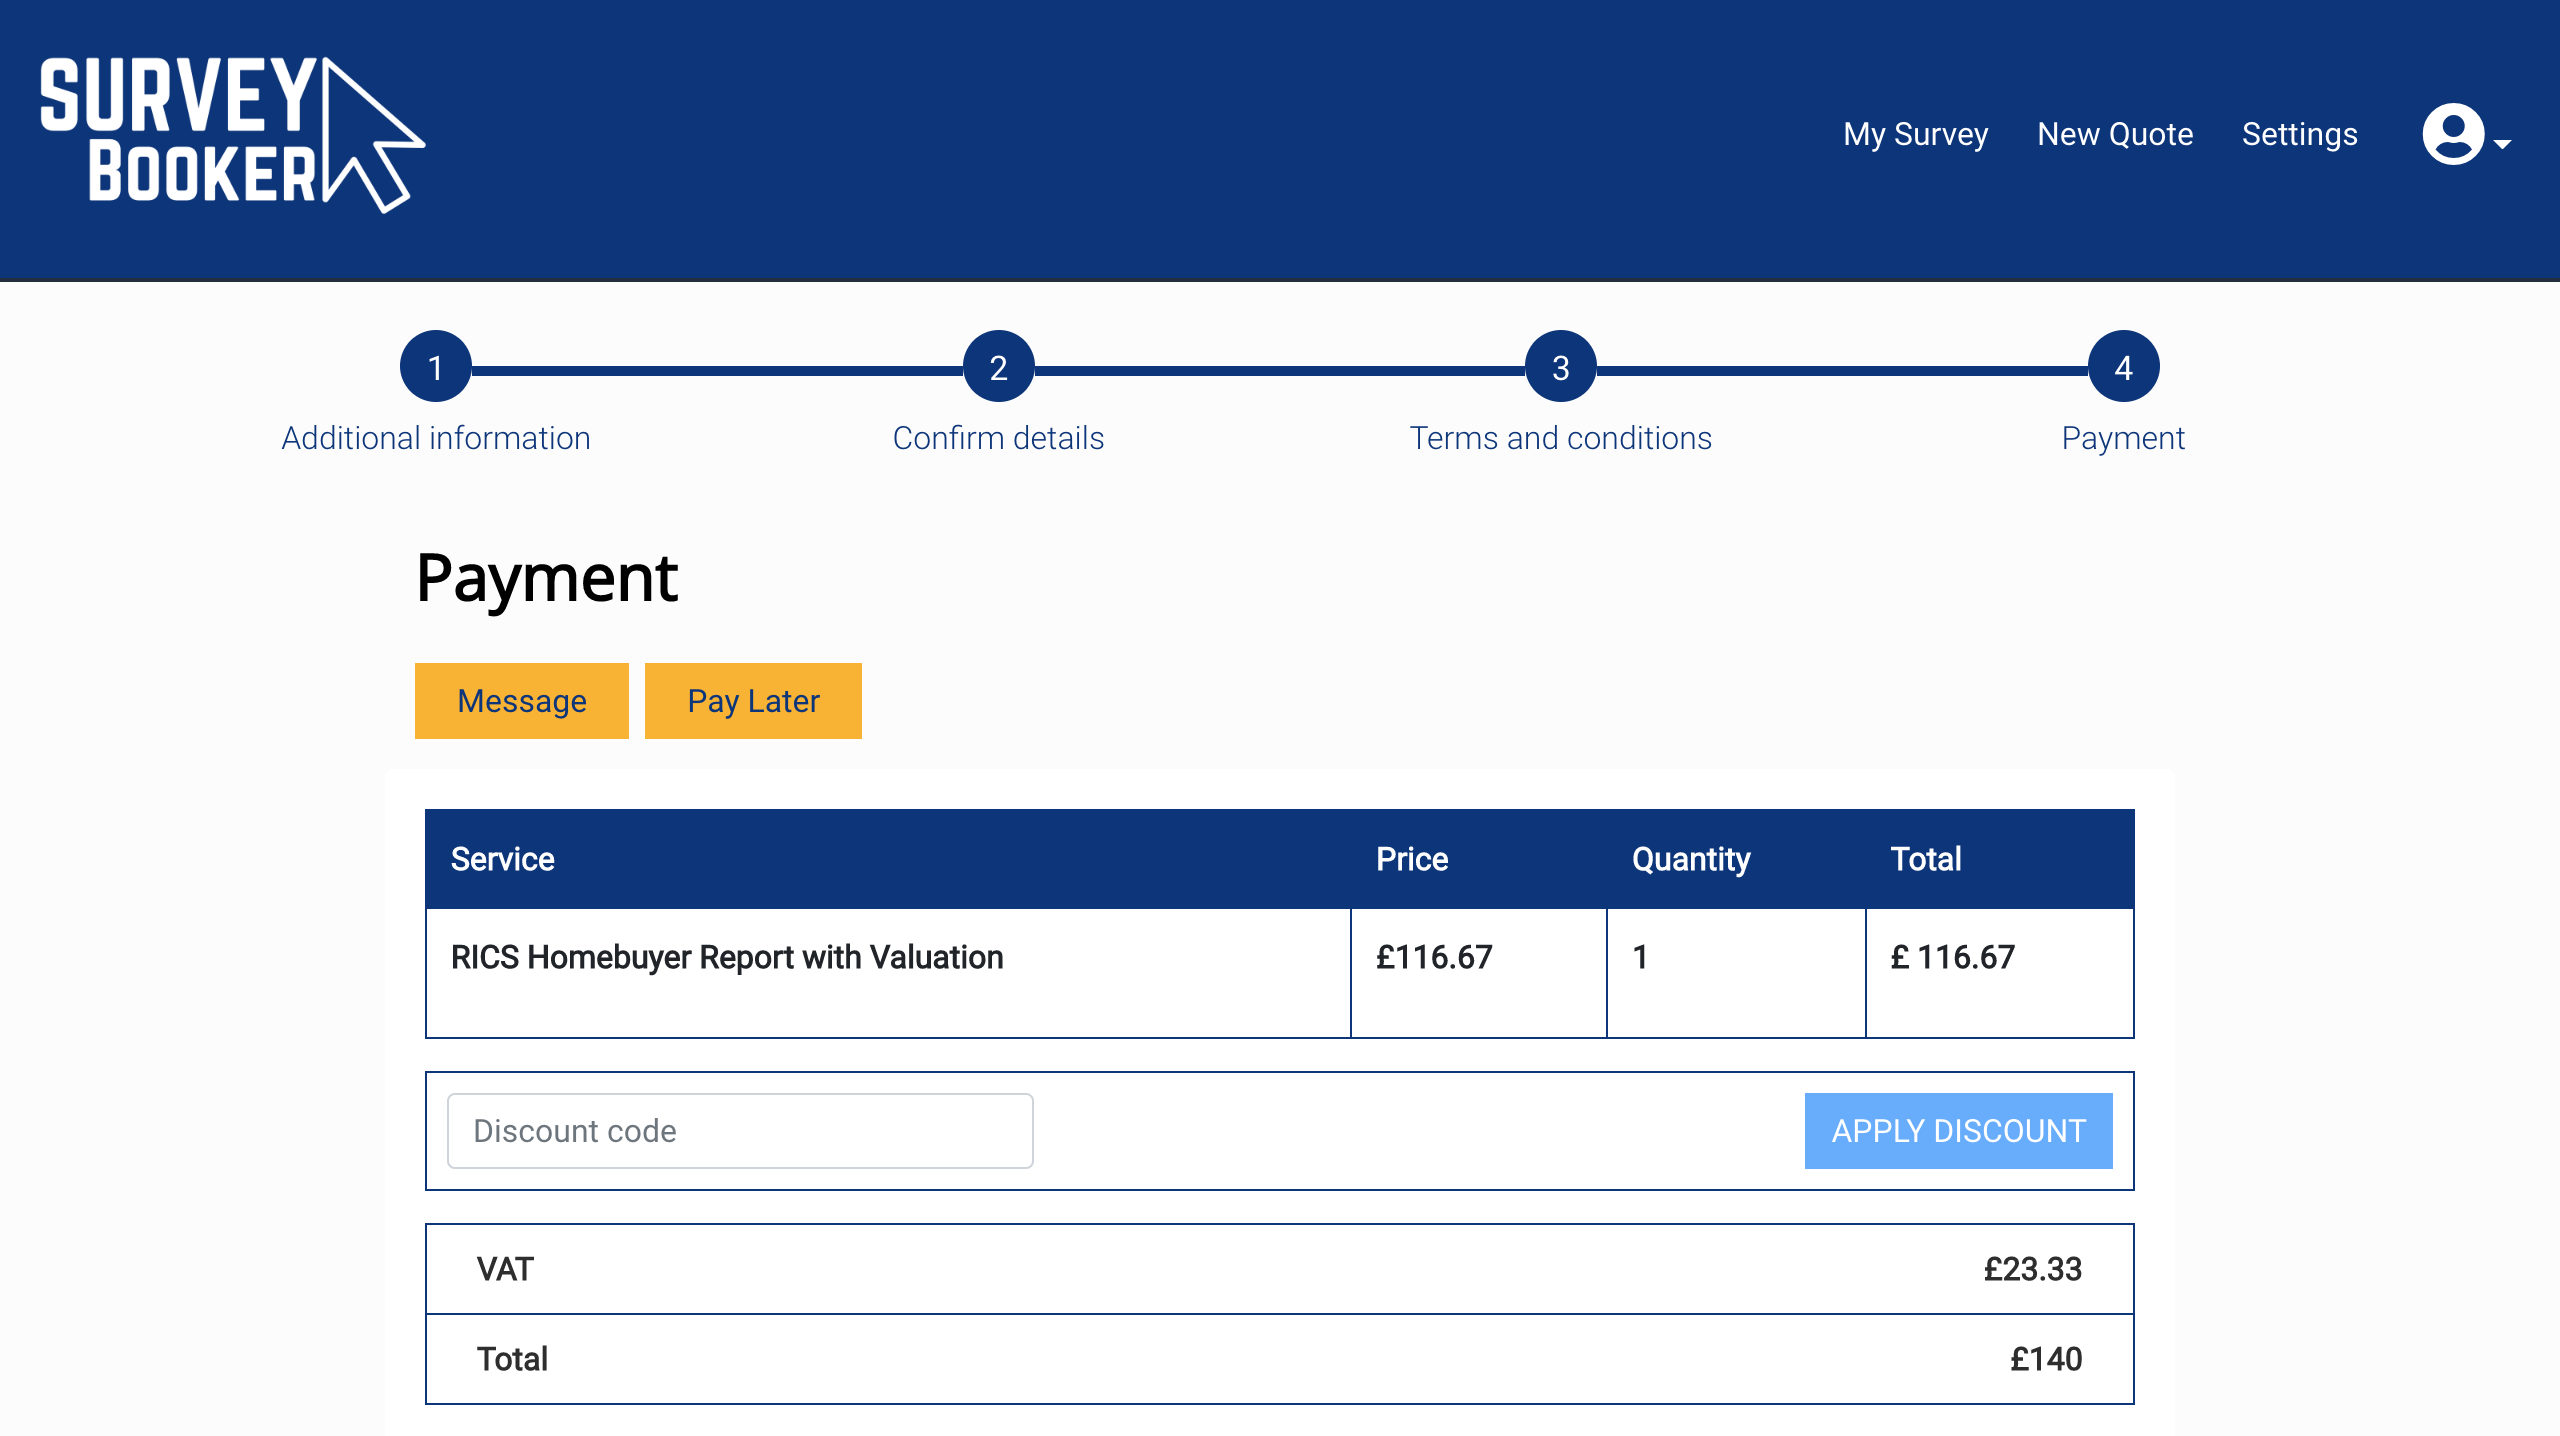
Discount codes
Want to run promotions? Set discount codes that you can provide to customers. These can be applied by customers on the payment page or added manually by you on the job timeline.
Set discount codes by:
- Job type
- Lead source
- Percentage / fixed amount
- Expiry date (fixed date / age of quote)
Plans: Pro / Large / Enterprise
GET APIs
Use our GET API to pull data from Survey Booker into other systems you use.
Please speak to the support team to request the API documentation.
Plans: Enterprise
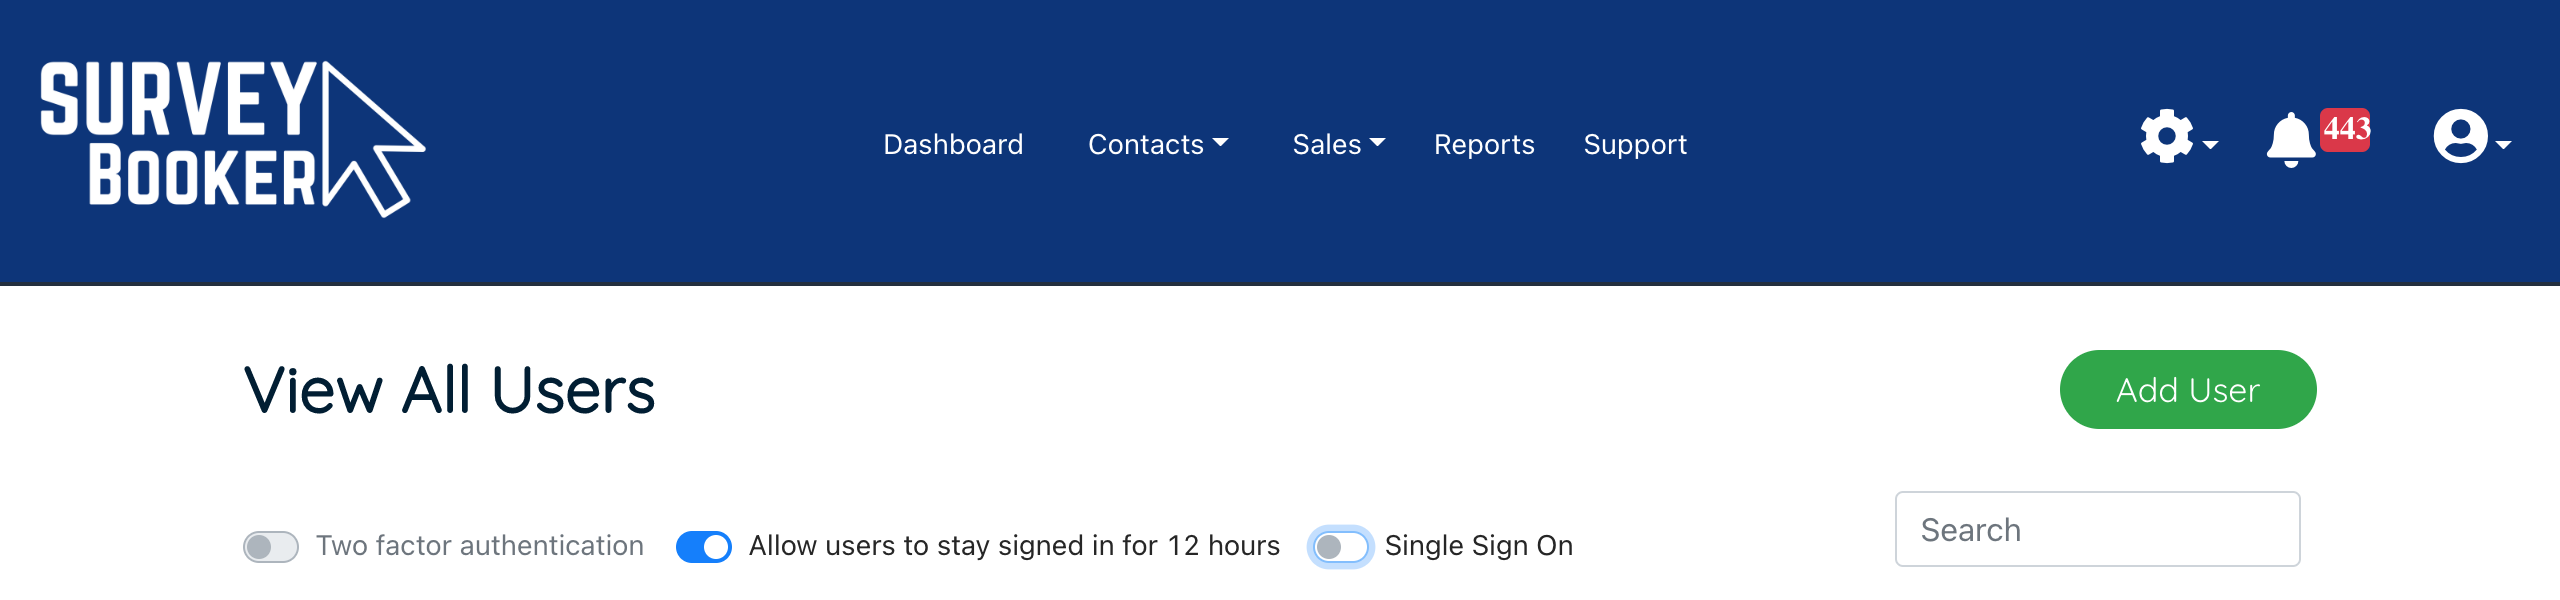
Single Sign On - Microsoft Azure
Require your users to sign into Survey Booker via their Microsoft login. Access can be blocked in Survey Booker when a user is removed from your Microsoft Azure tenant.
Plans: Enterprise
RingCentral (beta)
Use the RingCentral integration to automate your calls. Click a phone number and the call will start in RingCentral to your customer. Calls are logged on Survey Booker and the recording link is saved to SB.
Plans: Large, Enterprise
Other small updates to make life easier
We have a number of smaller updates to be released. Some of these are listed below and some more will be confirmed shortly.
- Quotes table
- Filters remain applied when you go back from a timeline page to the table to remove the need to open records in a new tab
- Layout adjusted to condense the page further and make navigating the table and pages easier
- Next deadline and created date filters to help narrow down data more easily
- Jobs table
- Jobs no longer require terms to appear here. Any record accepted (surveys) or won (projects) will appear here
- The report due date removes from the next deadline field once uploaded
- Manual quotes
- Stage filter for manual quotes removed
- Unpublished quotes appear immediately in your quotes table showing “Draft” on them until published
- Callback requests – a banner is now displayed on the record and it can be marked as completed
- User settings
- “surveyors” renamed to “users”
- You can now delete users from your account when needed
- Email settings – the plain text editor appears by default instead of the html code editor
- Office365 emails – automatic disconnect if a connection expires to prevent needing to resave your settings before reconnecting
- Notification table: bulk mark tasks due as complete in your notification table
- Regular users – the address / contact / company dropdown has been hidden from the timeline
- Archive options – “Expired” added
- Property type – “Maisonette” and “Town House” added
Customer Portal Release Note - 1st May 2022
Customer Portal Update - Release Note
We’ve made a large number of updates in this release. Most of these relate to updates to the customer portal to provide a refresh to what your customers see as well as various settings to personalise your general and customer portal settings.
Updated guides:
A list of new and updated guides can be found here:
- Customer portal pages – https://support.surveybooker.co.uk/a-guide-to-your-customer-portal-settings/
- Account settings pages – https://support.surveybooker.co.uk/a-guide-to-your-overall-account-settings-page/
- Select service page – https://support.surveybooker.co.uk/my-support/activating-survey-types-and-e-terms/
- Panel settings – https://support.surveybooker.co.uk/panel-settings/
All plans
Customer Account Design Updated
To view the changes yourself, add yourself as a contact in your contacts table using an email that isn’t used for another user type on the system (e.g. a different email to your surveyor login). You can then assign yourself to a quote and login with your customer email to see the new changes.
Quote result
Before
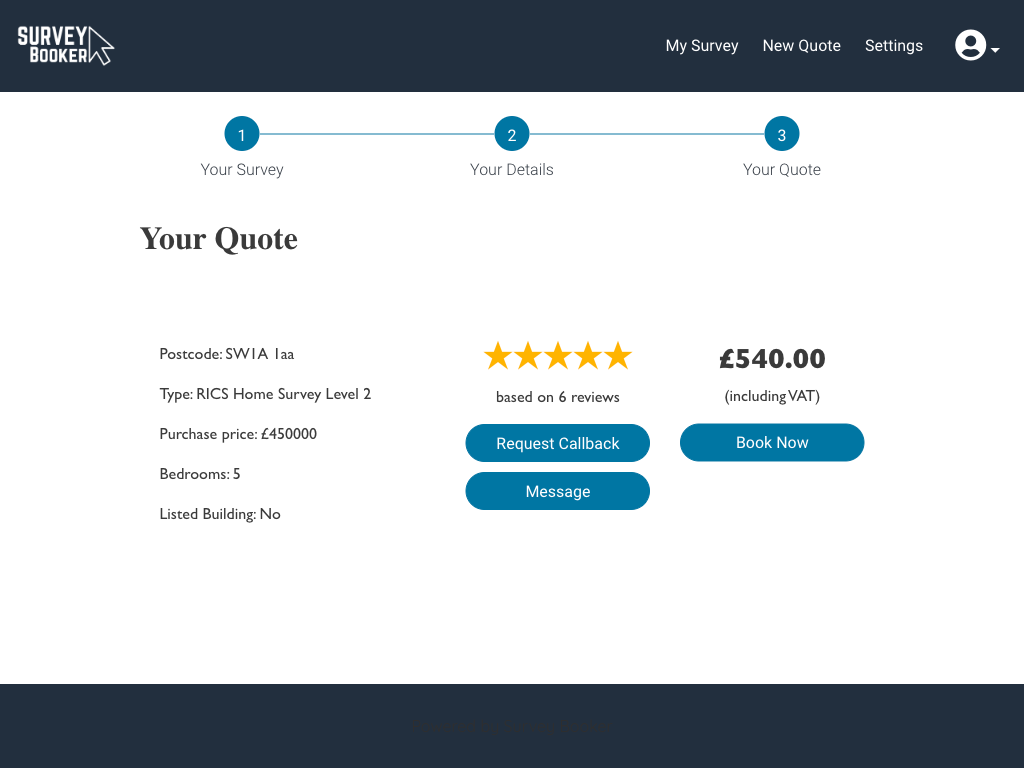
After
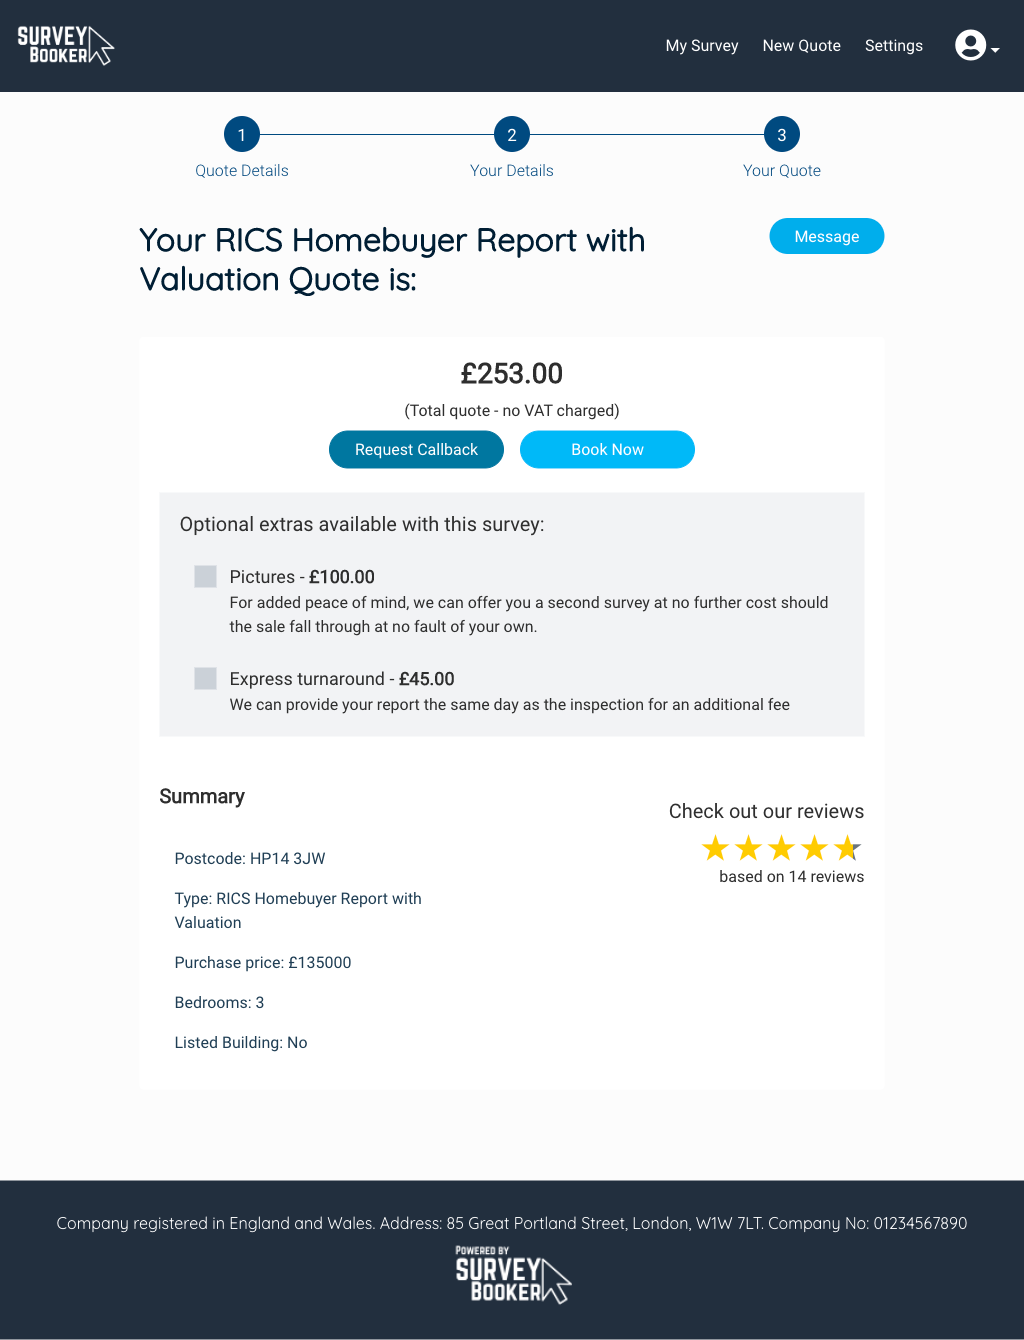
New title to the quote page with the quote central on the screen. Display optional extras here to show what else you can offer, show/hide reviews and more.
Customer dashboard
Before

After
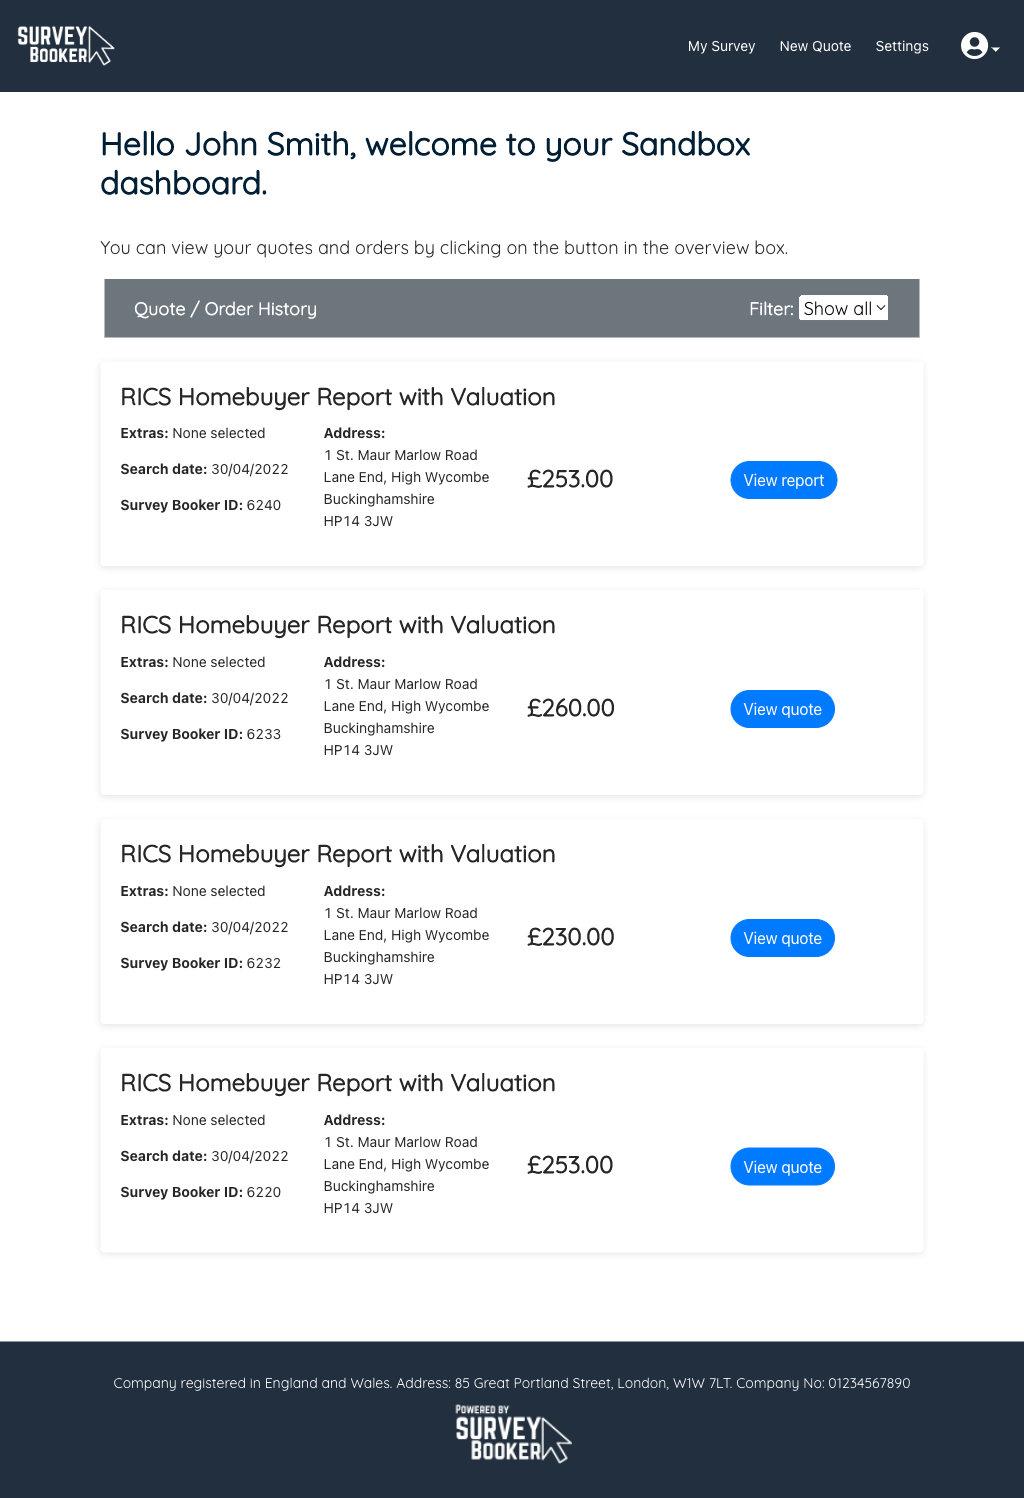
A modernised dashboard with a personalised welcome and a more detailed summary of each search/order.
Job tracker
Before
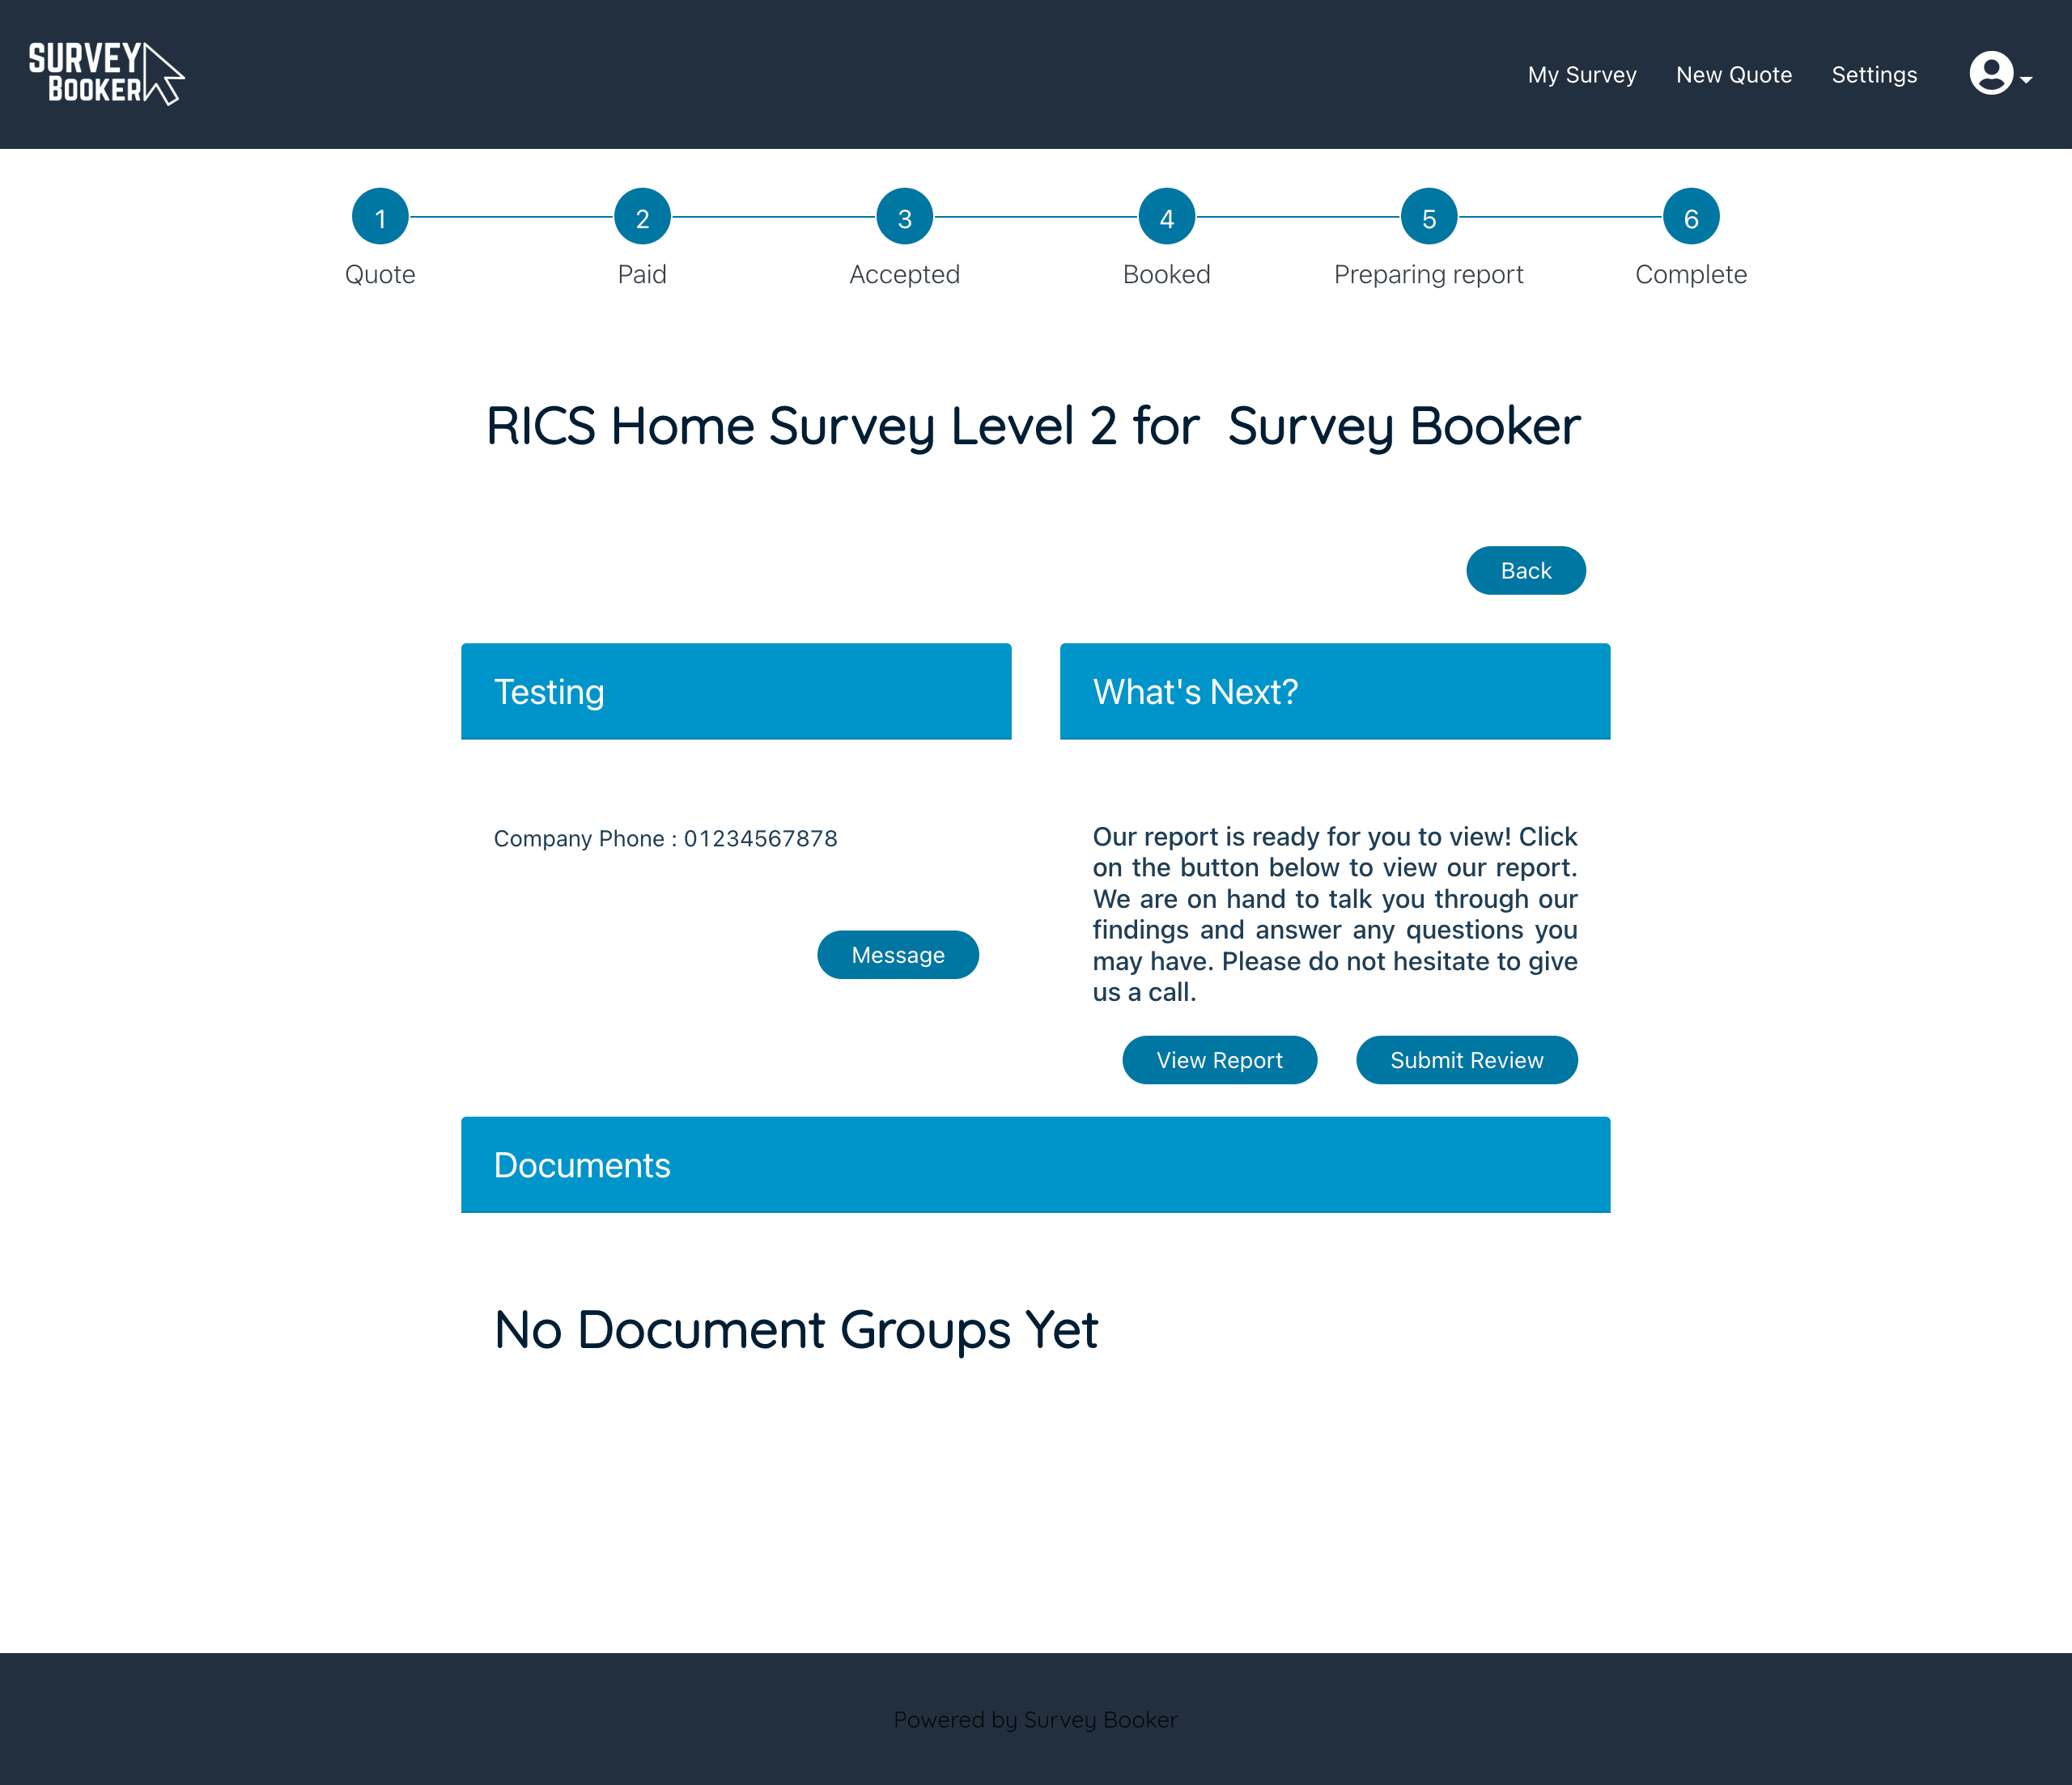
After
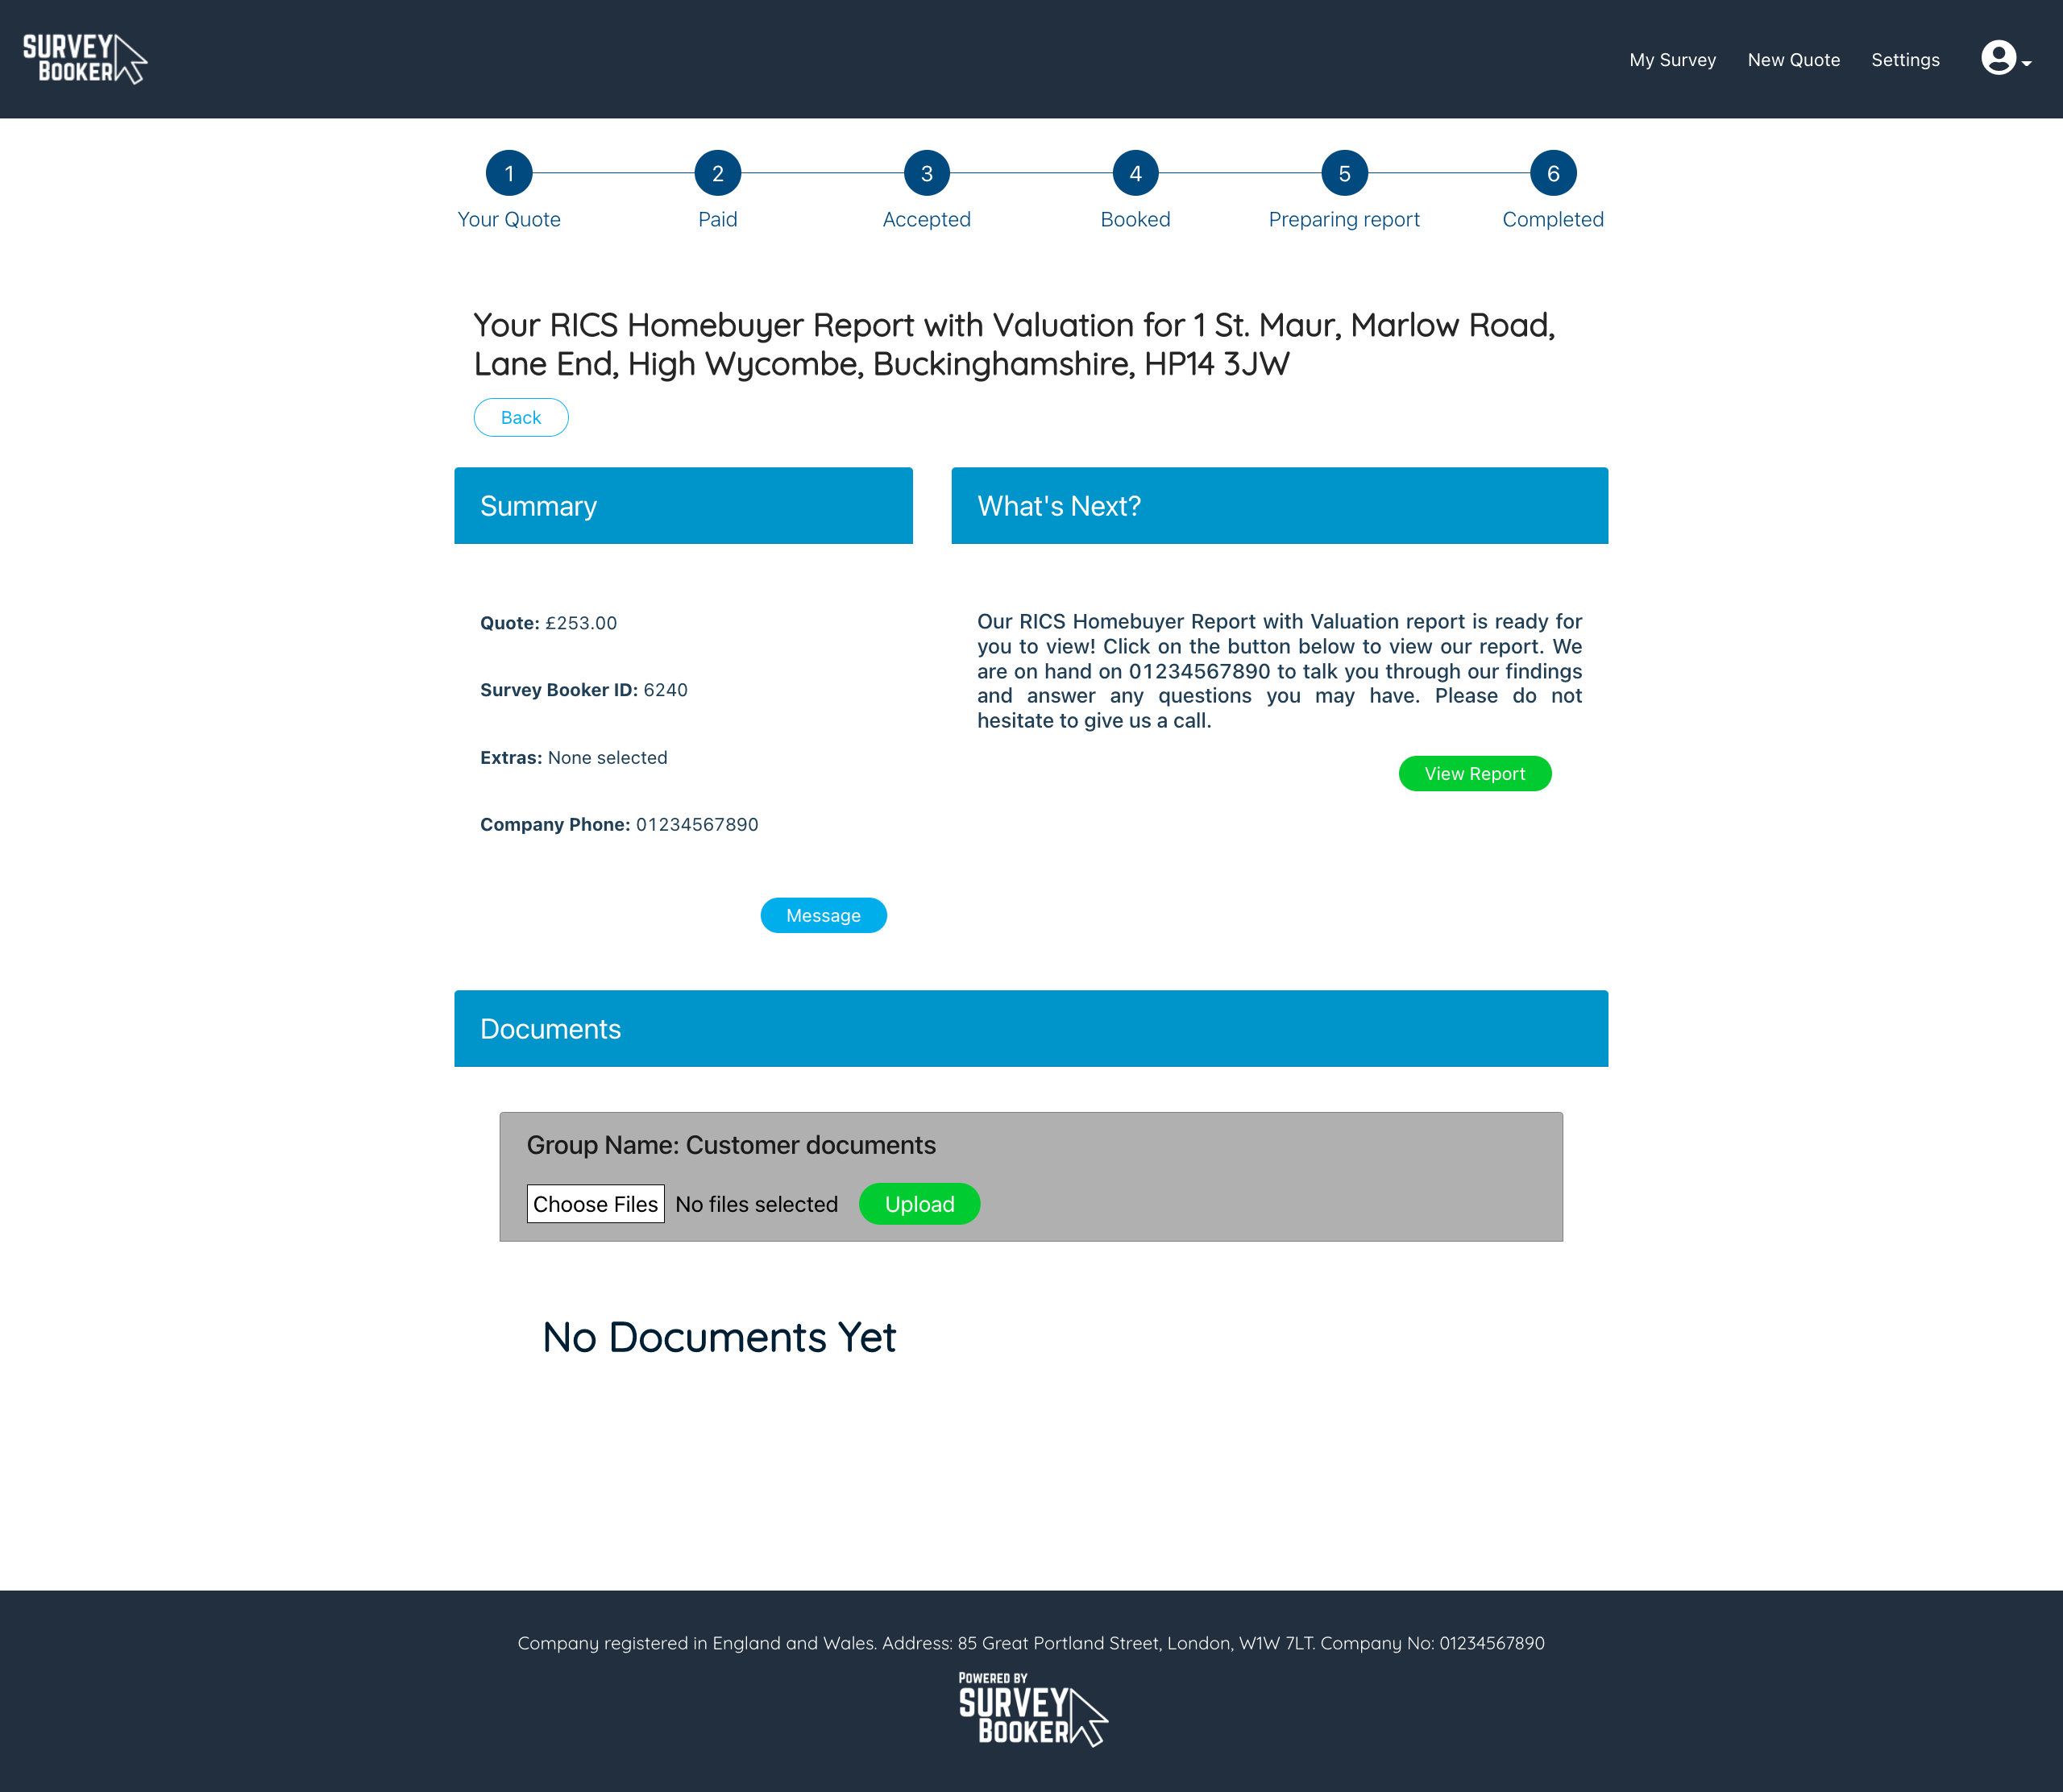
Customisable what’s next stage text (quote form personalisation feature) and a new section for customers to upload documents for a booking.
Customer portal
- Powered by Survey Booker logo – our site footer now includes a Powered by Survey Booker footer logo which can be set as a dark or light logo (Settings > Customer Portal Settings > Styling tab) so that they know where their data is being processed.
- Quote result page – we’ve updated the style of the quote result page to modernise the layout and improve engagement.
- Customer dashboard – an improved layout for viewing quote and order history. This includes the Survey Booker ID so your customer can easily provide you the job information. The view button now shows the status of the job and a filter that allows customers to view quotes/orders separately.
- Customer job tracker
- We’ve made small adjustments to the job tracker layout and the summary details displayed.
- Customers can now upload documents to a booked job using the documents upload section. This will then show to you on the documents tab for that job.
- Login page – this now provides a prompt to enter an email address if an account is not yet activated to receive a new account activation link helping to make logging in even easier!
- Accessibility – we have added page names to the browser tab for each customer portal page along with your company name.
- Reviews
- Choose to hide or show reviews on the quote page (Settings > Account settings)
- Set if all customers see the leave review button when a report is uploaded or only on request by you (Settings > Account settings)
- Privacy Policy – add your privacy policy for display on the quote form and create account page (Settings > Account settings)
- Learn more link – set a link to appear on your quote form above your services where customers can view more about your services (Settings > Customer portal settings > Quote form tab)
- Logo link – set a link back to your website instead of having the default link back to your quote form (Settings > Account settings).
- Hide the estimated report date banner in the customer portal so that they don’t see the report due date you have set (Settings > Customer portal > Account pages > Other settings)
Settings
- Quoting preferences – you can now set your quote preference by job type rather than for all job types. E.g. you could set a Level 2 Survey as an instant quote and a L3 Survey as an estimate to be confirmed (Settings > Survey settings > Quoting preference).
- Prevent completed jobs being deleted – set the number of days after completion before a job can be deleted (Settings > Survey settings > Select service > Report delete block column). If you try and delete a job that hasn’t reached this age, you won’t be able to delete the job to prevent accidental deletion of your records.
- User privileges – following the update, only Super admin users can delete quote/job records and contacts to protect your data.
- Set a custom “New quote” link that takes the customer to a quote form page of your choice such as a custom quote form (Settings > Account settings). This new quote link can be hidden entirely either for all customers (Settings > Customer Portal Settings > Account settings tab) or for customers from particular introducers (Introducer settings tab).
Other
- Outlook – you can now reply to an email chain from the job timeline page instead of having to create a new email.
- Enquiry method – the timeline can be used to set the enquiry method. This data can be viewed for all jobs in your quote table export. A job is automatically marked as ‘quote form’ when a search is made via the quote form, ‘API’ when a search is via an integration or you can set it as “phone” or “email’ if you have added the quote to the system.
- Optional extras – the price of the extra added to the job is now saved to each survey rather than globally. Once added the optional extra price can be edited by survey type if needed once added to the job.
- Zapier – four new fields have been added to the feed:
- signed terms date
- additional info
- property value
- agent company name (access)
Large plan
- Quote form personalisation feature:
- Extra settings have been added to this feature to control the font of all items on the page (inc buttons, placeholder text), set custom font colours, button shape, table header colours and more so you can further match your brand guidelines.
- How did you hear about us question for direct searches with custom answers set in your Customer Portal Settings.
- Show / hide quote form questions by job type.
- Set additional custom questions and answers
- Set custom service hover note text
- Add summary points about your service for each survey type on the quote result page
- Survey Hub: an adjustment has been made to the property types for flat and bungalow to make mapping easier.
This can all be viewed in the new customer portal settings (Settings > Customer Portal settings). A guide can be found here: https://support.surveybooker.co.uk/a-guide-to-your-customer-portal-settings/
Enterprise plan
Customer portal settings
- Availability and Coverage Alerts – provide an alert to customers about your general lead times and/or display different lead times for specific job types/locations if you have an extra wait in some locations (Settings > Survey settings > Quote preferences). You can also set if you want to block bookings where you no longer have coverage in your settings (Settings > Account settings).
- Set custom tracker text for the survey stage name and description that appears on the customer job tracker (Settings > Customer portal settings > Account settings tab).
Settings
- Autocomplete Address – customers can type in an address and be presented with address suggestions instead of searching by postcode and selecting from a list of addresses. Customers can also search for addresses on the booking pages.
- Panel settings – setup locations where you have partner firms that can carry out a job instead of you. Customers can then continue a search for a quote and pay in locations you don’t cover yourself but you have partners that do. Convert a direct job to a panel job where your capacity changes. View the panel settings guide here: https://support.surveybooker.co.uk/panel-settings/