

Webinar 12 - Reporting, Exporting, Google Calendar and Post Booking Questions
Webinar 12 - Reporting, Exporting, Google Calendar and Post Booking Questions
Learn more about how to get all the benefits from your new features!
✅ Exporting your data
✅ Running reports
✅ Connecting your Google calendar
✅ Setting up post-booking questions for customers to complete
Release Note - December 2024 - Release date 28th December
This update is to provides you with new integrations, new features and more ways to customise your experience.
Storage update
Bulk reassign users
SLA
Merging records
Tagging users in notes / UI change
SMS API
Second SMS provider
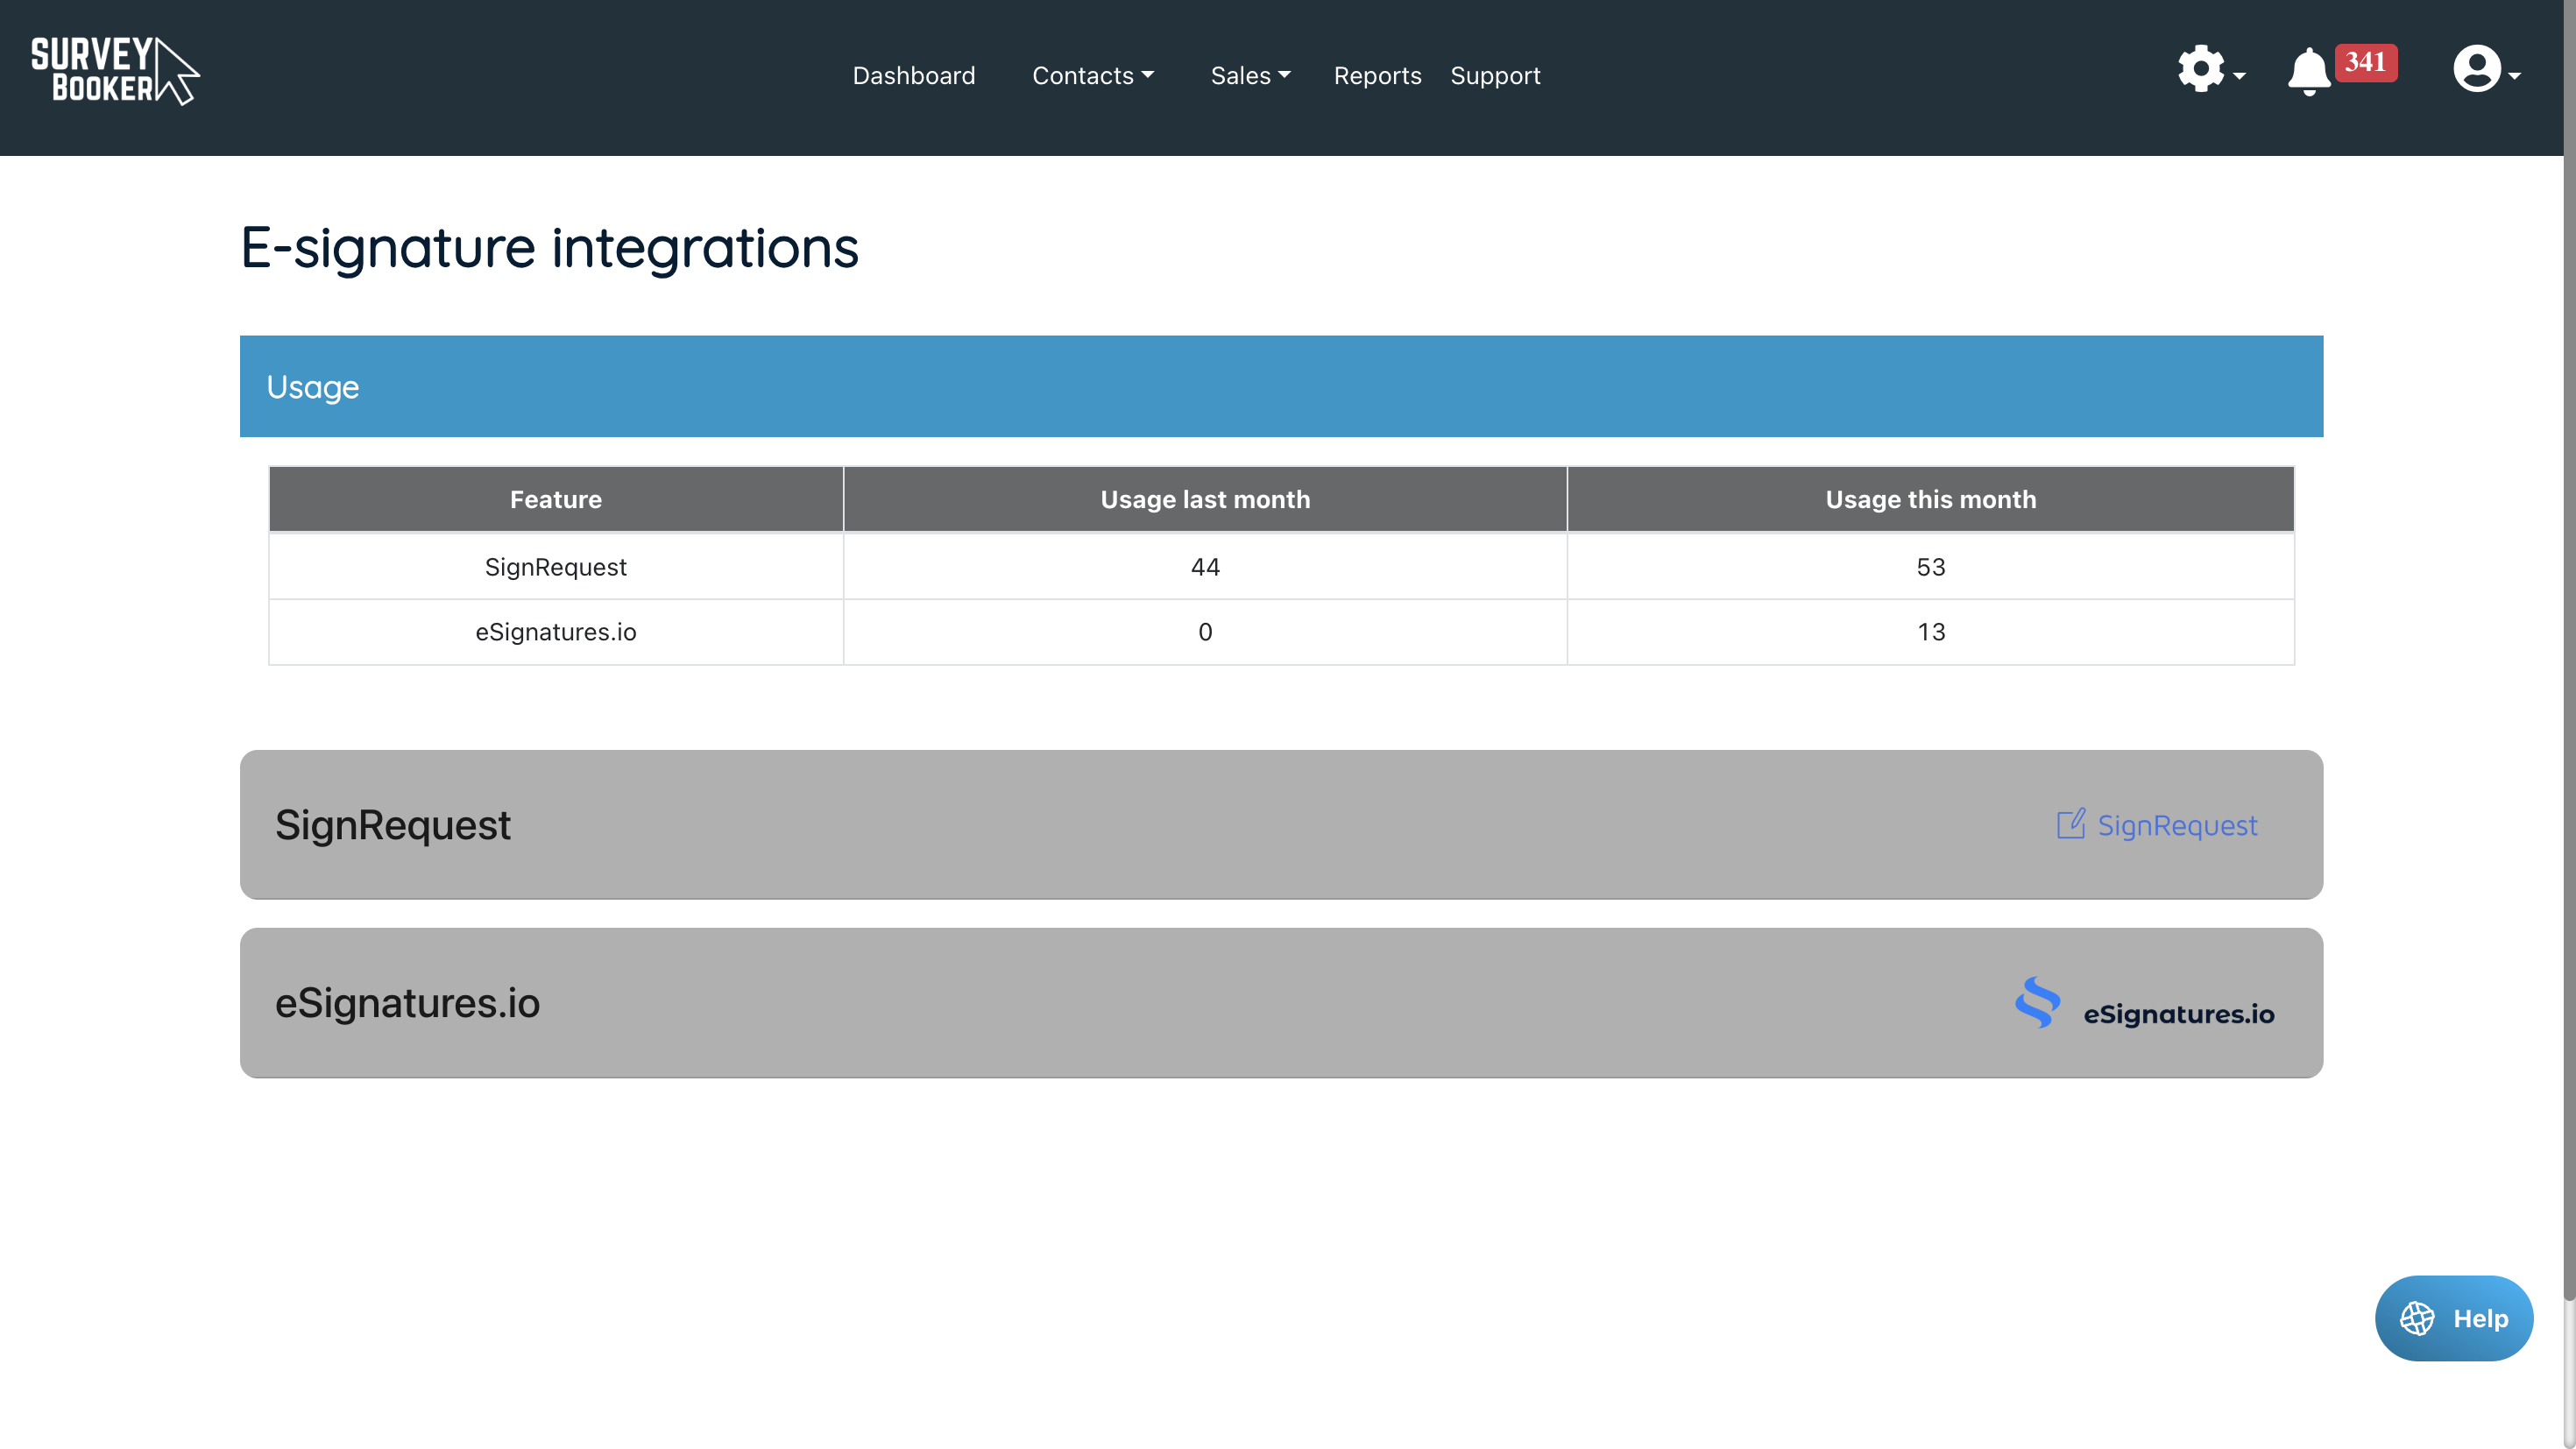
Additional e-signature provider
Contacted list options
Duplicate lead flag
Smaller refinements
Storage update
Why have we made this update?
Currently, we send out links to customers that do not expire. To help keep your documents secure, we will send out links that expire so that a link can’t end up in the wrong hands with the document accessible. By sharing expiring links, a link will be valid when it’s needed and then no longer allow access once it has expired to help keep your documents safe.
Available on: all plans
How it works: the link received by a customer to download their report will be active for 7 days and then expire. After this you can resend a new link or the customer can download their report via their account.
**IMPORTANT DETAILS**
REPORTS / REPORT AVAILABLE EMAIL TEMPLATE: Any links sent to customers before the update will all become invalid/expire. We recommend updating your email template before the update to say your link will be valid until COB on the 27th December. A new link can be accessed by logging into the customer portal.
For reports sent out after the update, the link will be valid for 7 days. After this the link will expire. We recommend updating your report available template after the update to state that report download links are valid for 7 days after which the report can be accessed via the customer portal.
EMAIL SIGNATURES: any email signatures set up using a link to a document from the email settings documents tab will no longer work and your image will not appear in any email templates sent out after the update. You MUST upload your email signature images to your website media area and use the media URL in your email templates for your email signature to use any imagery.
Note: This does not affect terms sent to customers to be signed – these links will continue to work as these are separate to stored documents.
Additional e-signature integration
Why have we made this update?
There are two key reasons why we’re integrating a second provider. Firstly, you can choose which provider you’d like to use. We’ve chosen the new provider based on the functionality offered. Rather than integrate a provider that offers very similar functionality, the new provider provides different document formats and tag settings offering you flexibility on how you send out your terms. The second reason we’ve added a second provider is to help provide an alternative method for sending terms should one provider go down. You can set up different templates to work with each provider so they’re ready if you ever need to switch across.
Available on: all plans
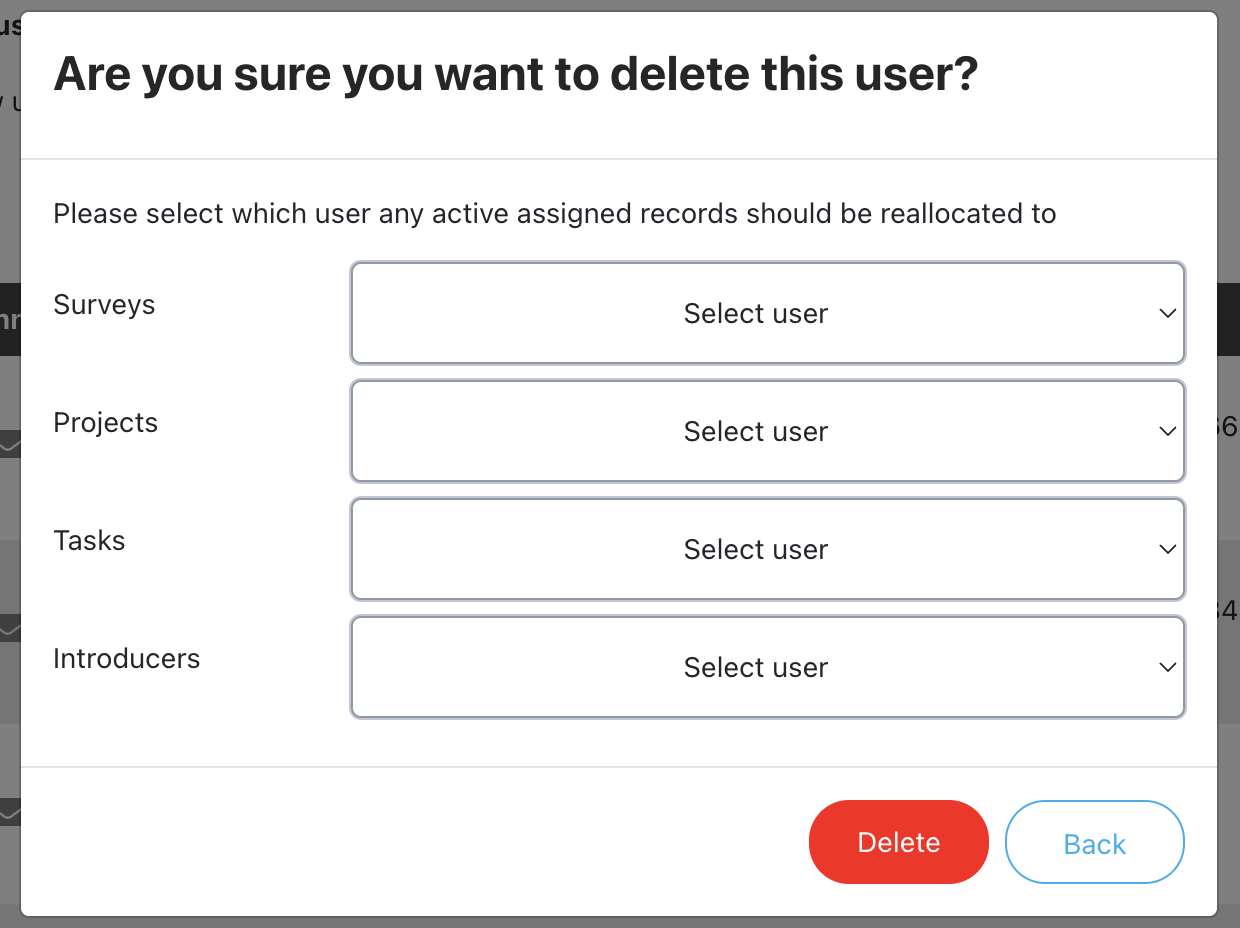
Bulk reassign user records on deletion
Why have we made this update?
Currently, when you delete users, any active jobs, tasks etc will remain assigned to the deleted user. This update allows you to reassign any active records to other users so that they can be continued up by someone else, saving the need to manually update records individually.
Available on: All plans
Manage user settings
- Select the user you want to delete
- Use the pop up that appears to set which active record types should be assigned to other users
- Archived, cancelled and completed records will remain assigned to the deleted user for reporting purposes
'Contacted' field options
Why have we made this update?
The contacted field options are currently fixed. This update allows you to edit what values appear for you to select so you can control your own last contacted status.
Available on: All plans

SLAs
Why have we made this update?
This new field and table column allows you to set your own Red, Amber, Green status colour to see which leads you need to deal with as a priority.
Available on: Enterprise
Settings:
- Use the settings to set how long a lead stays green and how long it stays amber before turning red and set which lead sources the SLA applies to
- View the remaining SLA time or time over the SLA on the quotes table
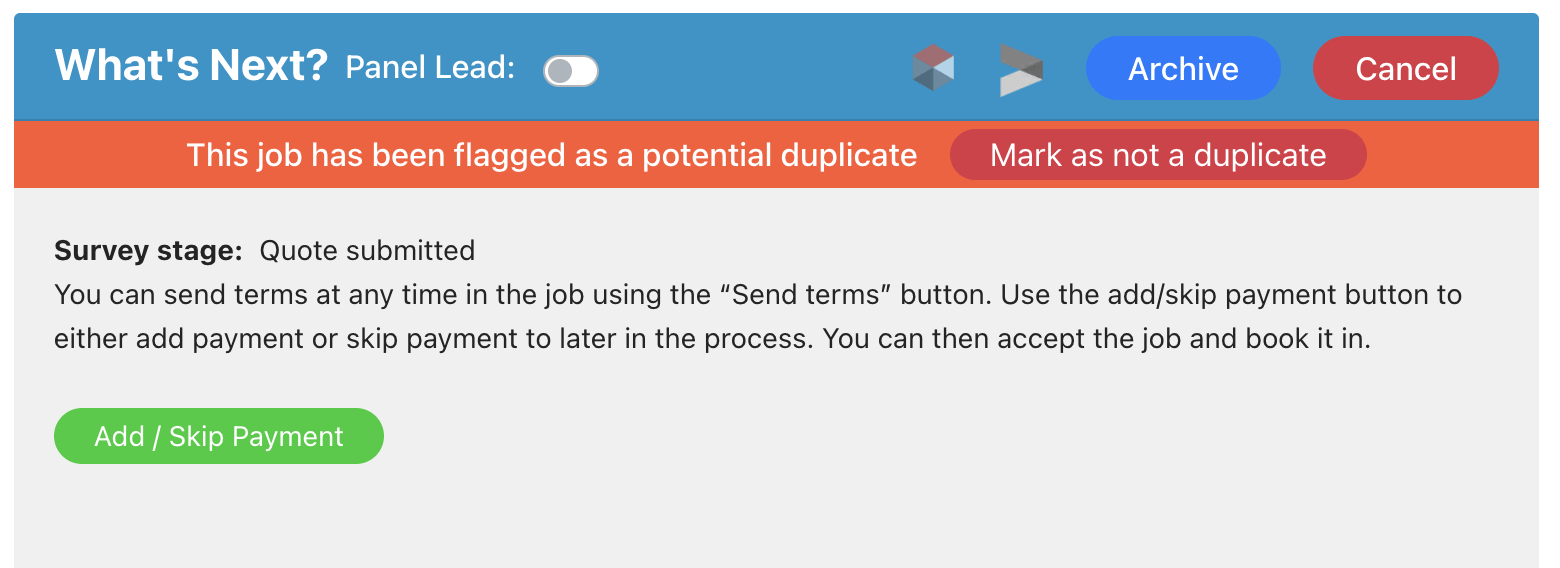
Duplicate lead flag
Why have we made this update?
We’ve added a setting that allows you to set if a lead should display as a potential duplicate in the quotes table. You can then override this on the job record to mark it as not a duplicate. This can help you see which leads are more likely to be unique to follow up on first.
Available on: All plans
- Set what determines if a lead is flagged as a duplicate (same name, same number or same email)
- If a lead has the same name, email or number (if active in your settings), the system will display ‘Duplicate’ on the view job button
- You can then review the quote record and keep it marked as a duplicate or remove the duplicate alert
Second SMS provider
Why have we made this update?
There are two reasons. Firstly, different providers offer different features and billing. This update means you can choose your preferred provider. Secondly, should one provider go down, you can switch temporarily to the alternative provider to keep messages sending until the other one comes back online.
Available on: Advanced, Enterprise
- Choose if you are integrated via SMS Global or Twilio.
- Add your integration details and set up credits on the relevant platform.
SMS Patch API
Why have we made this update?
Trigger a custom SMS message to a customer on a survey when you make an update to a job on another system.
Available on: Advanced, Enterprise
Merging records
Why have we made this update?
Sometimes you can end up with a duplicate record. E.g. the same property is entered slightly differently, a customer searches for the same quote via two different sources and more. This update allows you to merge details from one record into another to consolidate information.
Available on: All plans
- Merge quotes, contacts, properties, companies and referrers.
- Add across notes, documents, emails, tasks and call logs from one record to the other before the other record is deleted.
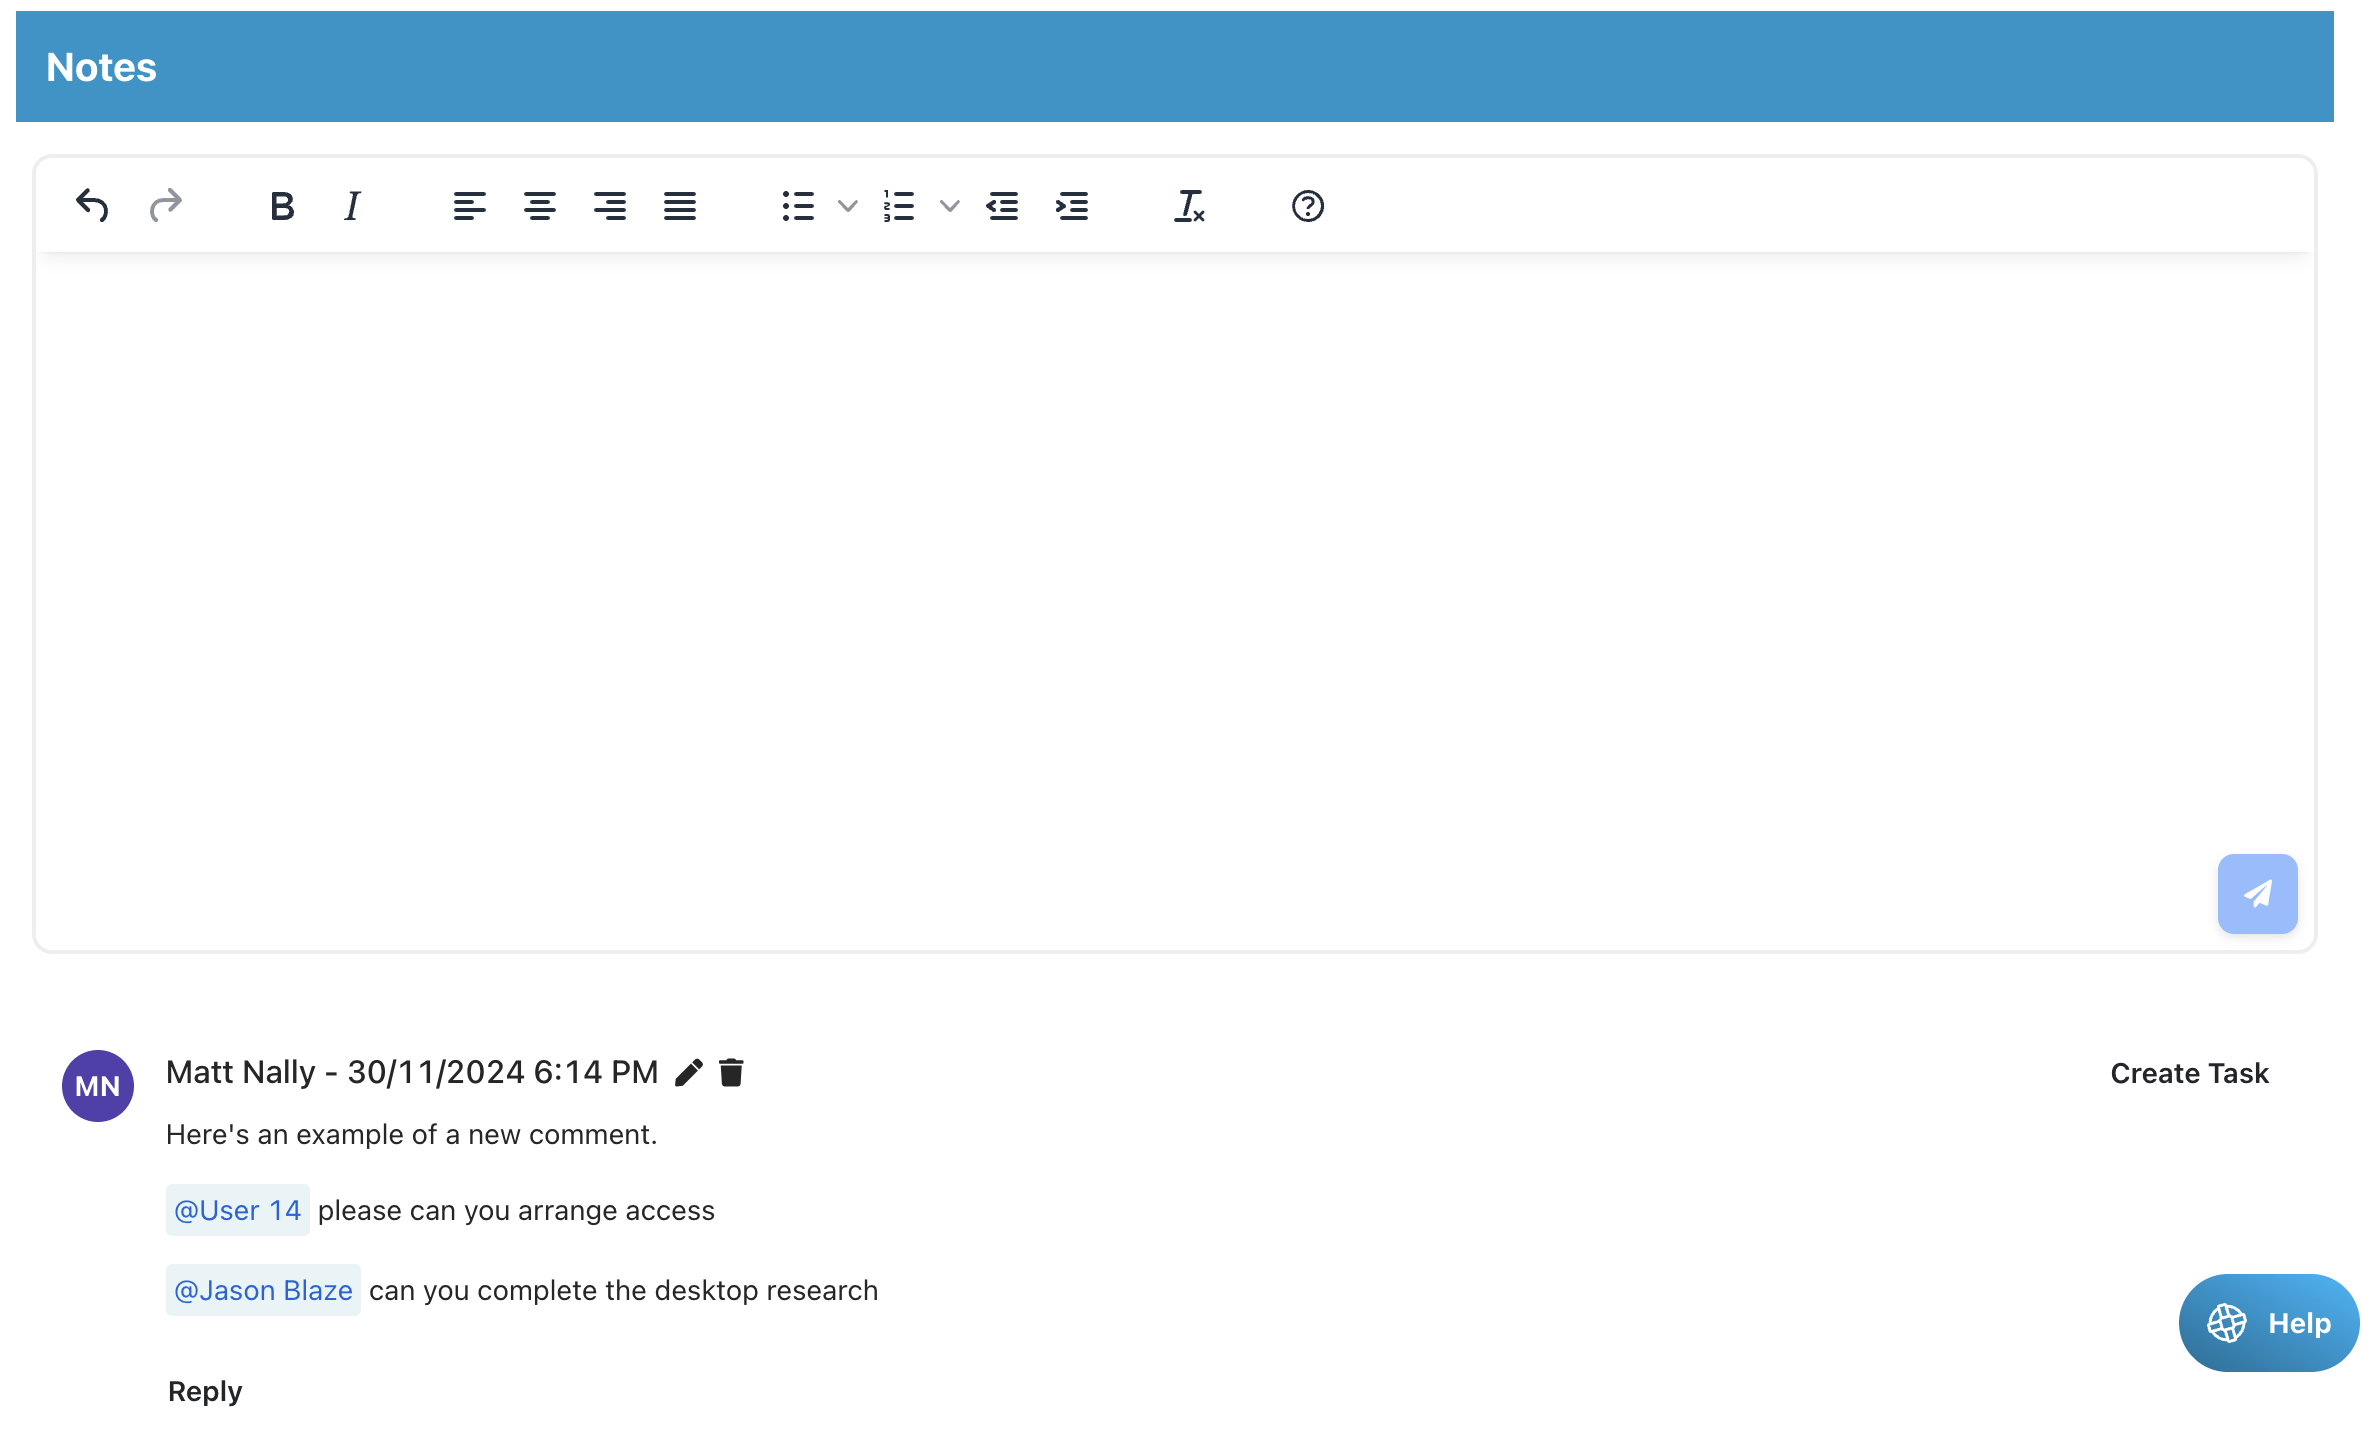
Tagging team members in notes and quicker note creation
Why have we made this update?
To make it easier to add nots and alert certain team members to key notes you’ll now be able to tag a team member in a note. This will notify them so they are kept in the loop on any important updates. We’ve also simplified note creation, removing the add note button to display a notes textbox allowing formatting of notes, a single field and quicker saving.
Available on: All plans
- Tag a user in a comment
- The user can be advised by email notification (based on their notification settings), mobile app push notification, or via the new “Tags” section in the notification table.
- Tag a user by inputting @ and then typing the user’s name or tag @AccountManager to tag the account manager of a referrer in a note.
Various smaller refinements to make life easier
EMAILS
Signature: In the email composer, you can now set an HTML email signature instead of a plain text one so that any emails sent out look more personalised.
Terms follow-up email – the shortcode for the terms document signature link can now be included in the terms follow-up email instead of referring customers back to the original email.
QUOTES/JOBS
Jobs tables – the jobs table will include the same columns that the quote tables include
Referral fees – this will now be calculated on the total fee (inc extras), not just the survey fee
Marketing preference – the contact section of the job timeline will show the marketing email preference yes/no
Manual quote – the ‘report name’ field will automatically populate with the customers name when creating the quote
Booking pop-up – the unassigned column on the pop-up will now appear to the right of the pop up and unticking unassigned from the dropdown will remove it from view.
Terms document tags (e-signing) – the referrer name tag will use the group, branch or contact name instead of the main contact name on the group or branch record. We’ve also added a tag of the full customer name (salutation, first name, last name).
Create task pop-up – a new time selector has been added to make it easier to quickly create a task versus the current date/time selector.
SETTINGS
Quote pages: the “Your quote” step text in the quote form timeline bar will be customisable.
Post booking questions: the “Submit booking questions” button text can be customised
Draft report document visibility block: if set to be visible to the customer it will be set to block the report from being viewed if terms or payment are outstanding (unless payment is set to be made via the referrer in the referrer settings)
Book Now button:
- Quote result page: the quote result page has a “Book now” button. You can change the wording on this button in the customer portal settings.
- Email template: the account activation button default text says “Book now” if the account is not yet activated or “Log in” if activated. You can set your own text in the customer portal settings.
ACCOUNT ACTIVATION
Login page: the login page has been updated so that a user entering their email on the login page that hasn’t yet activated their account will receive the customer account activation email template or referrer email template. This replaces a historical setting that used a general activation template on this page. Previously, these custom templates were used if pressing “Send activation email” on the relevant customer or referrer records but not if the customer entered their email on the login page. This update will make it possible to personalise your customer experience further.
REFERRER ACCOUNTS
Referral partner job tracker page: the tracker bar at the top will use the same stage names as set in the customer portal
New tags: a new tag of [Introducer Contact Name] has been added for the emails. This will input the assigned contact level name into emails. The existing introducer first name/ last name tags put the name of the person being emailed in (e.g. if emailing the branch level record, it puts the name of the person at the branch name in the email). This new tag will put the first/last name of the contact level referrer assigned to the job. Therefore, if an update email goes to the branch level the new tag will put the name of the contact that referred the lead in the email.
GET API – Referrer module: the ‘Last modified’ field is being added to help show the last time the overview page was edited or the notification preferences were changed. The last activity field shows when a note, task, or email was last added.
Phone number column – has been added to the referrer table to help search for records.
PROPERTIES
Add property: we’re removing the property name field when adding a property.
LOGS
Unassigned user: if unassigning a user, the activity log will now show who was unassigned and who by
CUSTOMER ACCOUNTS
Additional info page: the property details at the top of the page will hide any fields that were hidden on the quote form (e.g. if tenure was hidden on the quote form, it will be hidden here too.
Quote result page pop-up: the wording is being adjusted slightly as not all jobs have quotes automatically created or welcome emails sent. The new text displays the wording: “We have received your search details and a member of the team will be in touch shortly to discuss your requirements. If we’ve provided an automated quote you can press “Book now” or speak to a member of our team who will be happy to help! Many thanks, [Company Name]”
EXPORTS
Property value: the quote table and report page exports will now include the property value
Release Note - October 12th 2024
This update is to provide background processing updates to help you run larger reports. It also provides some extra background features depending on plan to help you manage your sales.
Exports and reports
Post booking questions
Google email and calendar
Smaller refinements
Exports and Reporting Page Update
Why have we made this update?
Currently, we process reports and exports in real-time. This limits the size of the report or export that can be run to ensure we can still load other data for you. In this update, we’re changing how we process exports and the reporting page to enable you to run larger reports of up to 12 months at a time (data limits may still apply).
Available on: all plans
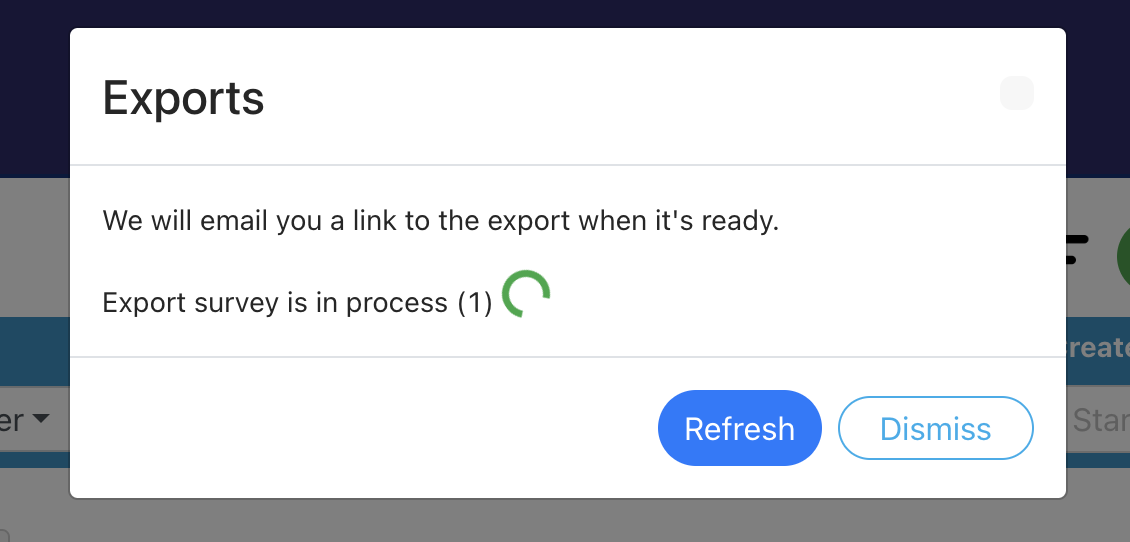
Exports: after you request an export, instead of instantly downloading, we will process the data into a spreadsheet and email you the export link so you can download your data. This enables us to build larger exports in the background and email them to you after a few minutes. Your export request will join a queue and process once any other exports have been completed.
Reporting page: after pressing run report, our system will start compiling your report. Once it is completed it will display on the reporting page. This will take slightly longer to process but allow you to select larger date ranges of up to 12 months (limits may still apply).
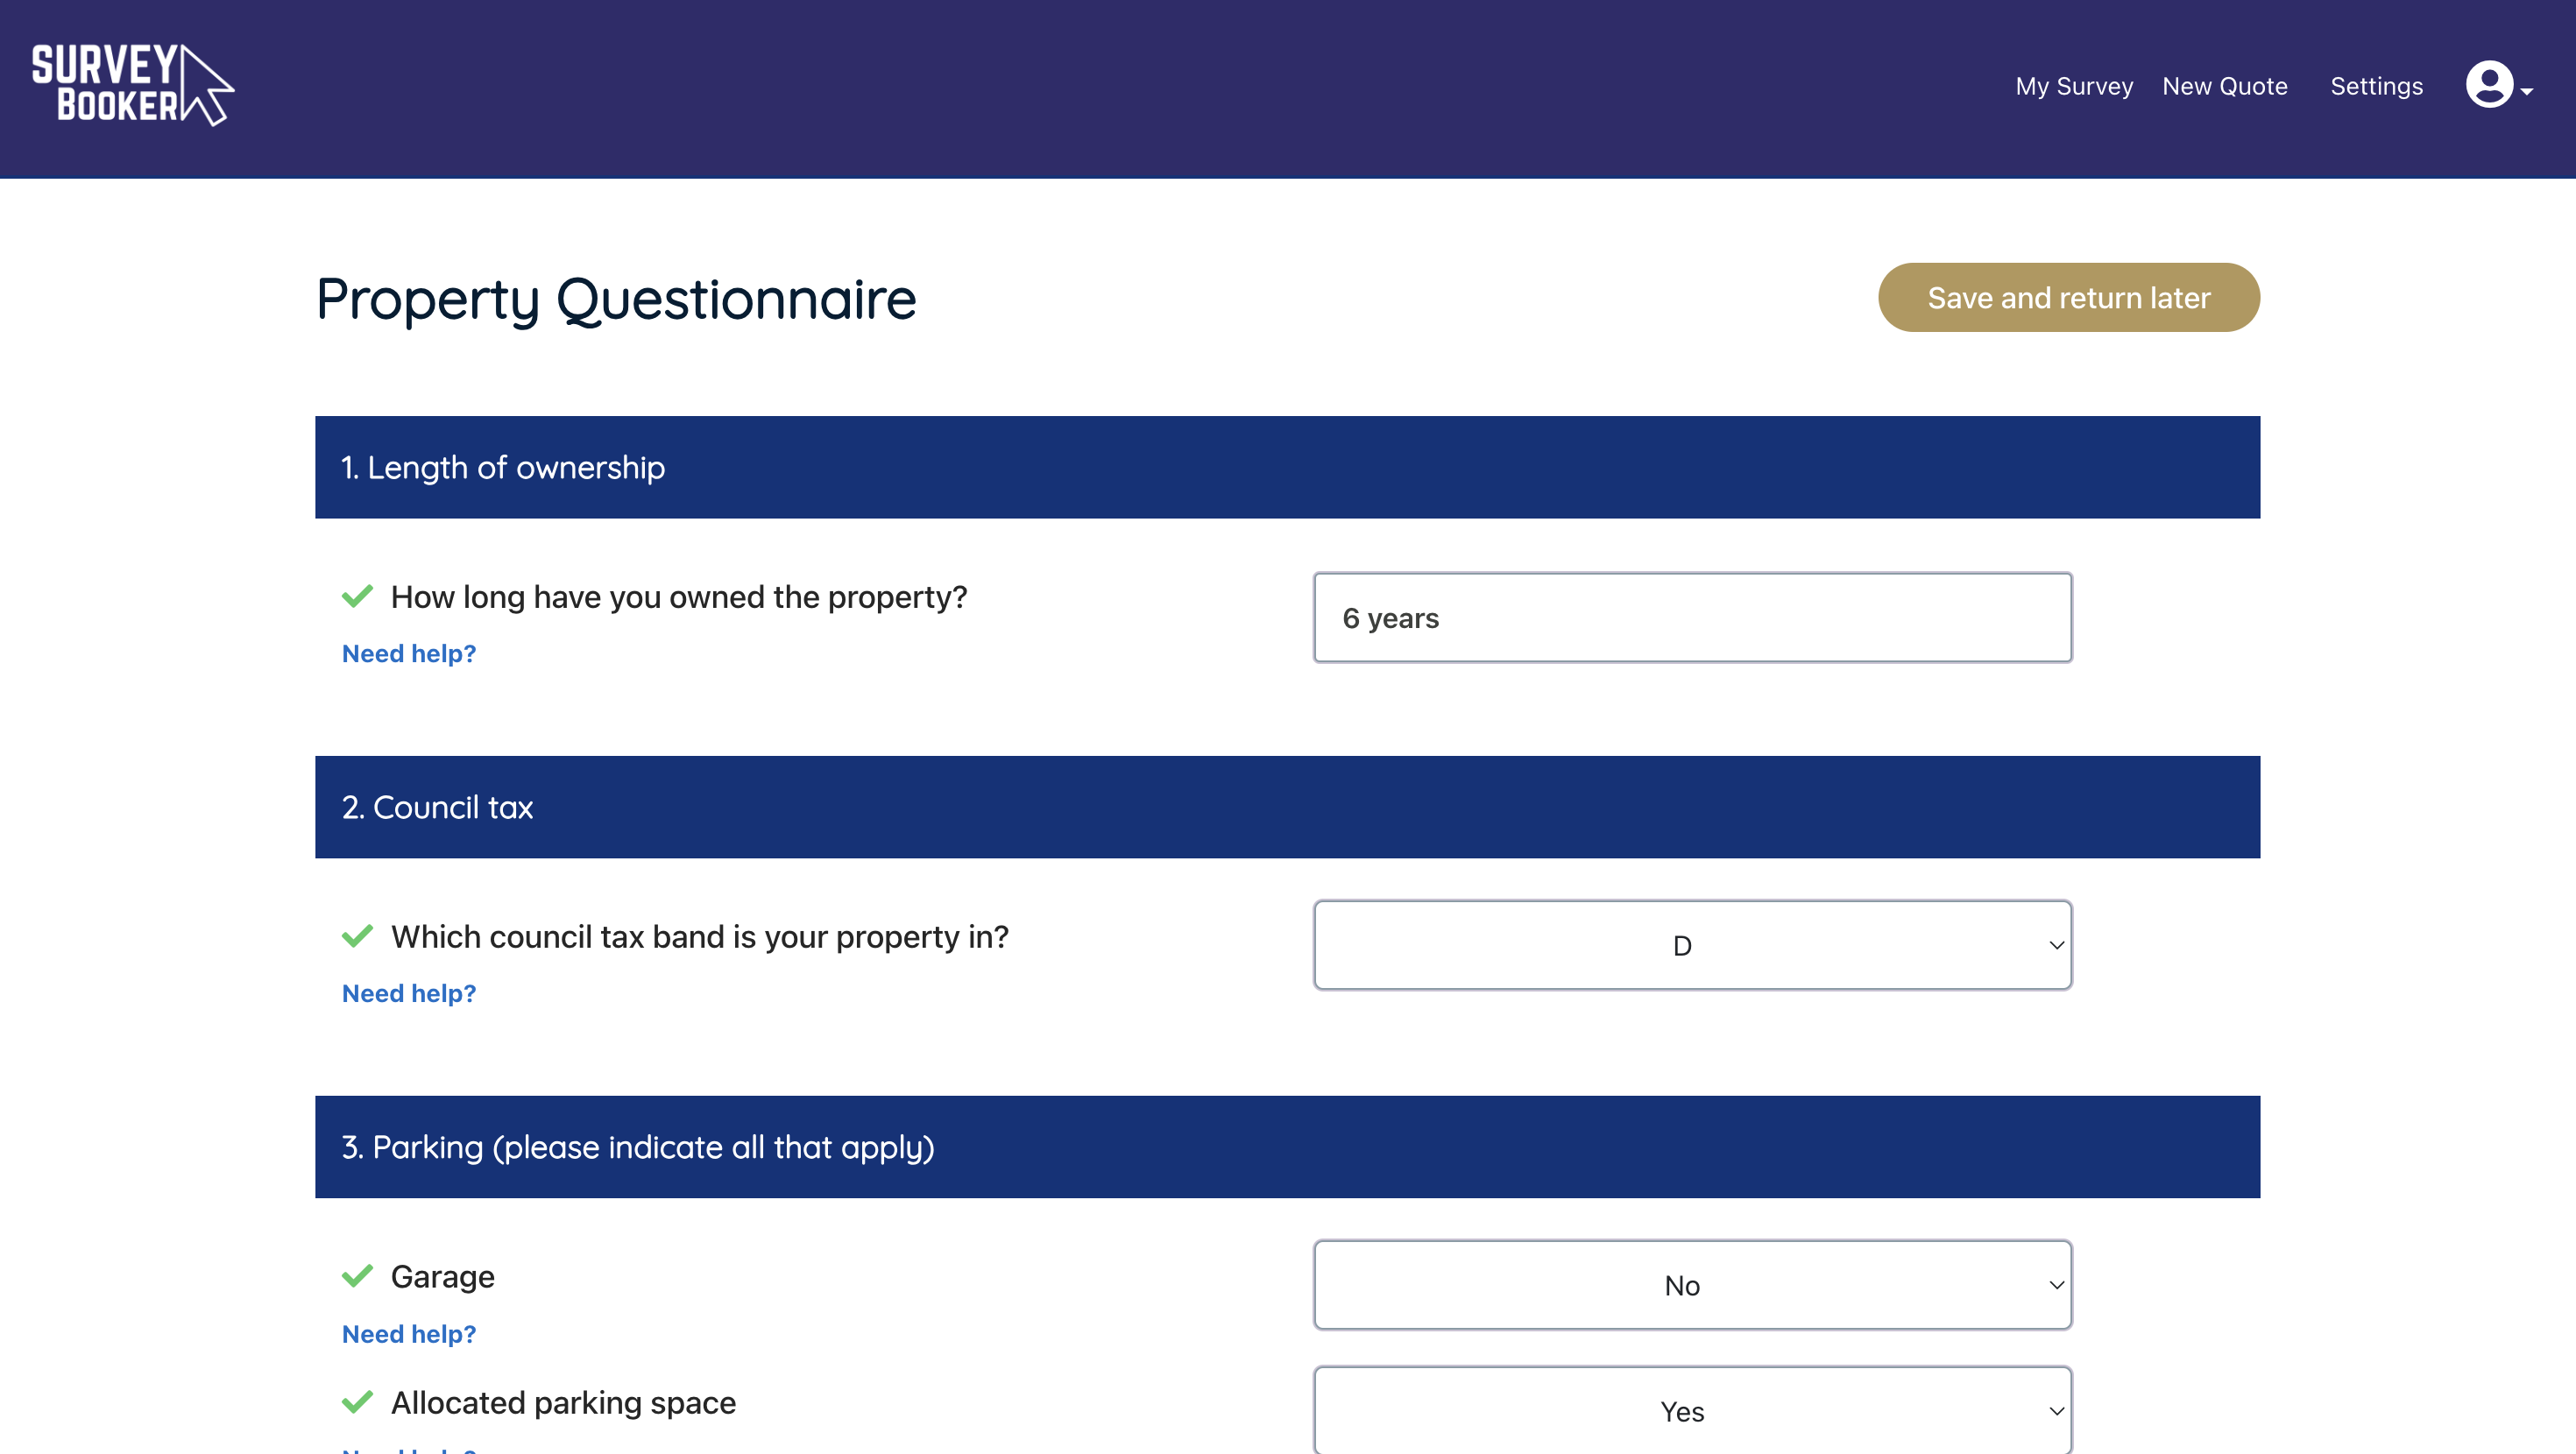
Post booking questions
Why have we made this update?
This update will allow you to ask customers to ask questions for customers to complete once an instruction has been accepted and the job is booked in. For questions before instructing we have the custom quote form questions and custom booking questions features already available.
Available on: Enterprise
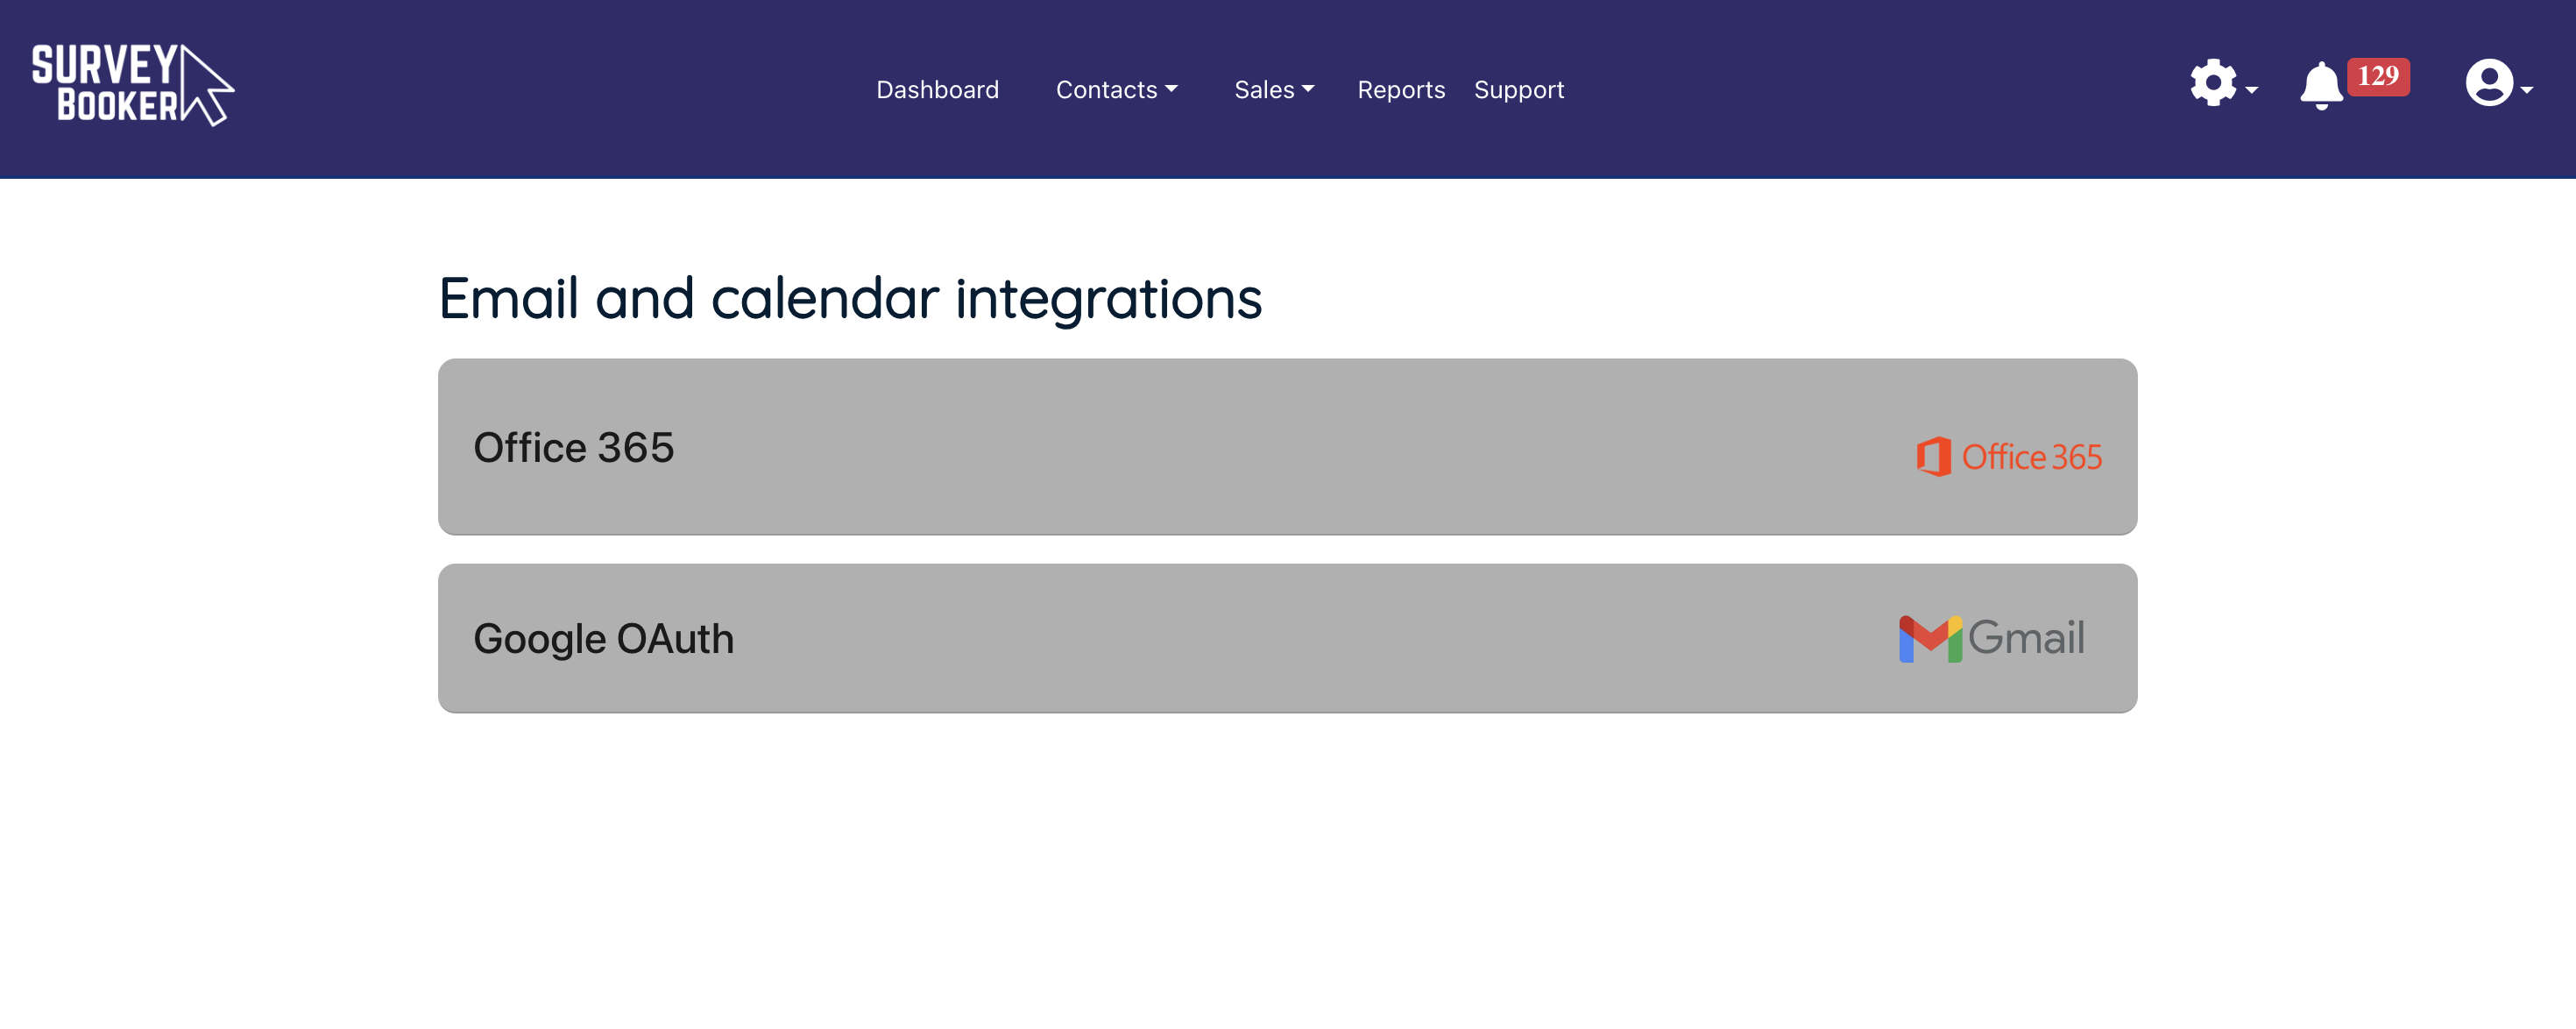
Google Email and Calendar
Why have we made this update?
We’ve added the OAuth2.0 email integration in order to help provide the latest connection method as required by Google’s new security policies. We’ve also added the calendar integration to help you book jobs directly into your user calendars as you can currently do with Office 365.
Emails available on: All plans
Calendar available on: Pro, Advanced, Enterprise
Smaller refinements
Quote form
Set your own quote form timeline stage names and page titles.
Set your own text for the “Learn more” link.
Emails and messages
Apple Mail reply improvement to help prevent bounced alerts if a message couldn’t be logged
Email composer updated to prevent accidental closure if accidentally clicking off the composer pop-up (the composer must be closed using the close icon)
Webinar 11 - Setting up multi document reports, creating job sheets and using webhooks
Webinar 11 - Setting up multi-document reports, creating job sheets and using webhooks
Learn more about how to get all the benefits from your new features!
✅ How to set up multi-document reports and when you might use them
✅ Creating job sheets and the types of document templates you might use it for
✅ How to set up webhooks and send data to other systems you use
Webinar 10 - Using your new timeline layout and features and activating your draft report stage and using it
Webinar 10 - Using your new timeline layout and features and activating your draft report stage and using it
Learn more about how to get all the benefits from your new features!
✅ Why the timeline has been updated
✅ The new features available in each section of the page
✅ How to edit each section
✅ How to activate the draft report stage
✅ How it works on the job record and with your integrations
Release Note - 27th May 2024
This update is all about allowing you to customise the services you offer and how you process them by setting up draft/review stages, multiple report documents per job and more. As always there are a few refinements being added to help make processing jobs easier!
New timeline layout
Draft stage
Multi-document reports
Webhooks
API updates
Smaller refinements
New job timeline layout
Why have we made this update?
We want to make finding important information quicker and provide a clearer breakdown of your quote. Whilst we love our current timeline as it’s simple, a lot of the empty spaces can be better used to show key items. For example, you can now quickly see the payment and terms status on a job. It’s also allowed us to introduce updates to make adding contacts faster, control what they can do and group different fields together better.
Available on: all plans
Layout
- Sidebar to enable easy navigation to different tabs no matter where you are on the job page
- Updated what’s next section to show the payment and terms status without needing to scroll.
- Updated general information section to clearly breakdown key dates, assigned users, source and more.
- A more detailed quote section so you can see how your quote breaks down in detail
Additional contacts
- You can now add multiple additional contacts.
- Set if they can view the job via an account (note: only the primary customer can sign terms and pay)
- Set if the additional contact should receive job updates or not – simply tick or untick the setting
Draft stage
Why have we made this update?
Whilst you might be happy for team members to upload their report and it goes out to customers, you can now turn on a draft job stage for all, some or none of your jobs. This allows team members to upload a report before it’s quality checked and sent out to the customer.
Available on: Pro, Advanced, Enterprise
Select service settings
- Turn on the draft stage in the “Select service” settings to activate this in the job flow on a job-by-job basis
- After confirming the inspection went ahead, you’ll be asked to upload your report and mark the job as draft submitted
- You can then mark the job as complete or choose to upload an amended report before marking the job as completed
Multi-document reports
Why have we made this update?
For other jobs, your report may consist of multiple documents (e.g. Scottish Home reports comprise of 3-4 parts). You can now upload each document separately, also allowing customers or referrers to upload documents, view and comment on them before merging them with title pages into a final report.
Available on: Pro, Advanced, Enterprise
Select service settings
- Set if there are multiple documents for the report (set the document name and if customers can view, comment or upload)
- Set if the final report should merge each document setting the order and any standard title pages needed)
- You can set if any documents should be visible to the customer and/or referrer, and/or be uploadable by the customer/referrer.
- If visible, the customer is able to submit comments at the draft submitted stage.
Job sheets
Why have we made this update?
So you can personalise your follow-up process further and stand out from competitors. We know you might get a lead from the same source as other firms at the same time. To make your follow-ups look more personal, you can now customise when the lead nurture follow-ups should be sent so they are sent at a different time to others.
Available on: Enterprise
- Set if a job should have a job sheet
- Upload your job sheet template with tags for data fields from Survey Booker
- Set if the job sheet should be created automatically on customer booking or if you generate it manually
- Download as a word document you can edit further
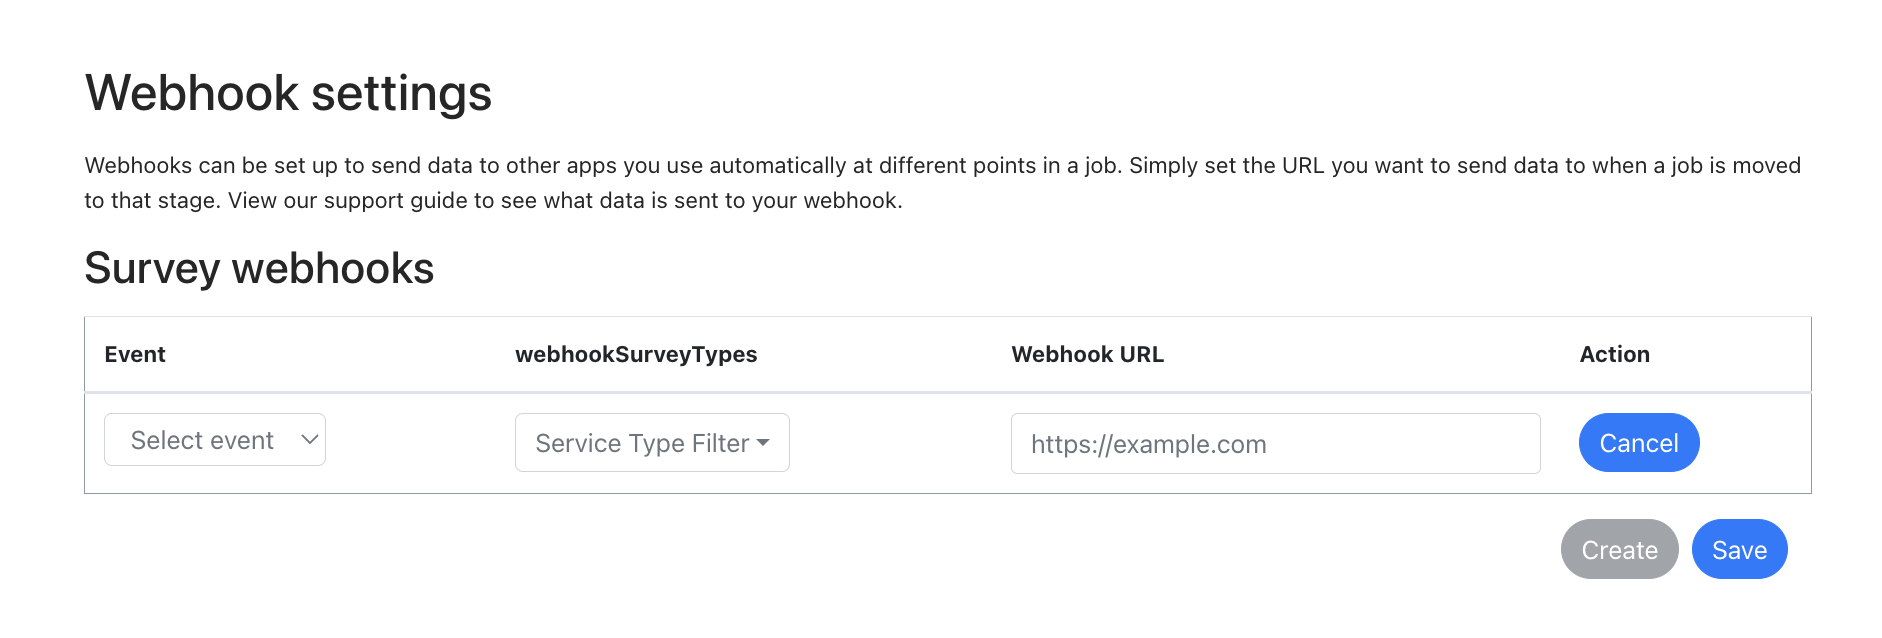
Webhooks
Why have we made this update?
We’ve added webhooks so you can automatically keep other systems you use updated as your job progresses in Survey Booker. Remove the need to manually update jobs as they progress by simply automating the process.
Available on: Enterprise
- Set when job data should be sent to another system you use.
- Choose the trigger point and which job types it should send for.
API updates
Why have we made this update?
These updates enable you to update jobs in Survey Booker from other systems automatically and look up data more easily.
PATCH API (Advanced, Enterprise):
- Update the status of a job in Survey Booker by posting in the status change from another system via API.
GET API (Enterprise):
- Look up survey data more easily by searching all jobs with a date/time stamp for a particular stage (e.g. completed date)
- Look up referral partners by status (e.g. active, live, lapsed)
Documentation is available on request.
Various smaller refinements to make life easier
JOB TIMELINE
Source field – you can now click on the lead source to open that referrer record in a new tab.
Bulk-allocated leads – when bulk allocating leads using the ‘reallocate’ button on the quotes table, the activity log will now show who allocated it.
Additional report contact – add extra contacts to the job, set if they can view the job (note only the primary user can submit details and pay) and if they should receive job notifications as well as the main customer.
Email composer – click on the email icon next to a customer or access contact and the email composer will load so you can start an email straight to that contact. On the email composer, there is a new dropdown so you can easily select if you want to email the customer, access contact, referrer or other email.
TABLES
Clear filters – we’ve added clear filter buttons to all tables on the system so you can quickly clear any filters applied.
Deadline filter – ability to filter next deadline by “No deadline set” to find jobs that have no next task set.
Tasks table – you can now right-click to open tasks in a new tab or open in the same tab as normal. The table will also show if the task is related to a job or referrer.
Exports (TBC) – the export process has been adjusted to support larger exports.
REFERRERS
Email logs – the logs now use the same name as the template to make it easier to see which template has been sent out.
SETTINGS
Email versioning
- When adding referral partners they will now automatically be added to your first welcome email template.
- If a lead source or job type aren’t assigned to a template, no email will send out for that template instead of using the default template.
Email template testing – you can now send yourself a test email of your template so you can see what it will send out like without needing to add a test record and progress it. Email editing just got easier!
Notification preferences – set if logged email replies should show in the notifications table or not. If no, emails will log but no notification is created in the table.
OTHER
Manual quote – when searching for the property address, the ‘Find’ button will remain so you can search again if you’ve used the wrong postcode.
Salutation options – the “M” and “Mx” options have been added to support the inclusivity of customers who want a title to be added but don’t wish to use one of the traditional options.
Tasks – if no user is selected when creating the task, the task will automatically be assigned to the user that has created it.
Webinar 9 - Using email versioning, setting up custom booking questions and managing your team more effectively
Webinar 9 - Using email versioning, setting up custom booking questions and managing your team more effectively
Learn more about how to get all the benefits from your new features!
✅ What is email versioning and how to use it? 00:00
✅ Setting your lead nurture follow-up times 08:32
✅ Creating custom booking questions for customers to complete during booking 12:38
✅ User features to manage your team 26:46
✅ Smaller refinements 37:14
Important information to ensure you emails continue to send in 2024
Important information to ensure you emails continue to send in 2024
Starting February 2024, Gmail and other email providers like Yahoo will require certain standards to be in place for senders who send messages to their customer’s accounts:
- Authenticate outgoing email
- Avoid sending unwanted or unsolicited email
- Make it easy for recipients to unsubscribe.
The rules have been partially implemented in the prior months but go into full effect from 1st Feb 2024 and will affect all emails you send whether via Survey Booker or directly via your email provider.
The new rules apply to two different groups, standard senders (those that send fewer than 5,000 emails per day) and bulk senders (those that send more than 5,000 emails per day). There are slightly different requirements depending on the volume you send but in either case, there are certain settings you must have in place so that your emails get delivered and don’t go to the spam folder or get blocked entirely. In either case, there are still certain standards that must be in place.
When you connect your email to Survey Booker, emails are sent to your connected email server to send on to your customers, referrers etc. We don’t send emails on your behalf, from our servers, saying that we are you. Therefore, you need to set up the correct settings for your email to ensure that you are proving to a recipient’s email provider that you are the genuine sender of the email. We can’t set this up for you! We can share some tips on what you need to do though. You must have this in place so your emails don’t just land in the spam folder!
Guidelines for Standard Senders (below 5,000 emails per day)
Keep your spam rates low.
Keeping low spam rates should already be a priority as bad scam scores can quickly affect the deliverability of all your emails.
The new guidelines state that you’ll need to keep your spam rates under 0.30%, and to do this we advise using postmaster tools and aiming instead for the Google-recommended target of below 0.10%. Go above these levels and you’ll risk being blacklisted as a bad sender. It’s best not to bombard customers with follow-ups and if they unsubscribe then stop sending emails.
You can also avoid spam filters by ensuring your content doesn’t appear spammy by revising your email content. Check out our blog post here.
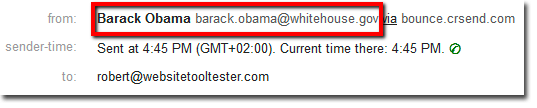
Don’t impersonate Gmail or other providers ‘From:’ headers.
What does this actually mean? If you’ve started your business and you have set up your company email ending in @gmail, @yahoo or @outlook etc you may be tempted to change the ‘from’ header to look like it came from a business address e.g. the ‘from’ is set to show as @mybusiness.com
Google will be enforcing a DMARC enforcement quarantine policy. This means if you don’t follow this rule then your emails will likely end up in spam, if even sent at all.
One good thing to do is set up your emails on your own company domain. It will also look more professional to your customers. Here’s an example of making your ‘from’ header look like something it isn’t!
Set up SPF or DKIM email authentication for your domain.
This authentication is more complex and may require the help of someone who can manage your DNS settings. Some email platforms will have helped to implement this already but for others, you will need to implement these yourself.
If you’re not sure where to start, you can contact your email software provider, domain registrar or web hosting provider as chances are they’ll have straightforward tools and advice to help get you started.
If you use an IT company to support your business, they will also be a useful point of contact when it comes to navigating this change.
Read through additional changes to ensure compliance
There are a few other considerations to check, many of which are existing best practices which are likely already in place via your email software or web hosting provider, but you’ll still need to check. These include:
- Make sure that sending domains and IP addresses have PTR records, which are valid forward and reverse DNS records. The Google guidelines have more information on this further down in their published document.
- Use a TLS connection when transmitting emails, Google has provided more information on this step here.
- Format messages according to Internet message format standards 5321 and 5322.
- Make sure your ‘from’ headers match your domain name.
- Don’t hide any information using HTML or CSS.
- Use ARC if you regularly forward emails to indicate that the message was forwarded.
- Whilst these points are a bit technical, they can help when it comes to asking service providers questions, so be sure to take a look at the guidelines in full from both Gmail and Yahoo.
Guidelines for Bulk Senders (above 5,000 emails per day)
‘Bulk’ senders must wave goodbye to shared domains
If you’re a ‘bulk sender’, which means sending 5k emails or more a month, you can no longer use a shared domain.
A shared domain is simply an address which is shared, for example: those using SendGrid might have an email that when sent, still comes from @sendgrid. Whereas those using a branded domain would appear in the inbox from @yourbusinessname.
You’ve probably seen these emails before, when looking at sender info it may display as ‘sent on behalf of’ or ‘sent via MailChimp’. So from February 2024, if you want your emails to land in the inbox of those using Gmail or Yahoo, you’ll have to set up a branded/company domain.
Set up a DMARC policy on your root domain
What is a DMARC policy? According to Klaviyo, ‘DMARC authentication is a protocol policy that servers use to make sure emails are coming from a legitimate sender. Brands use DMARC policies to protect the domain in their sender email address from unauthorized use by bad actors.’
Much like GDPR policies, your email service provider cannot set these up for you on your behalf, although Mailchimp has a handy tool to help its users through
Make it easier to unsubscribe
You’re going to have to provide at least one way that users can opt-out in one step.
If you don’t provide an easy way to unsubscribe, chances are users receiving unwanted emails will report you as spam. Remember that important spam rate at the start of this article? Spammy senders end up on the naughty step, which affects their deliverability overall and can even lead to blacklisting! So if you’ve not sorted out your unsubscribe flow yet, now is the time to do so.
You should already be doing this – if you have no unsubscribe button, not only is it a negative, frustration-inducing user experience that can harm your company’s reputation, it’s far more likely you’ll be reported as a spammy sender.
Survey Booker requires the use of the Unsubscribe shortcode in the lead nurture emails. We’ll also be adding an unsubscribe option to the email header to provide a more visual way to unsubscribe in the welcome email and lead nurture emails. This will prevent lead nurture emails from sending if the recipient wasn’t interested in your welcome email.
Align your ‘from’ header with your domain.
We already talked about the importance of trying to hide your ‘from’ domain in headers, and the extra step that needs to be taken is matching this header with your domain.
Useful tools
Mail tester: https://www.mail-tester.com/ – Test the spammyness of your emails. You can add the email shown on the link as a contact in Survey Booker and send it a welcome email to test the spammyness of your email and settings.
MXToolbox: https://mxtoolbox.com/dmarc.aspx – check the scammyness of your emails. It will show if you have missing DNS records that you need to add. However, even if you do have records present, you must check that they include the right information.
What do some of the terms we’ve used above mean?
1. Sender Policy Framework (SPF):
SPF is a list of approved senders for your domain (e.g., yourcompany.com). It tells recipients’ inbound email servers (in this case, Gmail and Yahoo Mail) which outbound servers are allowed to send emails on your behalf, helping to prevent your emails from being marked as suspicious.
For example, if you’re sending emails through an ESP like SendGrid, you’d need to add SendGrid’s servers to your list of approved senders.
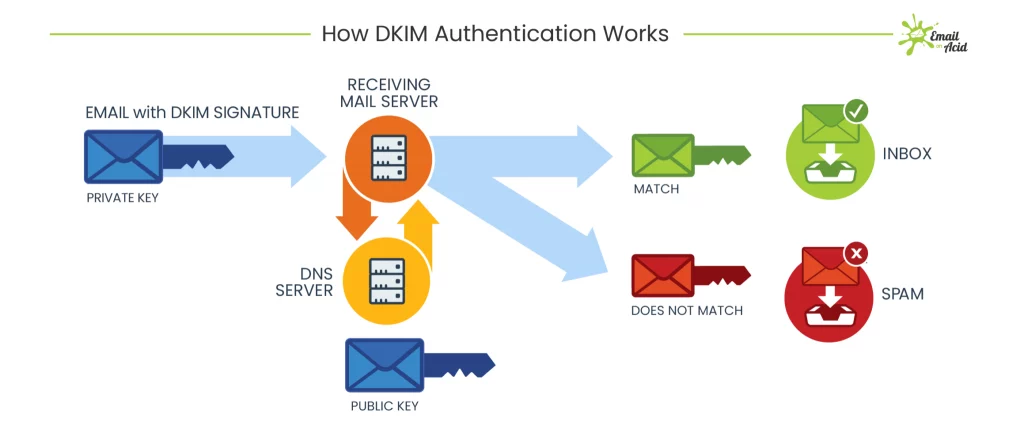
2. DomainKeys Identified Mail (DKIM):
DKIM adds an extra layer of security. It attaches a private digital signature to each email, confirming that it was sent by your domain. If the signature does not match with the public record, or if the message has been tampered with, the email will be more likely to be marked as spam.
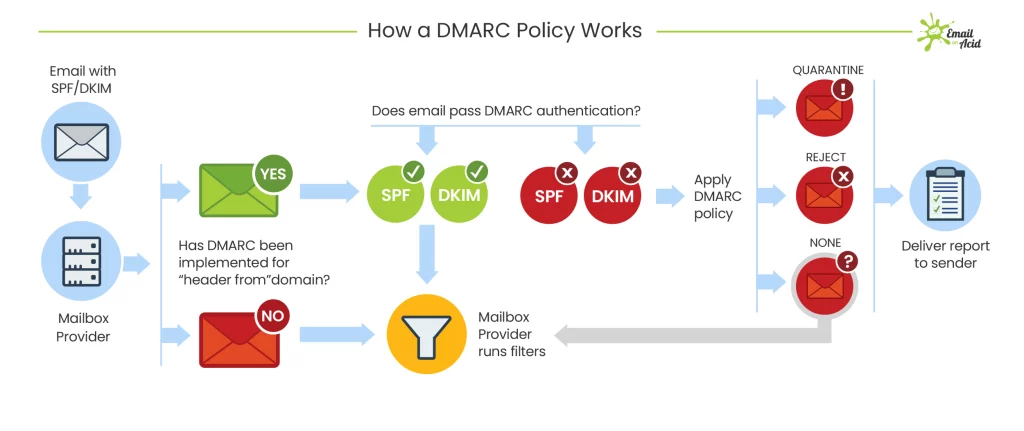
3. Domain-based Message Authentication, Reporting, and Conformance (DMARC): DMARC is the most secure form of email authentication. It guides Gmail and Yahoo Mail’s servers on how to handle emails that fail SPF and DKIM checks (for example, whether to reject or quarantine them in the spam folder).
To do this, you’ll need to publish a DMARC record for your domain. This will help to ensure that your legitimate emails reach their destination while protecting against spoofing (i.e. someone pretending to be you).
It’s also important to make sure that you don’t use email addresses on Gmail or Yahoo Mail’s domains (e.g. @gmail.com or @yahoo.com) to send bulk emails, as these will end up in the spam folder.
Webinar 8 - Setting up SendGrid for your automated emails and using your new referrer settings
Webinar 8 - Setting up SendGrid for your automated emails and using your new referrer settings
Learn more about using SendGrid for your automated emails and how to get the most out of your new referrer settings:
✅ What is SendGrid and what is it used for? 00:20
✅ Why did we stop sending emails on your behalf? 02:16
✅ Setting up a SendGrid account and API key 04:20
✅ Adding SendGrid settings in Survey Booker 08:53
✅ When SendGrid is used for customer and referral partner emails 10:00
✅ Bulk emailing referral partners with weekly/monthly statements via SendGrid 11:00
✅ Benefits of connecting SendGrid 13:00
Release Note - February 24th 2024
This is an important update to read as there are a whole host of smaller refinements that you can use to further personalise your service as well as some bigger stand-out updates. Please read through all of the smaller refinements to understand what changes are on their way.
This update focuses on small refinements throughout the system to help make using your account faster, easier and more streamlined. This is based on your feedback – we’re always keen to hear what small changes would help make a big difference to your experience.
Email versioning
Custom booking questions
Custom lead nurture times
Document groups
Smaller refinements
Email versioning
Why have we made this update?
When sending automated emails, you may want to send a different welcome email based on the lead source to run promotions by lead source or share different information to stand out against competitors. During jobs, you may also want to provide more job-specific information. For example, when setting the appointment, you want to give different information for a desktop job versus one requiring a site visit. You may also want to send different supporting documents with each report you send out or different turnaround times when confirming appointments went ahead. You can now provide even more personalised updates throughout a job.
Available on: Pro, Large, Enterprise
Email and SMS Settings
- Email versions: create different email template versions by lead source (welcome emails) and job type (all other stages)
- New template layout to list available shortcodes and the order the templates are sent out
- Primary user: When the first user is added to a job they will be set as the “primary” assigned user. This can be changed to another user assigned to the job later on if needed. This setting will be used to set which user’s email address should be used for sending an automated email if more than one user is assigned where you choose to send emails from the assigned user in your settings. It also sets which user’s details add into the email template when using the allocated user shortcodes.
- New shortcodes:
- [Assigned Surveyor] – enters the name of the assigned user on the job that is set as a surveyor
- [Access First Name] – enters the access contact’s first name into the email
- [Access Last Name] – enters the access contact’s last name into the email
Custom booking questions
Why have we made this update?
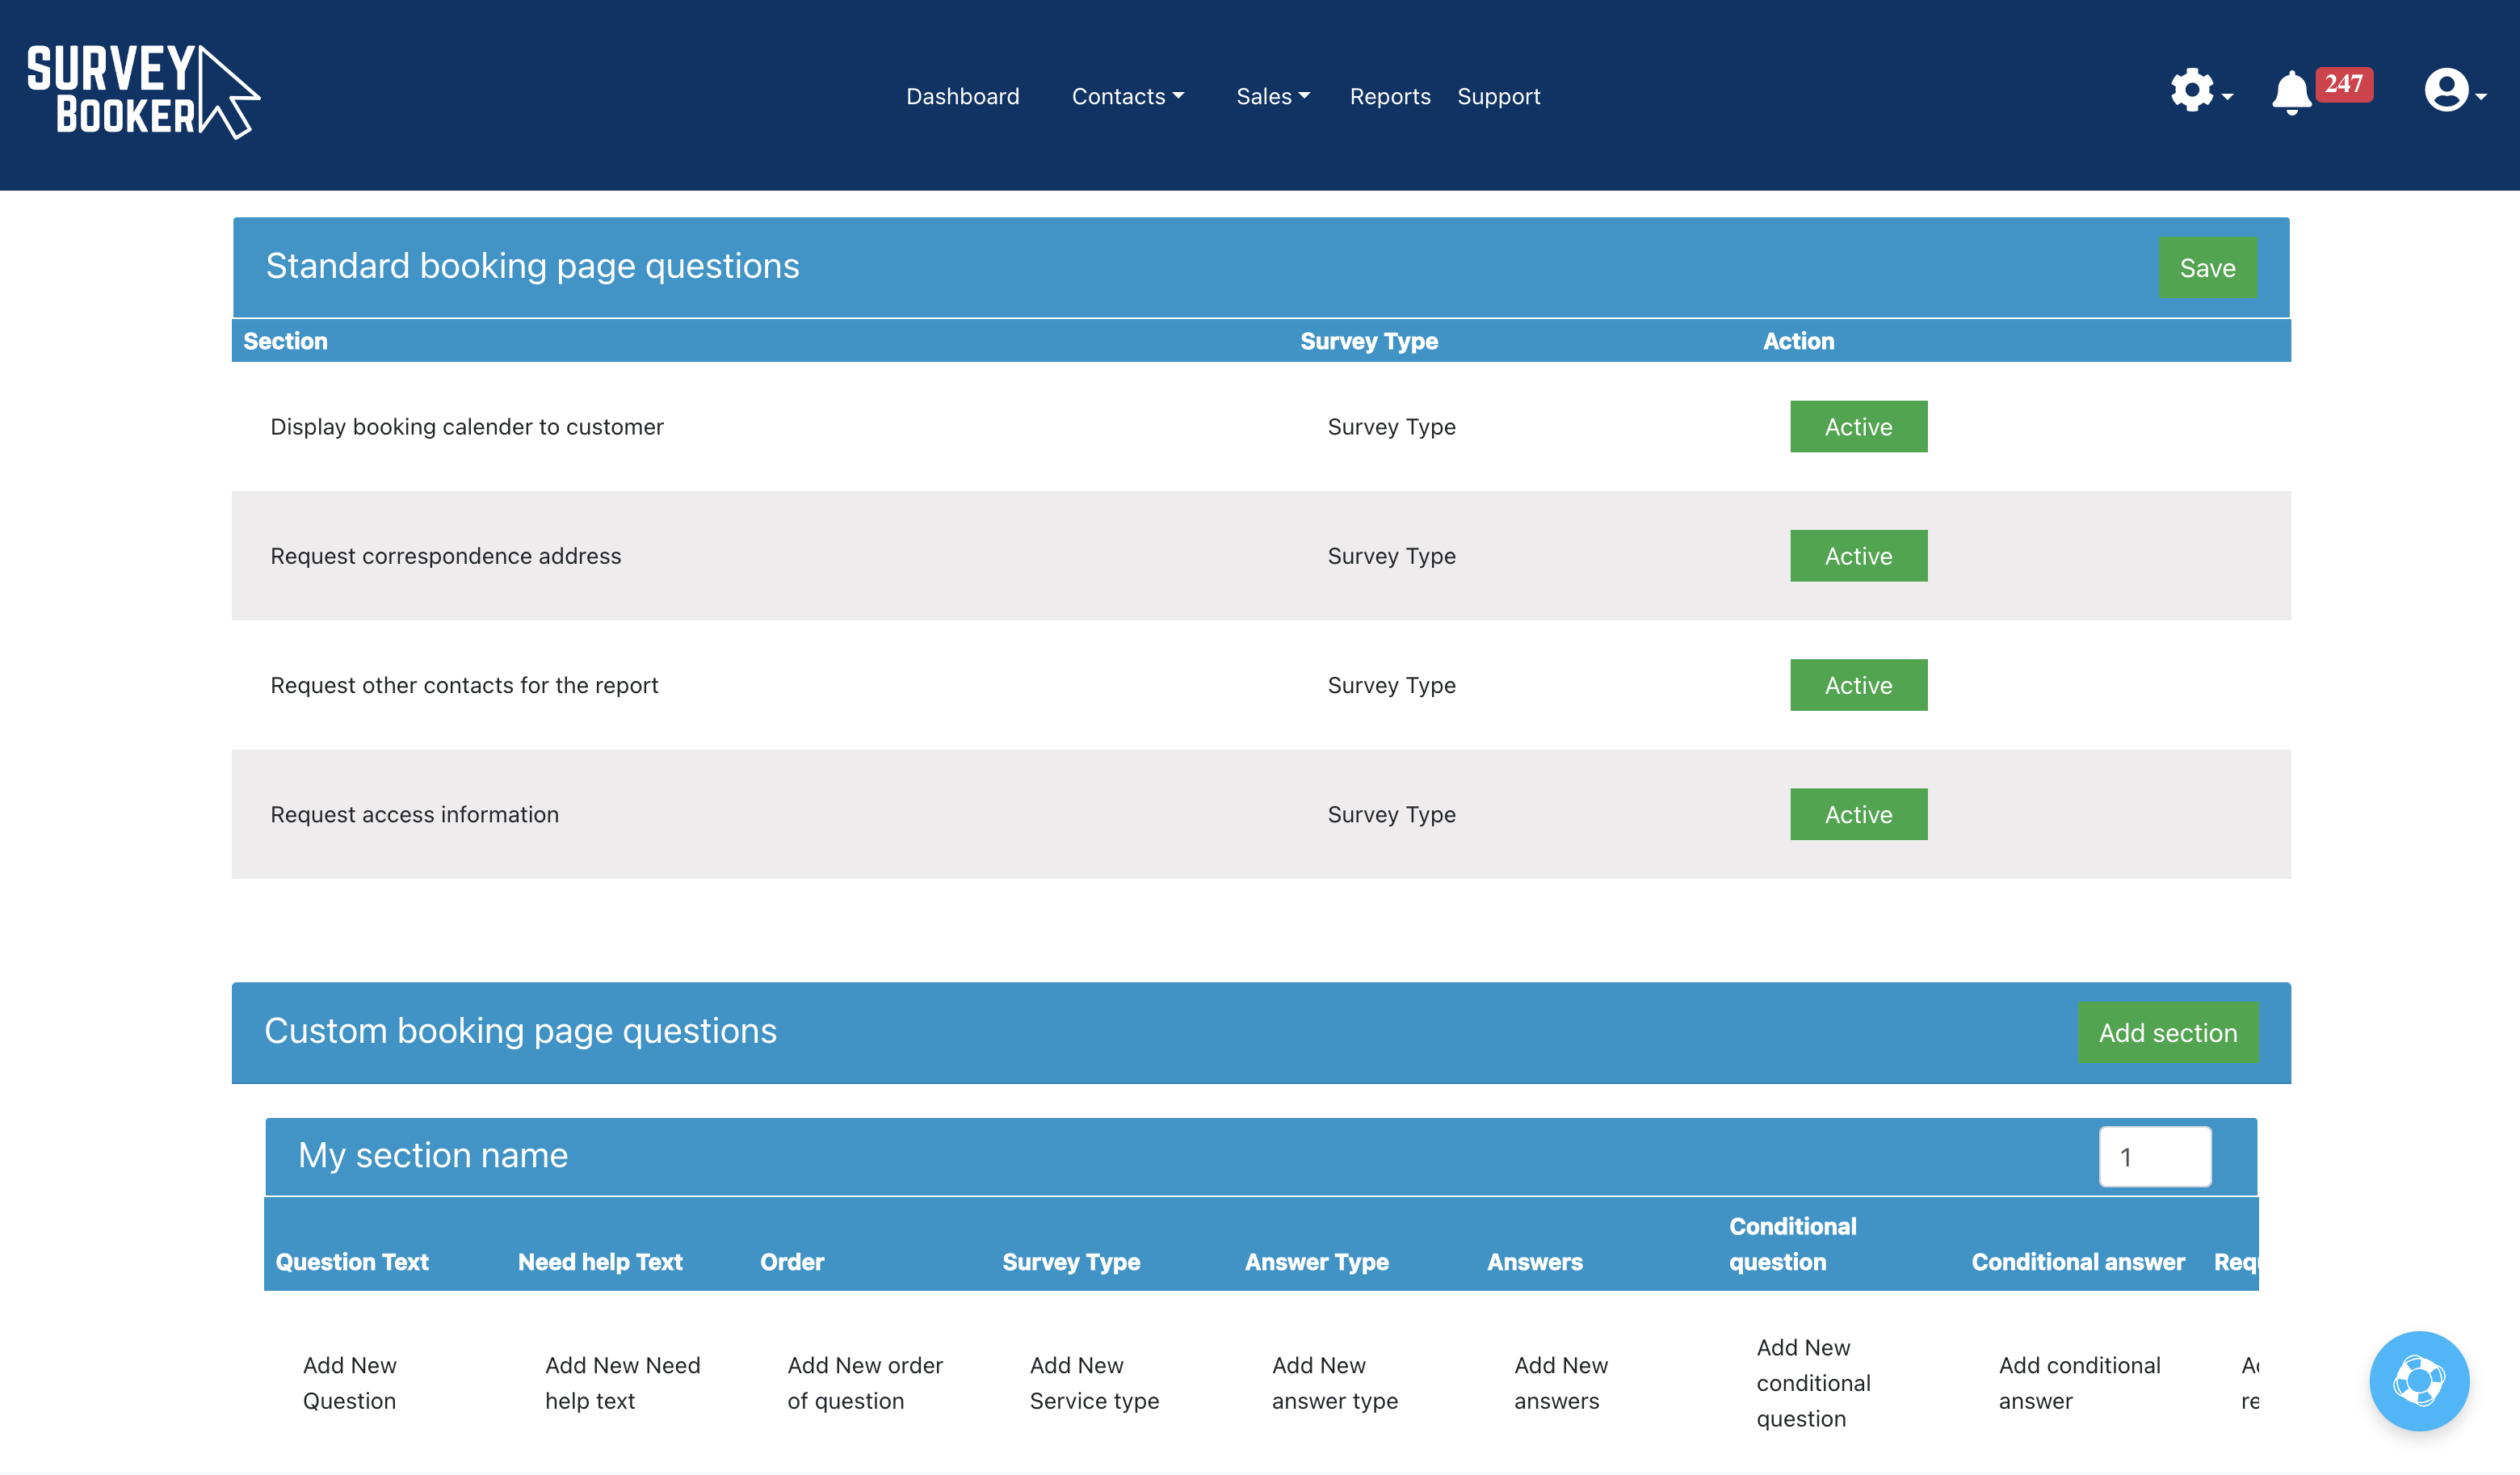
During the booking process, you may want to ask customers to share additional information. Instead of having to request this via automated or manual emails, you can now ask customers to complete this information via the booking portal. Customers can fill in the extra details you need from them whilst providing information such as access details and more. Customers can save and return later if there is a lot of information you need making it easy to complete it steps where more complex information is needed.
Available on: Large, Enterprise
- Create custom booking questions
- Set which job types they appear for
- Set where the answers display on the job record
- Allow customers to fill in information, save and return later
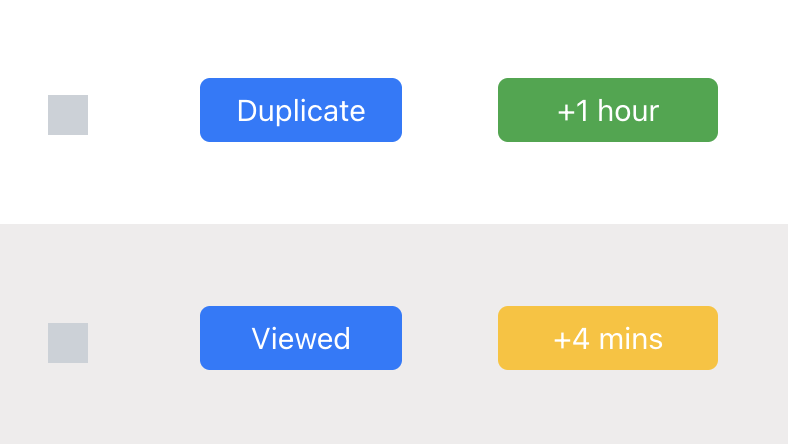
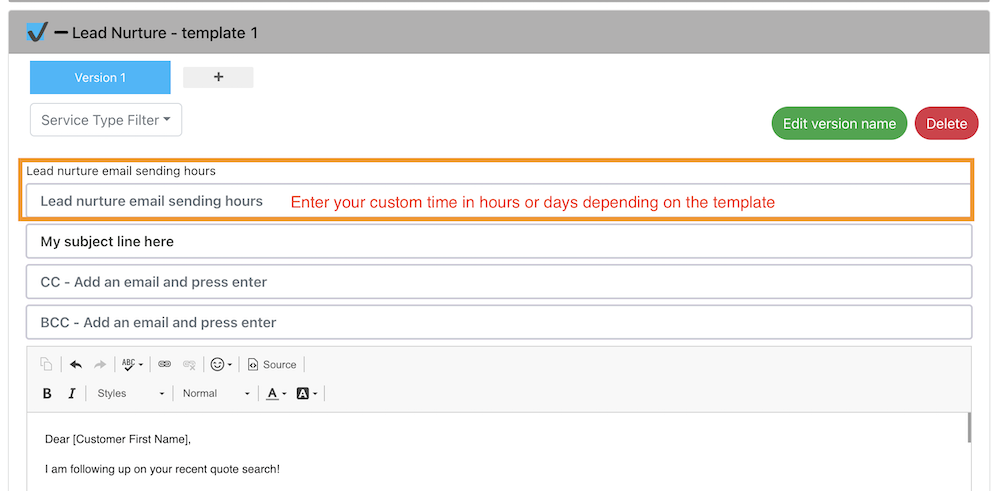
Custom lead nurture times
Why have we made this update?
So you can personalise your follow-up process further and stand out from competitors. We know you might get a lead from the same source as other firms at the same time. To make your follow-ups look more personal, you can now customise when the lead nurture follow-ups should be sent so they are sent at a different time to others.
Available on: Plans with lead nurture
- Set the number of hours from quote confirmation for the first follow-up between 0-48 hours
- Set the number of days from quote confirmation for the second and third follow-ups between 2-60 days
Document groups
Why have we made this update?
We’ve updated this section to make uploading and managing uploaded documents easier.
Available on: All plans
- View the progress of uploading documents
- Drag and drop documents between document groups
- Bulk tick documents to be deleted
- Preview and/or download uploaded documents

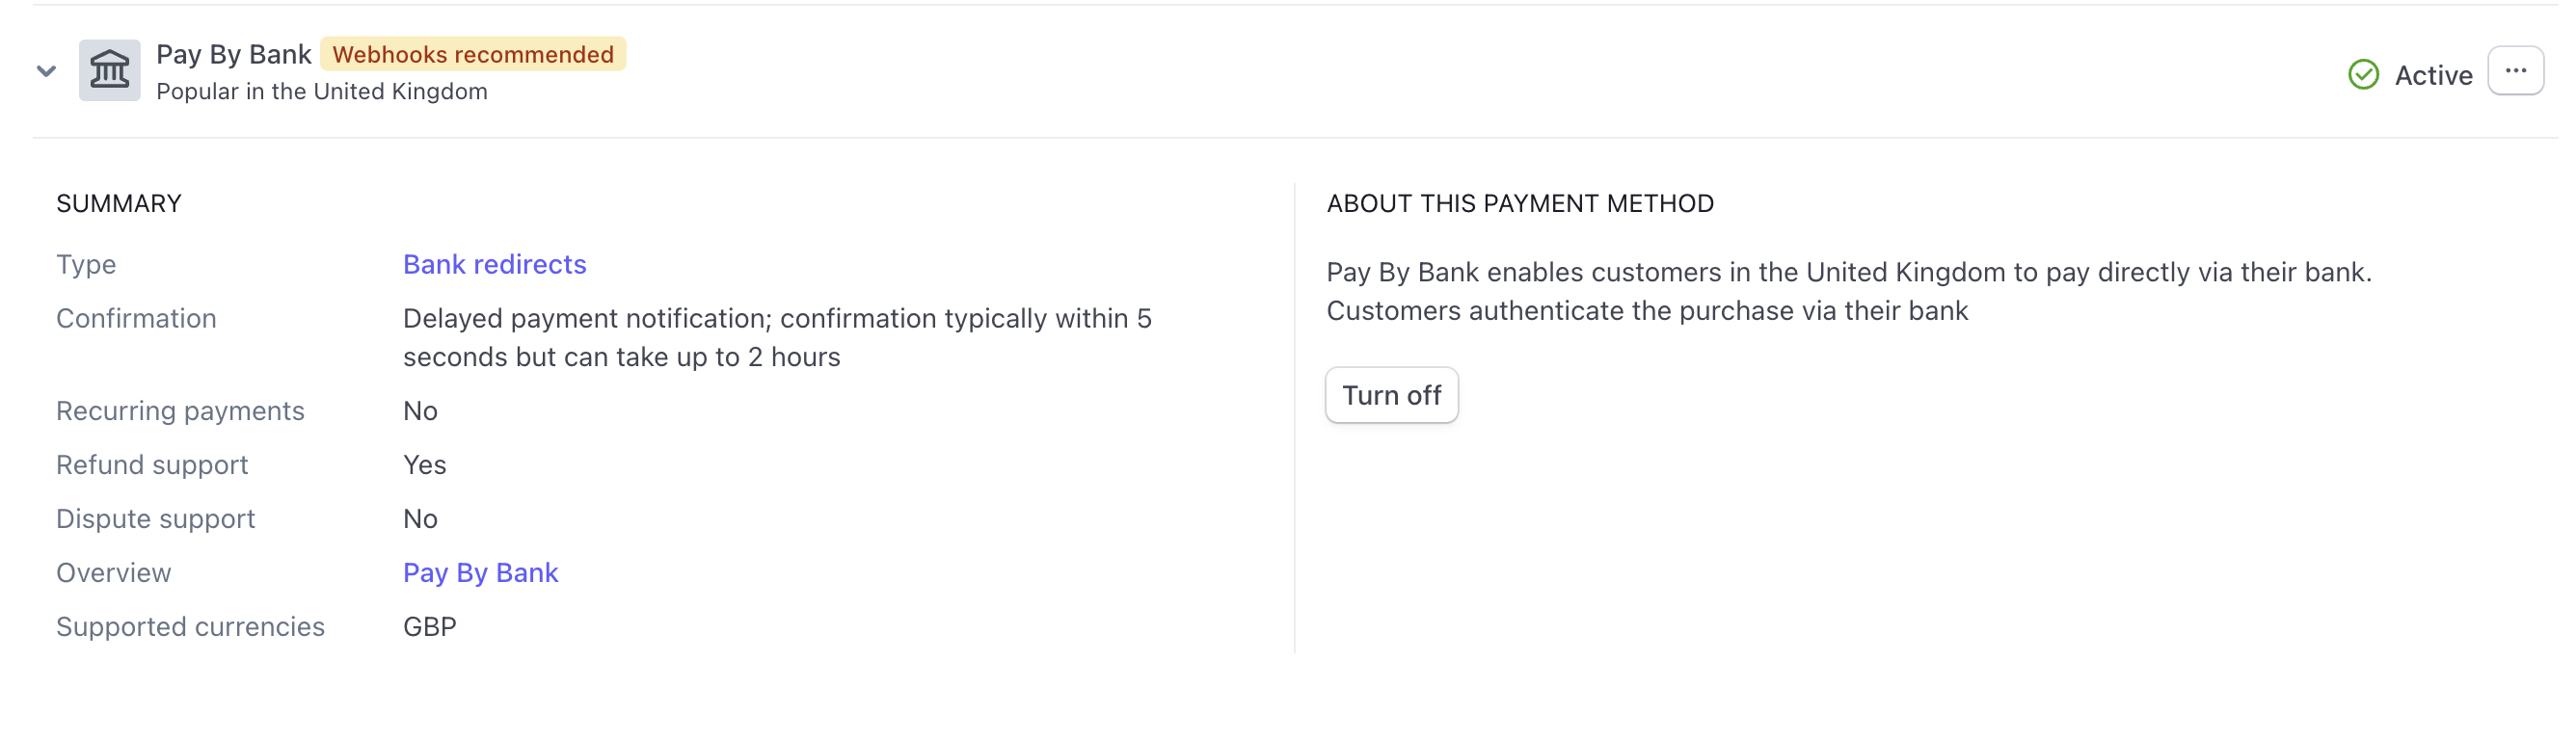
Pay by Bank
Why have we made this update?
Offer customers more ways to pay and benefit from cheaper transaction fees
Available on: All plans
- Using the Stripe feed you can enable Pay by Bank to offer automated bank transfers.
- Activate pay by bank in your Stripe account.
- Customers will have the option of card or bank transfer (confirmation can take between 5 seconds to 2 hours depending on how long the bank transfer takes to process.
Various smaller refinements to make life easier
Job record updates
Updating the job contact: if you need to change the customer email address on a job record and a contact already exists on your account with that email, a pop-up will appear asking if you want to change the contact on the job record to the existing customer record you have on your account using that email address. This will make changing the contact associated with the job faster if you’ve accidentally created a job with the wrong email address and you want to associate it with an existing contact record.
Referral fees – If changing the job type, and the lead source is an introducer, the system will recalculate the referral fee owed for that job type removing the need to update it manually. The fee will also be recalculated if the job fee is updated.
Add project quote – we’ve updated the add project quote page to include fields for the customer and property details. This removes the need to first create a contact or property to your account before adding the project quote. This means you can add the quote more quickly and easily. We also have a big project update being started shortly following a review with different customers.
General updates
Notifications table: custom events now have their own tab in the notifications table instead of being a toggle option on the tasks tab, making it easier to see custom events due.
Quotes/jobs table –
- The “Booking required” stage filter will combine jobs at the accepted, paid and payment skipped status. This will remove the payment made stage so you can more quickly see jobs that need to be booked in.
- A new column is being added for the terms status of a job to show a quick visual as to which jobs have terms completed, which need sending and which aren’t required.
Referrer/surveyor on multiple accounts – a historic security decision meant only customers could be added to multiple surveying firm accounts. We’re updating the settings so that a surveyor email or referrer email can be added to multiple surveying firm accounts (e.g. a surveyor who acts as a consultant for different firms or a referrer who refers to two companies).
Referrer accounts – the view button in the referrer table will show green, amber, red or blue depending on the lead lead submitted date (green for a last lead in the last 30 days, amber for a last lead in the last 31-60 days, red for last lead in the last 61-90 days and blue if no leads have been received).
Referrer plus – when signed terms are received, the group and associated branches/contacts will move to “Live”.
Quote/job export – we’ve added a data limit to exports to help protect accounts from running slow from very large exports. You can still export all your data, however, if this is over the data limit you’ll just need to export your data in different date batches.
Deleting data – when deleting a record (e.g. job or referrer) we’ll delete any related notes, tasks, messages and emails to prevent issues with linked data appearing in notification tables. E.g. a task shows as due but it is related to a record that has since been removed. This will also help support your GDPR requirements.
Calendar tab – the calendar month view will now show an event for users set in the user availability settings as on “annual leave”, “sick” or “unavailable”. The weekly and day views will continue to show the user as greyed out.
Data searches – sometimes data won’t appear if the number of spaces in your search doesn’t match the number of spaces in the system. We’re updating searches so results still return regardless making it easier to search for records.
Terms documents – you can now create your own tags for custom booking questions or custom timeline fields. This data can prefill into a terms template for you. See our terms guide on how to create the tag.
Settings updates
User settings – we are adding two icons to show if an email and/or calendar has been connected for that user so you can see which users have calendars/emails connected and which users need to set it up. We’ll also show the last login time for that user.
User availability – currently, user availability settings are provided for surveyors and users assigned to automated lead allocation (enterprise). We’re updating these settings so you can track when different team members are working, on annual leave or off for other reasons. Shifts can then be published for your team to view at any time via a new “My Shifts” page so they know when they are working and when they are off.
Optional extras – we’re adding the ability to set the order in which your optional extras appear in the customer portal. Currently, they display in the order they’ve been added. This update will allow you to prioritise the order based on how you want customers to see them.
Integrations
Report writing / GoReport – the feed is being updated to send the “report name” through instead of the main customer name (defaulting to the main customer name where a report name hasn’t been set).
Lead generation site integrations – the sending of the welcome email will be changed to send 3-5 minutes after the lead is saved in Survey Booker. This is being done to ensure we save the lead once received from the lead generation site, provide a success response to confirm it saved and then send / process the welcome email afterwards. This will prevent lead generation sites from trying to repost leads when it has already successfully saved in Survey Booker but where the sending of the email is failing or taking too long delaying our success response to the lead gen site. If this takes too long, lead gen sites can sometimes assume the posting of the lead failed before getting our success response.
Enterprise
Automated lead allocation – we’re updating automated lead allocation so it only assigns leads from the time you turn it on (existing leads will now be ignored). This means if you haven’t been using this feature from the start, you can subsequently turn it on, or pause it and restart it and only new leads coming in will be allocated instead of historic data too.